How To Grow And Care For Cinnamon Fern In Your Container Garden
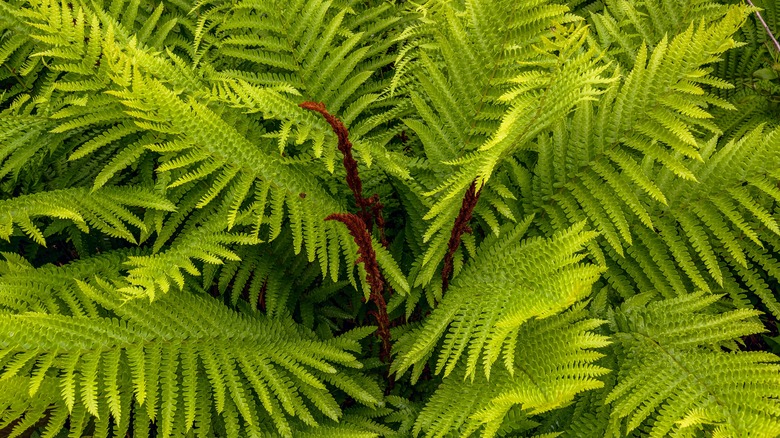
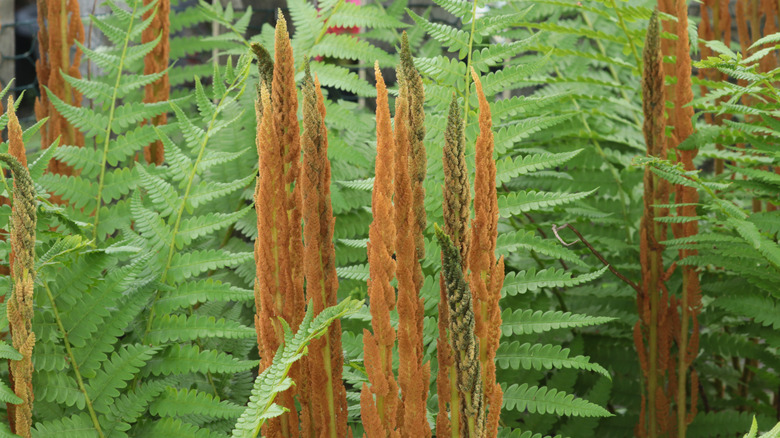
If you're looking for a stunning plant to add vibrancy to your container garden, you should consider growing the cinnamon fern (Osmundastrum cinnamomeum). This attractive fern is native to North and South Carolina but can be found growing naturally in other parts of the U.S., such as Florida and Texas. It grows in wetter regions along streams, swamps, floodplains, and wetlands in USDA Hardiness zones 4 through 9. This should give you an indication that it prefers plenty of moisture, a little fertilizer, and room to grow. Its common name of cinnamon fern comes from the beautiful cinnamon-colored fibers that are found near the base of the fronds.
The plant is particularly useful in shady spots around your garden that get plenty of moisture and can handle wet soils quite well. It will also attract songbirds who use the fuzzy fibers on the stems to line their nests with. This is why hummingbird lovers add cinnamon ferns to their garden because these birds also use the fibers for building nests, but this delightful plant can also be grown in containers as long as you're able to provide your fern with plenty of moisture. The gorgeous fronds emerge in spring as the most striking feature of this plant since they appear from the center of the plant like tall flower spikes. This fertile early growth is covered with spores and the lovely cinnamon color blends beautifully with the lush green color of the sterile fronds.
Choosing the right container and position for your cinnamon fern
The cinnamon fern can reach a height of 6 feet and a spread of up to 3 feet in ideal conditions. This means that you want to select a large container to give the plant plenty of room to grow. The pot you start with should be at least 2 inches larger than the nursery pot that the fern is currently growing in. This will give the roots enough room to spread and become established. The best tips for choosing the right container for your cinnamon fern include making sure there's plenty of room for the plant to grow — from root to tip — and that the container has adequate drainage. Choose a premium potting soil suitable for ferns to fill your container with, or you can make your own mix by combining 2 parts aged compost with 1 part vermiculite and 1 part perlite. This mix will provide nutrients for your newly planted cinnamon fern and help to retain moisture while still being free-draining.
Once you've planted your cinnamon fern, you want to choose a shady spot to place it. Make sure that the spot is protected from strong winds, as these will damage the delicate fronds. Although cinnamon ferns can handle some sunlight, when grown in containers, they do best in the shade because the potting soil won't dry out as quickly.
How to care for your container-grown cinnamon fern

The most important thing to remember is the water needs of your cinnamon fern. As the soil in pots tends to dry out fairly quickly, you want to check on your fern regularly to ensure the soil is moist. It might be necessary to water your plant at least twice a week or more. As your cinnamon fern continues to grow, it will be necessary to move it into a larger container as soon as you notice some roots starting to poke through the drainage holes in the pot. Checking for excessive root growth is one of the primary tips for easily repotting your favorite plants. Choose a container that's at one size larger than the current one to give your plant more space to grow.
You also want to feed your cinnamon fern in spring while it's coming out of dormancy and putting on its spectacular growth. It's best to use a slow-release fertilizer as ferns are sensitive to over-fertilizing. Choose a balanced fertilizer that's suitable for ferns and always follow the instructions on the pack. Although the plant will change color in the fall and lose its fronds before going dormant over winter, you should protect the roots from the cold by covering the container with either frost cloth or fleece if you're leaving it outside. Remember to remove this as soon as the weather starts to warm up in spring and the last frost date has passed.