Give Your Countertops A Unique Upgrade With An Unexpected Material
What if we told you the loose change hiding between your sofa cushions can be a statement countertop? Believe it or not, you can use pennies to upgrade your counters with a unique copper finish. They can give your home a rustic and whimsical touch. It might sound super eccentric, but the coins aren't that different from penny tiles. The mini rounds have rich red-brown tones and a distinct look that creates a beautiful mosaic for your bathroom or kitchen counters.
If you want to decorate your home on a budget with a one-of-a-kind design, then don't overlook the humble cent. People have also used pennies to decorate sink bowls, bathroom floors, coffee tables, and backsplashes. You can also pull off this design with other coins for a silver or gold countertop. Or forget about the money and turn feathers, photographs, fabrics, CDs, or almost any other item into a unique countertop design. For this project, you'll need epoxy resin (get a food-safe version if using in the kitchen), paint, a paintbrush, a blow-dryer, end cutters, plastic sheets, scrap wood trim, a putty knife, and roughly 260 pennies per square foot.
How to make a penny countertop
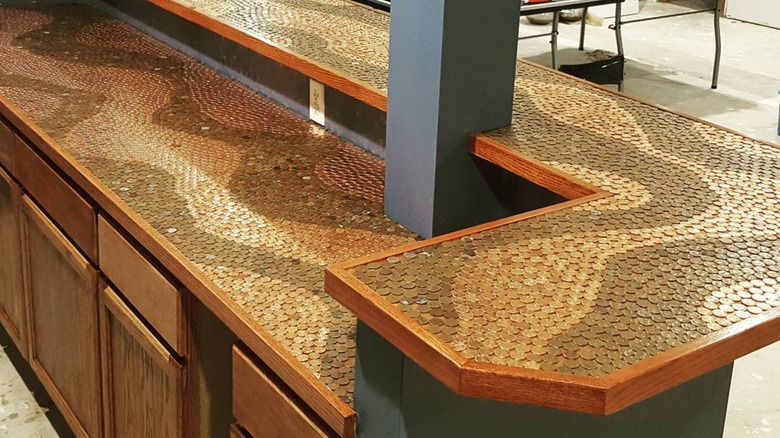
First, you'll need to prep the countertop: clean, sand, prime, and paint the surface. Painting is optional, but keep in mind that the existing counter will be visible between the pennies. Its shiny copper color will pop best against a dark background. Once the surface is dry, lay out your pennies. There are various designs you can create with the coins, interchanging the pennies heads-up vs. tails-up or shiny vs. dull. Use an end snip to cut any coins for the corners and edges. Next, glue the pattern in place with a strong adhesive like Gorilla Glue or E6000. The coins need to be secured, otherwise they can float once the epoxy is poured.
Once all the pennies are glued, it's time for the epoxy. Use the scrap wood trim to board around the counter. This will hold the epoxy in place and prevent any from spilling while it cures. Cover all the surrounding areas and appliances with the plastic sheet and tape. Now, follow the product's instructions for mixing the epoxy properly. If done incorrectly, the epoxy won't harden and you'll have a gooey nightmare. Pour a thick coat of epoxy over the pennies and spread it evenly with a putty knife. Use a blow-dryer to pop any bubbles and wait for it to dry. Once cured, if you like, you can remove the wood perimeter and enjoy the new surface. This penny counter is undoubtedly a unique and creative way to bring copper into your kitchen or bathroom design.