Use Wood Pallets To DIY TikTok's Gorgeous Garden Bench That Doubles As A Planter

We may receive a commission on purchases made from links.
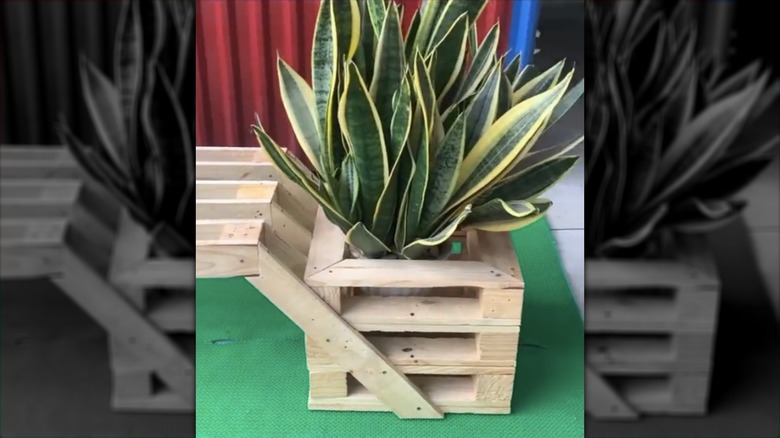
You can never run out of ways to use pallet wood to improve your garden or outdoor space. If you are a DIY enthusiast, chances are you have a pile of them destined to be used on your next backyard project. This garden bench shared by user diyprojects88 on TikTok might just be the home improvement hack it has been waiting for. The pallet wood construction not only provides additional seating, it also comes with a pair of sizable containers for your potted plants.
This undertaking requires a considerable level of carpentry skills and may be suitable for more experienced DIYers. However, it is a welcome challenge for beginners too if you have the confidence and the proper equipment. Building this bench will involve a wood-cutting power tool, although a good-quality manual saw and triangle rulers also work if you are experienced in precision cutting. You will also need a hammer, drill, and sanding tool. Considering the extensiveness of the job, it is worth reminding to observe safety measures while doing your woodworking at home. The DIY garden bench has two components: the actual seat and two planter boxes that will flank it on either side. We will first discuss how to construct the latter.
Building the planter sections of your garden bench
The bench planters consist of three units of square frames placed on top of each other. To build these square frame units, cut wood strips into uniform lengths of about 14 inches with the ends cut at a 45-degree angle, creating elongated trapezoid shapes. You will need eight pieces for each unit. Apart from these wood strips, you will need stud blocks that will support the corners of the frames. If your pallets come with wood blocks as bracing pieces, these will work perfectly for the job. Otherwise, you can create cube shapes from construction lumber. Just make sure that the blocks will have the same width as your wood strips.
Now, you can begin constructing your square frames by piecing together your trapezoid strips, connecting their ends to form right angles. Secure them in place by nailing the intersecting ends onto your wood blocks. There should be two frame faces, one on top and one on the bottom, with the stud blocks sandwiched in between them. You need to build three units of these frames then fix them on top of each other. Elevated from the ground, the stacked frames will serve as the planter's walls. Before screwing them together, however, cover the bottom unit with pallet wood slats to provide flooring. Repeat the process to build the second planter.
Constructing the seat section of your garden bench
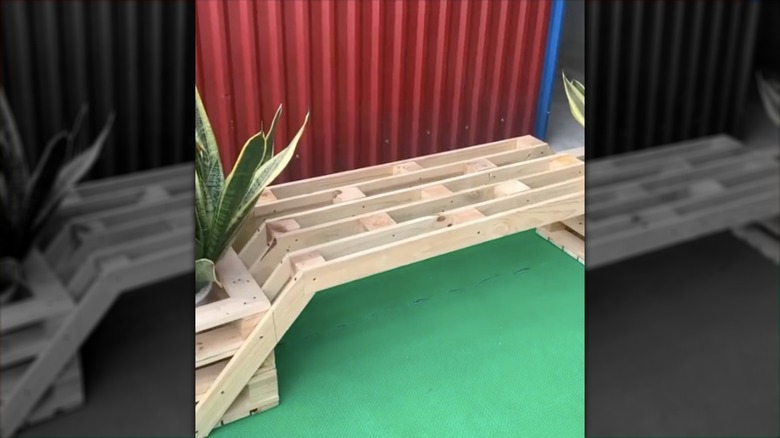
The bench seat will connect the two planters to one another like a bridge. Constructing it also involves alternating layers of wood strips and blocks. This time, however, the pallet slats are oriented vertically, similar to floor joists. To start off, cut your strips into uniform rectangular pieces, about 3 feet long. You will need six pieces of these for the seat. Additionally, gather or cut out thirteen more wood blocks.
Next, get one of the wood strips and nail three stud blocks onto it, two blocks on each end and one at the center. Affix a second board to sandwich the blocks. Then, add another layer of blocks but only use two of them and offset their alignment from the first three studs in an alternating pattern. Continue the process until you have used all six slats. Keep in mind that the width of the seat assembly must be just slightly bigger than the width of your planter boxes. To be precise, give an allowance of two times the thickness of your pallet wood board.
Joining the seat and the planter boxes into a whole piece
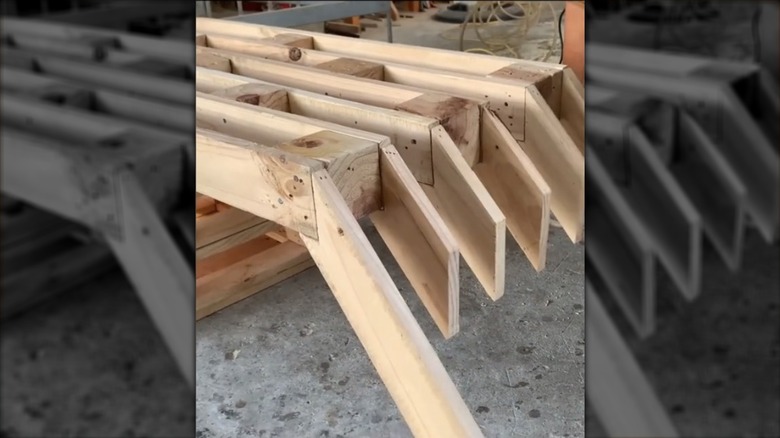
At this point, you would have your assembled bench seat and your two planter boxes. Your next task is to join these three components into a piece of furniture. To do so, you need to install a series of diagonal legs extending from the ends of the seat unit slats running down to the planter box wall. Again, use your pallet boards to build the legs. This time, cut them to a shorter length of about 8 inches. Then, cut one of the ends at a 45-degree angle. These ends will connect to the top unit of the planter boxes. The other end, however, needs a 90-degree L-shaped cut that will interlock with the square ends of the seat slats, much like a puzzle.
For the outer slats, you will need longer leg pieces that will extend to the base of the planter, clamping the boxes on its sides. Screw all members together. To reinforce the structure, add metal plate brackets to the underside of the joints. You can find these slotted brackets in most hardware stores. They are also available on Amazon. Screw them onto the points where the diagonal legs meet the planter. After this, give your new outdoor furniture a good sanding and your bench/planter combo is ready for use. It is a perfect upgrade idea for your patio space or garden. As an optional step, stain the wood to enhance its appearance.