Upgrade An Old Cooler To Create A Gorgeous Patio Piece With This Clever DIY
We may receive a commission on purchases made from links.
Drink coolers are among entertaining essentials that are a must for your outdoor space, but some can look beat up, dirty, or out of style. Luckily, you can dress up your old or basic hard-sided cooler by crafting a chest for it that can sit on your patio. If you'd like, you could add wheels to make it a cart, allowing you to easily move the cooler to wherever you need it most. This project will require some wood boards, such as 2 by 4s, as well as fence planks to construct your outdoor furniture. Additionally, you'll need a saw, drill, screws, two hinges, and waterproof wood glue. For an even more functional cart, you might choose to add handles, a bottle opener, or other bar accessories.
For those that would like their cooler stand to have some additional storage space, you can add a shelf to the bottom, or double the length of the chest to incorporate an open cabinet. While this DIY is fairly simple, some woodworking experience will be helpful and it will be more cost effective if you already have the necessary tools. With this clever DIY, you can keep your drinks safe from the summer heat and add a gorgeous piece of furniture to your patio.
Crafting your patio cooler stand
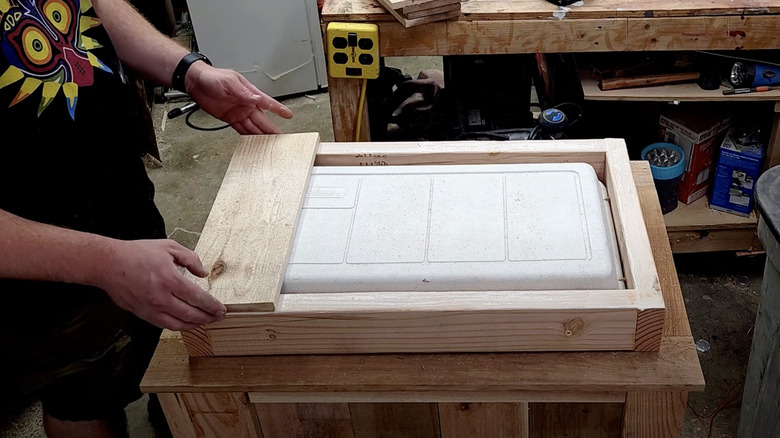
Start by disassembling the lid from your cooler and cutting some wood boards to the dimensions of the cooler's base and lid. If you're incorporating a storage cabinet, be sure to double the size for the base of the cooler. Use wood glue and screws to join these pieces into two separate frames. Place the lid inside its frame, attaching it with screws, and set this piece aside for later. Now, you'll need to make the legs for the stand. Cut eight planks to your preferred height to create four legs. Glue two pieces together perpendicularly and screw to secure each leg. Set these legs flush with the corners of your cooler's rectangular base frame and screw them together.
For the base frame, screw two or three extra planks across the middle for support. With your stand upside down so the legs face up, set your cooler inside the chest, also upside down. Place your support over the bottom of the cooler and screw it into the legs. For those creating a larger chest with a cabinet, glue and screw fence boards across the open half of the base to create the bottom of your cabinet. To have a shelf beneath the cart, form another rectangular base, place fence slats across it, and attach it beneath your cooler on the legs of the stand.
Finishing your gorgeous cooler stand
To conceal the cooler, flip everything upright, cut fence planks to the length of the open sides, and secure them around your stand. For those with a cabinet, leave the front of the cabinet section uncovered, but add a thin plank inside to separate the cooler from the storage space. For a more professional appearance and keep your DIY wood project from looking cheap, use glue narrow fence slats to the top and bottom to create trim. Bring out your set-aside cooler lid and attach fence slats over the top, screwing into the wooden frame to create a finished lid of your patio piece. Place the lid onto the cooler and use hinges to attach the wooden top to the cart.
Open the drain of the cooler and stick a pen through to mark the same spot on your chest. Drill a hole the same width as your drain, and connect it to the cooler with a spigot (about $10 at Home Depot). This will allow you to easily drain melted ice without having to remove the cooler. When it's all put together, sand and paint or stain your project. Finally, you can add any accessories you wish, such as a handle, caster wheels ($8 each at Home Depot), or a bottle opener ($3 at Hobby Lobby).