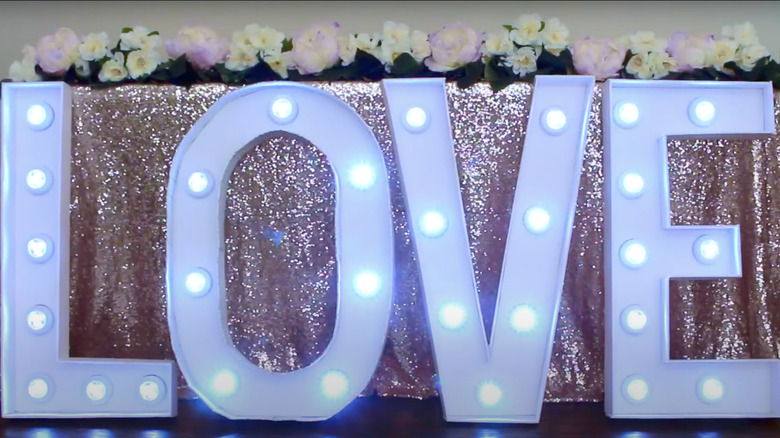
Light Up Your Entertaining Space With A Stylish Dollar Tree Marquee Sign DIY
We may receive a commission on purchases made from links.
Whether you're throwing a birthday party, a backyard wedding, or any type of celebration, you can light up your decor with this easy Dollar Tree DIY. With just white foam boards and LED push lights from the low-cost retailer, some hot glue, and a little creativity, you can make stylish marquee signs to enhance any gathering. This is a great way to decorate on a budget, since Dollar Tree items are only $1.25. In comparison, just one marquee number is over $35 on Amazon – so this could add up to incredible savings. You will be able to make several marquee signs with this DIY for a fraction of what it would cost to buy them.
Because this project is so versatile, there are many ways you could make and decorate your signs. With letters, you could spell out the name of someone or an important word that matches the theme of the gathering. For those that want to make marquee numbers, you can turn Dollar Tree items into the ultimate birthday bash decor with signs of the person's age, or you might make a jersey number of a favorite player for game day. However you decide to do it, this DIY decor will add a gorgeous glow to your entertaining space or could even be cute bedroom decor.
DIYing light-up marquee signs
First, you will need some white foam boards to create your marquee signs. For each number or letter, you'll most likely need two poster boards, one for the base and another to create the three-dimensional effect on your signs. Once your signs are constructed, several self-adhesive LED push lights can be attached inside for that signature light-up aesthetic. To start making your signs, decide what letters or numbers you'll need for the full display. Now, begin tracing them onto your poster boards with pencil. The designs can take up a whole board each. You could choose to make them smaller, but it's crucial that they're large enough to fit the lights.
Using a box cutter or x-acto knife, cut out your shapes, making the lines as even as possible. With another poster board, cut out 3 or 4-inch wide rectangles that match the lengths of the sides of your numbers or letters. Line up these pieces along your sign to ensure they'll fit correctly. Hot glue each rectangular piece so that it stands upright along the side it corresponds with. Packing tape could also be used to secure these parts to your sign. Once you finish them all, you'll have a 3D letter or number. Repeat this process so you have all the signs you need to decorate your entertaining space. If you'd like the decorations to stand on their own, try gluing another horizontal piece of foam to the bottom of your letter.
Finishing your Dollar Tree marquee sign
After you've made all your letters, consider how you want to decorate your signs before you attach the puck lights. If you like the look of white marquee lettering, you might leave them as-is or use white paint to hide any visible tape or pencil smudges. Alternatively, you could use spray paint to change the colors of your signs to match the party's style or theme. Another option would be to stick adhesive glitter paper to the inside of the letter or all over it. This could also work with leftover scrapbook paper from previous projects and a little glue. For a unique look, you could decorate your signs differently from each other, using alternating or various colors or designs.
When your signs are assembled and decorated as you like, it's time to add your lights. Ensure that the puck lights have batteries and are working properly before sticking them to your signs. You may also want to use a ruler to mark evenly-spaced spots along the poster board before attaching your lights. This will help to make sure that they look perfectly placed. Now, peel back the covering from the adhesive on each puck and stick one onto each marking. Push the lights to turn them on and see your sign glow. With your stunning Dollar Tree DIY, you can make your party the talk of the town without breaking the bank.

