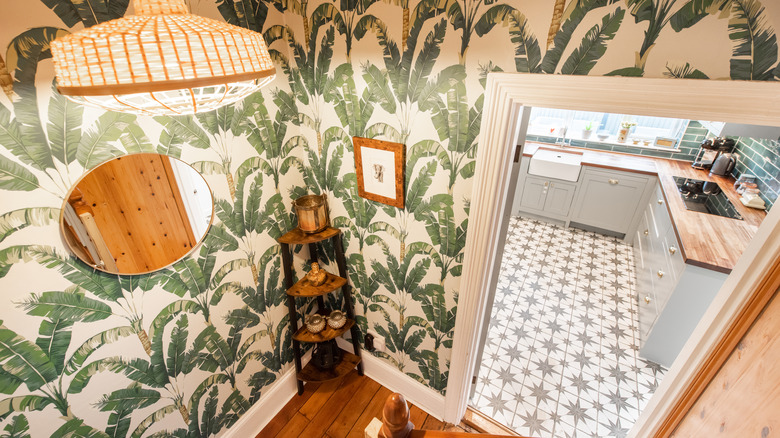
DIY Tropical Wallpaper For A Fraction Of The Cost With A Creative Stenciling Kit
We may receive a commission on purchases made from links.
Already have all the trendy big-leaf houseplants to add drama to your home a person can possibly cram under one roof? There are other ways to hide those once-trending greige walls. Dramatic bespoke wallpaper is pricey, even if you're only getting a few rolls to complete a feature wall in, say, your living room. Plus, while DIY installation is totally do-able, hiring an installer is an added expense. But transforming your home — or the walls, at least — into the Amazon rainforest understory doesn't have to break your renovation budget. And you don't have to have a fine arts degree to DIY such a look, either. Big box retailers, specialist companies, and even Etsy sellers have quality stencil kits that are easy to use and feature all your favorite tropical plants, from dramatic monstera to 1920s parlor palms.
While many of these stencils are designed for walls, their usefulness in home decor doesn't stop there. You can use stencil kits to easily decorate pretty much any large, flat surface paint will stick to. Do up a tired (aesthetics-wise) dresser in your bedroom using fern frond stencils and paint in a handful of green hues. Or go botanical on your ceiling with big blooms in maroons and violets. (Note: This method is a bit trickier than stenciling vertically.) You can also take this handmade technique outside — all you need is a plain patio floor or chunky pavers, equatorial-themed stencils in a repeatable pattern, and a few pails of durable outdoor paint.
Gather your materials: stencil designs that pop with the right paint
Finding unique ways to add a touch of the tropics to your space isn't as difficult as you might think! Shopping at a dedicated stencil supplier guarantees interesting designs and clean lines. Cutting Edge Stencils sells a palm fronds three-piece wall pattern kit for under $80. Designer Stencils makes philodendron wall stencil sets starting at just over $100, depending on the size. Big box retailers sell kits, too. Head to Walmart to pick up an abundant Tropical Dreams wall stencil set for well under $50. And, of course, Amazon has tons of budget options, like this vibrant 11.8-inch square tropical stencil kit by FINGERINSPIRE for just over $6. With coconut palms, flamingos, hibiscus, and big-leaved plants, it's giving South Pacific vacation vibes.
Experts say latex paint is the best option for stenciling indoor walls, ceilings, and wooden furniture. It's less messy than spray paint and requires fewer layers than acrylic. If you're stenciling outdoors, you can't go wrong with exterior masonry paint. Consider paint colors that will bring a tropical vibe to your space, like various leafy shades, from turquoise to lime to dark spring green; jewel tones like fuchsia pinks and fiery reds and oranges; and summer beach sunset hues like peach, coral, mint, and soft yellow. Tone-on-tone stenciling is particularly popular right now, where you use lighter hues to add detail to the first layer of stenciled patterns, or add satin highlights to matte designs.
The how-to: Using a stencil kit to create your very own rainforest
Invest in a 3/8 inch nap, 4-inch long paint roller to ensure a smooth finish and little to no bleeding around the edges of your stenciled imagery, and a paint tray that fits your roller. You'll also need painter's tape to give a clean border to your overall design, and, most importantly, hold the stencil sheet in place. Add a removable spray adhesive to your cart for extra stick. Get some paint dabbers — small wooden sticks tipped with a flat-ended sponge — for adding highlights or when using multiple colors.
If your walls or stenciling surface has been freshly painted, you can go ahead and get started right away. Otherwise, you'll need to add some time to your project schedule to fill any holes with spackle, and add a coat of primer and base paint. Starting in one corner of the wall or surface, stick your stencil to the wall, making sure it's completely smooth. Load your roller or paint dabber with paint, taking off the excess onto a paper towel. Then, roll the paint over the stencil using medium pressure until the entire area is coated evenly. Wait a few minutes to allow the paint to dry before removing the stencil and re-sticking it to the next section of wall. Most stencils have guides — overlapping border images built into the stencil design — to help you line up the sections accurately. Repeat the process until you've finished the wall.

