DIY A Rustic Wooden Bench That Is Perfect For Any Room In Your Home

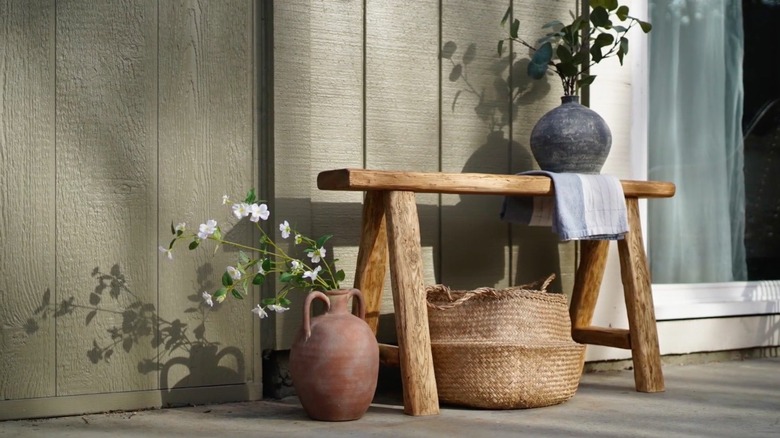
If you are in search of furniture ideas for a rustic-style home, then this DIY wood bench is worth your attention. This design is the creation of furniture flipper and home decor enthusiast @jnn.liu.liu. The unique piece is made of construction lumber, crafted and assembled to form a simple yet sturdy seat that exudes a rich, old-soul character. Functional yet inconspicuous, this bench will serve perfectly in any room. You can place it along the hallway, in the mudroom, out on the terrace, or next to your bed. Not only will it provide a firm surface, but it will also add a warm, nostalgic effect to the space.
This project is ideal for intermediate-level DIYers. However, it also presents a good challenge for beginners looking for an opportunity to test their skills and take things up a notch. This is given, of course, that you have the needed equipment. Building this bench requires a wood-cutting power tool such as a circular saw, miter saw, or jigsaw. However, a good-quality regular wood saw will also suffice if you are confident with it. Be sure to observe woodworking safety precautions while working on the project in your home.
The key tools that make this DIY special include a chiseling tool, a wire brush, and a sanding tool. You will use these to shape and weather the wood boards to create a faux driftwood look.
Materials for your DIY wooden bench
Before building your bench, it is important to select the right type of wood for the project. You will need solid, natural wood. Do not buy manufactured wood such as plywood, particle board, or medium-density fiberboard as these will not produce the desired effect. For the bench seat, purchase a wood plank, 2 inches thick, 6 inches wide, and 4 to 6 feet long. You can get these from most hardware stores, such as this pine lumber that is available from Lowe's for around $5. Being a softwood, pine is a type of wood that is easy to build with, especially for shaping and carving.
To add character and visual interest, find a piece with well-defined wood grain patterns. Such features will look great for the above-facing side of the furniture. Apart from the wood plank for the seat, you will need another piece that is 2 inches thick and 3 inches wide. This narrower block will be used to create the bench's support frame. Be prepared as well with wood filler and pocket hole plugs. Lastly, choose a wood stain to give your furniture a beautiful finish.
How to build your rustic wooden bench
With your materials ready, you can begin by cutting your 6-inch-wide wood plank into the desired length. It is important not to make it too long to keep the bench from sagging. As a reference, Liu's original piece measures 35 inches long. Next, you need to cut out the leg pieces from the narrower wood block. You will need six parts in total, with legs trimmed at a 15-degree angle to form a pair of A-shaped units. Each unit will consist of two diagonal pieces serving as the actual legs and one shorter piece to act as a horizontal bracing. Drill the slot holes for your screws at the adjoining points of each member.
Take out your chisel and partially carve the wood blocks to give them that rugged, rustic look. For added effect, lightly scratch select areas with your wire brush. Once you are satisfied, sand the wood to clean its surface and remove any splinters. After that, you are ready to assemble them into an actual furniture piece. Do not forget to fill the slot holes of your screws with your pocket hole plugs and a layer of wood filler. You can mask these patches by sanding them. The final step is to stain the whole body of your new rustic-style bench.