Tips For Using IKEA's Kitchen Planner To Design Your Dream Space

If you've ever tried to plan a major remodeling, you've probably learned a thing or two. You almost certainly learned the quickest route to the nearest hardware store for things you've forgotten or maybe never even heard of before. You've learned that budgeting would be considered a dark art if it ever worked. And you might very well have learned that most room-planning tools are only slightly more useful than an Etch A Sketch. IKEA seems to have solved all of these problems, at least for kitchens, with its newest Kitchen Planner online tool. With a few tips and nudges in the right direction, you can use it to create a detailed, accurately measured drawing and shopping list.
It's a browser-based tool that isn't compatible with mobile devices, so it doesn't compromise detail and functionality to work on a tiny touchscreen. The Kitchen Planner is a well-executed drag-and-drop tool for visualizing your kitchen space and ordering the right products, but there's a lot more going on under the hood. One of a suite of planners, including the IKEA Kreativ augmented reality app, the Kitchen Planner is also useful for office and bathroom planning ... though some bath products like IKEA's HAGAAN wall cabinets for small spaces aren't available in it. You don't have to use the IKEA planner with only IKEA products, and you don't have to model your entire kitchen. If you're just designing cabinetry along one wall, that's all you need to create in the planner.
Tips for putting the right item in the right place
As much as we like the IKEA kitchen planner, its features and functions aren't always obvious or easy to use. For example, it can be frustrating to track down the way to change countertops. Click the cabinet for which you want a different material, click Modify, then next to Worktop click Style/Color. You can select your new countertop material here. When modifying, you can change all countertops or just the selected one. A lot of the customization options are found under the Modify and similar menus, but not all of them. Some elements like wall shelves have a height handle so that you can position the item at your preferred distance from the floor. The kitchen planner will automatically fill in small spaces next to base and wall cabinets with a cover panel. You can turn these off for each cabinet by selecting the cabinet, clicking Modify, then turning off the "Filler piece" toggle.
Once the pieces are in the right place, there are lots of options for refining your design. You can resize filler pieces and other elements by simply entering new numeric dimensions in the Modify menu. You can check drawer clearances with the Open function. Adjust the location and orientation of cabinet handles by selecting the cabinet, clicking Modify, then clicking Modify next to Handle. Swap the handles out entirely by clicking Style/Color.
Tips for using the kitchen planner effectively
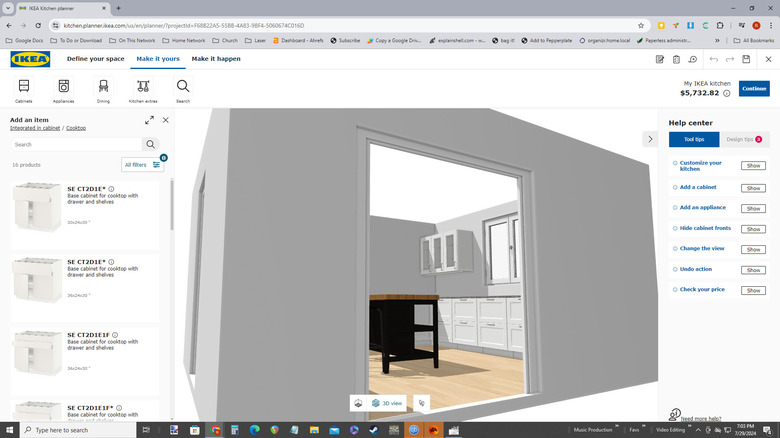
Manipulating the IKEA Kitchen Planner interface is simplified so that options like zooming with your mouse's scroll-wheel can get lost. In 3D view, you can change the view height to options like high, countertop, and ground. There's a positioning marker with four arrows on it that indicates the center of your view. If you move the positioning marker closer to your point of view, you can view your room through a door, window, or wall opening. (You can also do this using the rotation tool.) Double-click the positioning marker to place a person in your room, helping you grasp the current perspective. Moving the positioning marker causes the drawing to re-center around the marker, and rotating your design in 3D mode rotates it around the positioning marker. Sometimes this rotation point gets out of whack, and this can usually be resolved by saving, closing, and then re-opening the layout.
There are other ways of viewing your creation, such as a Google Street View-like walkthrough mode and a top-down 2D mode where you can make sure things are positioned correctly (for example, that cabinets are properly against the wall). You can print measured drawings and elevations for walls, which is indispensable for the actual installation process. While you can add notes to the overall design and to the individual products in the design, unfortunately those don't print on the measured drawings, but you can "print" a PDF containing your design and product notes.