How To DIY The Checkered Floor Tile Trend For A Luxurious Look On A Budget

If you're looking to recreate checkerboard floors but don't want to break the bank, then it's time to get creative. One of the best ways to snag this coveted flooring trend is by using peel-and-stick tiles, as demonstrated by TikToker @dailydaylen. More specifically, @dailydaylen used the WallPops brand to create this look. These floor tile kits have everything you need to instantly transform any space; the only tools you'll want to have on hand for this DIY project are a utility knife and a straight edge should you need to make any cuts.
The exact tiles used are the WallPops CLJ Grey & White Marble Bonneville Peel & Stick Floor Tiles. A package of 10 tiles costs $21 and covers 10 square feet of flooring. The backs of these tiles have arrows so you can know the direction to place them. This works to create a cohesive appearance in the room you're looking to makeover.
On average, you can expect to pay between $9 and $50 per square foot when retiling a kitchen floor (without the help of a professional). So if your kitchen is 10 feet by 10 feet, traditional tile would cost you anywhere between $9,000 and $5,000. But when using WallPops peel-and-stick tiles, you can achieve these same results with 10 cases of flooring, costing $210. Installing peel-and-stick tiles is arguably the easiest way to update a kitchen on a budget.
Apply your peel-and-stick tiles
If you're chomping at the bit to change your floor in a flash with peel-and-stick tiles, you might already be browsing the selections. But before purchasing, you'll need to measure the space you're looking to upgrade. WallPops has a convenient measuring tool located on the same page as whatever item you're interested in purchasing. Simply add your floor's length and width (in feet) and voilà! The calculator tells you how many cases of floor tiles to purchase.
Next, you'll want to prep your floors to ensure the adhesive sticks. According to WallPops, your floors need to be clean and dry. Remove dirt and debris along with any oil. Keep in mind that if your floors are uneven or you have radiant heat, peel-and-stick tiles aren't recommended. Once your floors are prepped, place your tiles on the floor without removing the backing. This step lets you see how your floors will look once the tiles are installed, so be sure to check that the grain of each tile is facing the correct direction.
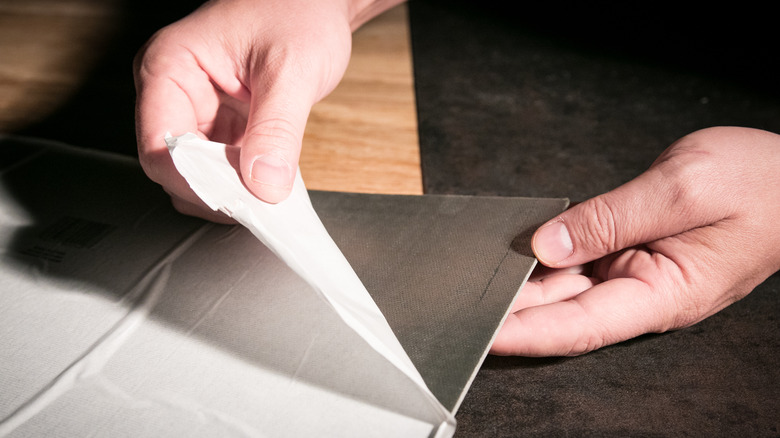
If you're satisfied with how your floor looks, all you have to do is peel and stick your tiles into place. According to @dailydaylen, the process of tiling her front kitchen floor took about an hour. She used a utility knife without any kind of guide, but warns that it's not the best way. Having a straight edge will help you make cleaner (and safer) cuts. It's also important to protect your hands when cutting tiles, especially in small corners. Amazon sells cut-resistant gloves for $10.
Things to consider before applying these vinyl tiles
This type of floor makeover is ideal for renters, as you're not permanently altering your home. However, WallPops comes with a disclaimer under the FAQ section which warns that their floor tiles are coated with a durable adhesive and are not designed to be easily removable like some of the brand's other products.
Although you can lift up these floor tiles, it won't be easy, and you might have some residual adhesive. In this case, you might have luck with a hair dryer or heat gun, but this extra step can make the removal process a tedious task. Essentially, removing these floor decals is ideal when replacing them with something else. So if you're a renter, you might want to think twice before using peel-and-stick vinyl tiles.
Additionally, WallPops recommends using a scraper or similar object to remove these tiles, which means you risk damaging the flooring beneath. As a precaution, you should run this hack by your landlord before modifying any floors in your home. Otherwise, you may risk losing your security deposit.
The other issue is harmful volatile organic compounds (VOCs). These types of tiles are made from virgin vinyl which consists of chlorine and ethylene. VOCs can pose serious health issues, especially for children, the elderly, and anyone with underlying respiratory issues. In addition to the vinyl used to make these tiles, VOCs may also be present in adhesives. However, the FloorPops tiles purport to be phthalate-free, FloorScore certified, and in adherence to the California VOC compliance regulations.