The Easiest DIY Oven Mitts You've Ever Made To Personalize Your Kitchen
We may receive a commission on purchases made from links.
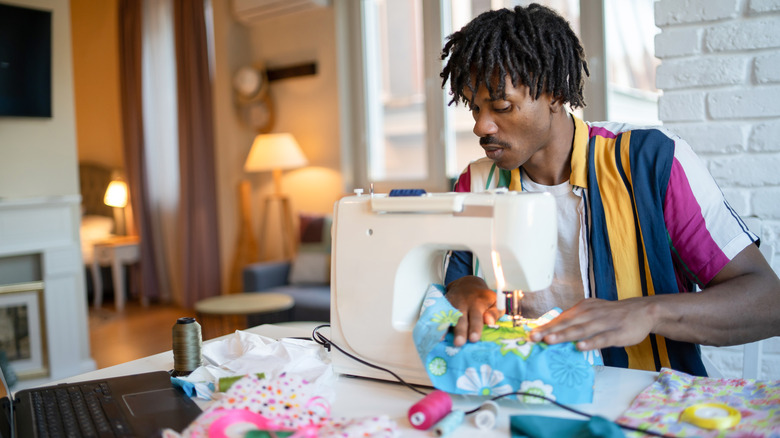
Filling your home with things you've made yourself gives a surge of pride every time you see them. When you can use your creations every day, it's even better. If you've never sat down in front of a sewing machine before, but you've always wanted to, an oven mitt is a low-skill-required place to start. What's more, you'll end up with an object that's practical as well as personalized. YouTuber Shelly from Coral&Co has a pattern for you, plus some easy steps to follow to stitch up your own cooking accessory. It's even equipped with a loop for hanging, hands-down the best way to store your potholders.
Oven mitts are common enough, but when you've made one yourself, it turns this commonplace item into something special. Plus, this design is quilted, making your final product even more impressive. With just a few supplies and a sewing machine, you can turn out this project in no time. Sewing may just become your new favorite DIY project!
Prepare your materials
Gather together some batting, 2 fat quarters of fabric (9x18-inch quarter-yard fabric pieces), bias tape, and Insul Bright. You'll also need scissors, pins, a ruler, and a fine-tipped marker. You can either download and print Shelly's free pattern here, or you can trace a mitt you already have onto two pieces of printer paper taped together; if you do that, add an extra margin of ½ to 2 inches to the shape before cutting the pieces.
You'll be cutting four pieces of fabric for the mitten shape, two for the exterior and two for the lining. Cut out the pattern, pin it to the fabric, and cut out each of the four pieces. If your fabric has a print on one side, flip the pattern over when you're cutting the other face of the mitt so you'll have the print side out on both the palm and back of the mitt.
Next, prepare the lines that you'll be sewing for the quilting. Using your ruler, draw parallel diagonal lines spaced about 2 inches apart across one cut fabric piece. Follow up by using the same technique to draw lines in the other direction so that all the lines come together making a diamond pattern. Cut two large pieces of Insul Bright and two of batting. On a table, layer one piece of batting followed by one piece of Insul Bright, then topped with the fabric you drew the lines on. Pin all the layers together.
Get stitchy!
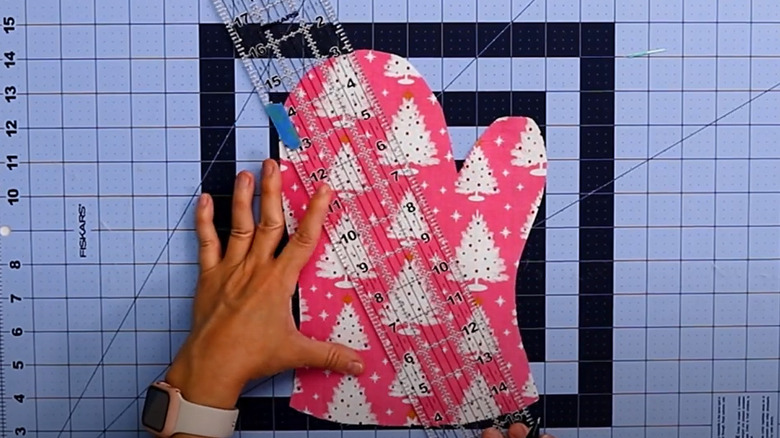
To make the quilted exterior of the mitt, sew along all of the marker lines you made. Trim away the extra batting and lining. If your marker lines still show, try using milk, which is an effective albeit unexpected dairy product that removes permanent marker from fabric. Repeat these steps with one of the reversed-pattern fabric pieces. Set the two quilted pieces on top of each other with the lining sides out on both pieces. Do the same with the two lining pieces. Pin them together, and sew all edges but the bottom with a ¼-inch seam allowance. Turn the quilted part of the mitt inside out, and slide the lining inside it as-is.
You'll use bias tape to finish the raw edges. Leaving the bias tape still attached to the roll, open the fold of your tape, and sandwich it over the cut edges on the open end of the mitt. Pin it down, making sure to secure all four layers of each side with the pins. Once you've pinned the tape to the edges of the mitt's opening, cut the tape with a 1-inch margin at the end. Fold it under to hide the cut edge, and pin it.
Cut a 6-inch piece of bias tape that will become the hanging loop for the mitt. Stitch the tape's fold closed, fold it in half, and pin it under the bias tape fold at the pinky-side of the mitt. Sew the binding in place, and now you're ready for the hot stuff!