DIY A Backyard Daybed With A Canopy For A Relaxing Summer Oasis
Comfy seating is a crucial part of living well in your outdoor spaces. While there are many suitable choices — including lounge chairs and sofas — available for outdoor living, one specific option is a favorite among those who long to spend their leisurely days horizontally on their porch or in their yard. The daybed is a perfect spot for lounging, reading, afternoon naps, and, yes, even sleeping under the stars. This is particularly true if you have a canopy to protect you from direct sun or pesky insects, making the space even more welcoming.
Daybeds made for outdoor use, however, can be expensive, with even the most basic frames costing upward of several hundred dollars. Luckily, you can DIY a simple canopy-style daybed outdoors. All you need are inexpensive cuts of lumber, plus some basic tools and fasteners to create the daybed of your dreams. The cushion is a simple standard single mattress with a waterproof cover that will withstand the elements.
An outdoor daybed is a perfect way to maximize your outdoor living space. Create a spot for spending time outdoors that not only provides additional seating, but can be a perfect outdoor sleeping spot as well. Freestanding, you can place it on any surface like a sleeping porch or deck, or place it on the grass in your yard.
Making a DIY outdoor daybed
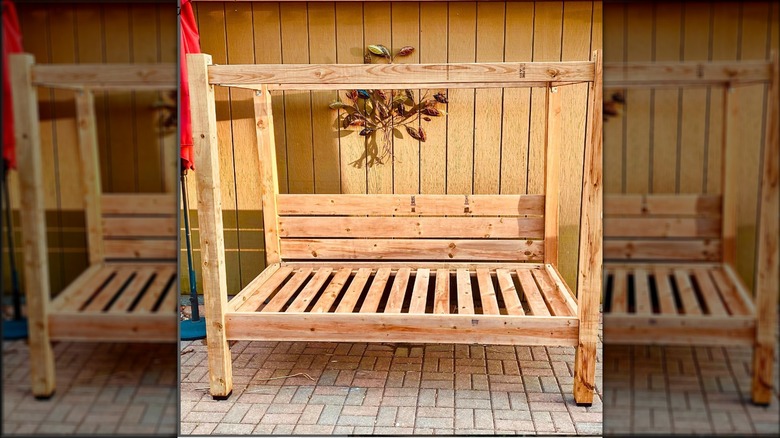
To build your outdoor daybed, you will start with four 4x4-inch wood posts that will serve as your corner supports and will run from top to bottom of the daybed. Measure the length and width of your mattress to determine how far apart they will need to be, then create supports to hold them together at the ends of the bed using 2x4s and pocket screws. Attach another 2x4 plank near the top of the bed frame that will offer additional support and provide a framework for your covering. The mattress supports are made from two 2x4s with a 1x2 screwed in along their length that forms a cleat for the bed slat. These slats, made from 1x6 boards, provide a base for the mattress, so screw them into the cleats to keep them in place.
While pocket holes are typically used for creating the structure, you can also use metal L-brackets at the seams, which can be less unsightly, particularly on the upper supports that are more visible. Additional cosmetic modifications include adding caps along the top to look more finished and adding a 1x6 apron along the front that covers the side of the mattress. You can also employ back slats attached to the posts on one side to create a back panel or slats above to create a pergola over the bed.
Customizing your outdoor daybed
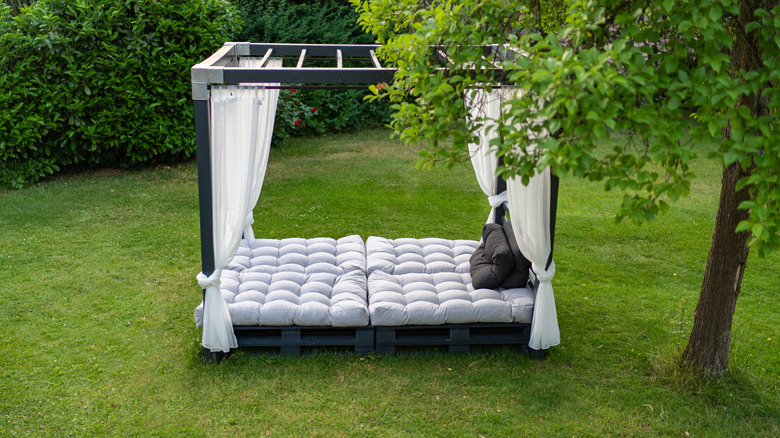
Options for customizing your outdoor daybed are endless. Most DIYers cover their bed with their favorite stain and waterproof varnish to keep it looking good, but you can also paint it any color you desire. After installing your mattress, to decorate your daybed, add cushions and pillows with waterproof covers to make it extra cushy. Use fabric curtains or mesh screening along the top of the bed, either draped artfully over the canopy structure, attached with grommets or hooks, or stapled to it using a staple gun.
If you are looking to make a swinging bed, opt for creating a platform with no legs that you suspend with rope or chain from each corner post along the base of the bed, using sturdy high-capacity hardware specifically designed for porch swings. Since the weight of the bed will need adequate support vs. the legged version, you may want to do both pocket holes and L-brackets to hold it securely in place. You can also adapt an IKEA bed into an outdoor swinging daybed or use shipping pallets as the base instead of slats.