Restring Your Ryobi Weed Eater Easily With Our Quick Guide
We may receive a commission on purchases made from links.
When it's time to clean up the edges of your yard after mowing, edging the lawn with a weed whacker is the perfect solution. Ryobi is one of the best brands for yard work and lawn projects, as it offers a lot of outdoor tools that can do the job. If you're using a Ryobi cordless battery string trimmer ($99 at Home Depot), you eventually need to learn how to restring the weed eater to add more cutting line after it wears away. You can replace the line or purchase a spool that's preloaded with string.
Before you replace the line on your Ryobi string trimmer, it's important to understand a few key things so you can do it right. First, use the correct line diameter. With the Ryobi trimmer, the line replacement needs to use either a 0.065-inch diameter round line or a 0.065- or 0.08-inch diameter twisted line. When restringing, you'll be using the same spool that's currently on the trimmer, so remove all the parts carefully.
If you want to just replace the existing empty spool with one that's preloaded with a trimmer line, make sure the spool matches the Ryobi trimmer model you have. Replacement spools cost around $25 at Home Depot for a three-pack. You'll need either a 0.065- or 0.08-inch diameter line. The owner's manual should list the compatible models of spools for your trimmer.
How to restring a Ryobi weed eater
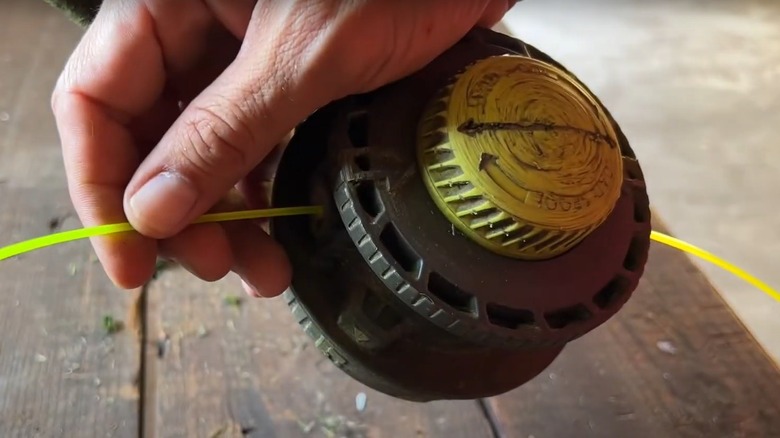
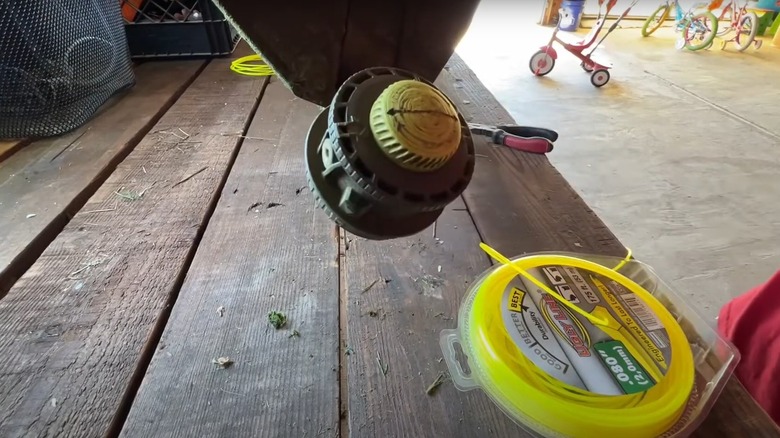
To restring the Ryobi weed whacker, start by removing the battery pack so the tool doesn't accidentally start running. Twist the cap on the bottom of the head until the arrows line up, which causes the holes on either side of the head to line up. From your new trimmer line package, cut a piece about 9 feet in length. You may need clipper pliers, nippers, or heavy-duty scissors or shears to cut through the line cleanly. Insert the line in one hole and push it forward until it exits through the hole on the other side. Pull the piece through until you have a roughly equal length of line coming out of both holes. Start turning the end cap clockwise to wind up the line until a few inches remain outside the holes.
With other Ryobi models that have one hole for the trimmer line instead of two, you may need to remove the old spool from the head of the trimmer before threading the new line onto it. Press the tabs on the sides on the underside of the trimmer head and pop off the cap to access the spool. Place the new line in the anchor hole at the top of the spool. Wind the string onto the spool clockwise until about 6 inches of line remain, then replace everything. If you're unsure which method to use, read your user manual for the specific instructions for your model of Ryobi weed eater.
How to install a replacement spool on a Ryobi weed trimmer
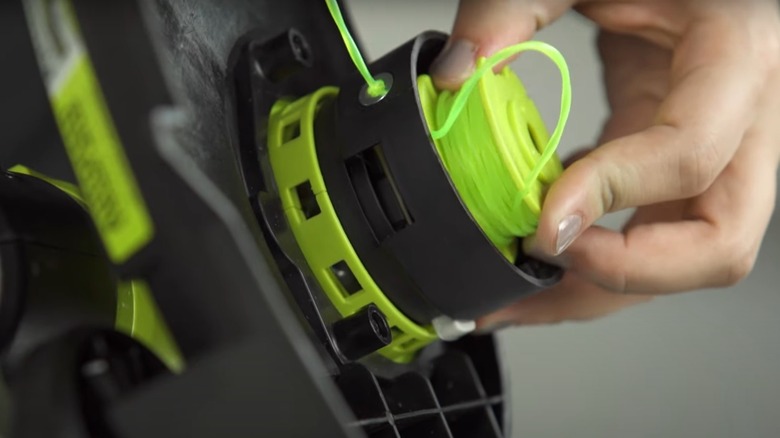
To put a replacement spool onto the Ryobi weed eater, start by removing the battery from the tool. On the sides of the trimmer head, you should see an end cap piece with tabs on either side of it. Squeeze the tabs inward and lift them upward to remove the cap.
Pull the empty spool out of the head; it should lift out easily. Grab the new spool with the line pre-loaded. The end of the line should be inside a small notch on the spool. Release the string from the notch and unwind about 6 inches of line. Then place the line back into the notch while keeping the 6 inches of line loose.
Place the spool back into the head and pull some of the loose end of the string through the hole in the side of the head. Give the line a slight tug to release it from the notch. Pop the end cap back over the spool while making sure to line up the tabs with the slots in the side of the head. Press the release button on the side of the head to free the line. Pull it until it's at the length you want and release the button — the trimmer is now ready to use.