Transform Two Dollar Tree Items Into A Beautiful Lantern Base With An Easy DIY

Lanterns have been used for centuries, and although they are mostly associated with camping, the flickering candlelight from a lantern demonstrates their enduring appeal. If you're short on cash and time but still want to pretty up your living space, spend a few bucks on a couple of Dollar Tree products to make a charming wooden lantern. The gentle flicker of the candle is soothing, even if it's from a battery-operated flame. Creatives of the world have come up with heaps of DIY hacks made from Dollar Tree finds, and Youtuber Crafting with JC is among them.
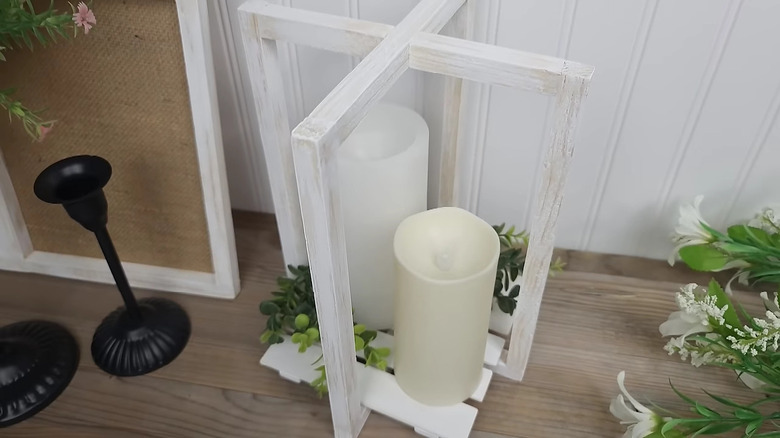
For a few dollars, JC whips up posh-looking decor for pennies, and one standout is a charming wooden lantern base set with LED pillar candles. Two artists' canvas frames, a mini wooden pallet, and a layer or two of paint come together for a modern farmhouse-style lantern that's cute enough for outdoor entertainment, gifting, or even as wedding table centerpieces. Keep in mind that since this structure is made of wood, you should only use battery-operated candles with it.
How to build your open-sided lantern
To copy our YouTuber's design, you'll need a 6x4-inch wood pallet and two 5x7 artist canvases. As for tools and supplies, have some wood glue, spackle, paint, a paint brush, a saw, and sandpaper on hand. If you have a mitre box it can be helpful for cutting the wood frames, but it's not necessary.
Start by removing the staples and fabric from the artist canvas wood frames. Sand the wood and fill any staple holes with wood glue. Once the glue is dry, measure and cut one of the frames in half lengthwise. You'll be left with two same-sized halves from one frame while leaving the other frame intact. With wood glue, perpendicularly secure both halves to the front and back of the intact frame to create an open-sided box. Paint both the box frame and the pallet if you choose to.
Once the paint is dry, stand the box horizontally and set the wood pallet inside so it's resting on the crossed wood that's acting as a base. You'll notice that the pallet does not sit securely on the frame since there are two slats on its underside that are holding the top slats in place. A small stack of popsicle sticks — maybe two or three — glued to the spots on the pallet's underside will help the pallet make contact with both pieces of the wood base. Finally, decorate your lantern with one of our clever and cute customizations.
Accessorize your lantern

What else does Dollar Tree have in stock that can zhuzh up your creation? Dress your lantern up for the seasons with their autumn or winter fabric, either by appliqueing it to the lantern's frame or by covering its open sides with fabric. To apply the fabric to the wooden frame, measure each section of wood on the two frames since you will wrap all the exposed wood in the fabric. Cut separate pieces for each section for easier handling, and adhere them with glue. Apply extra glue to areas where the fabric's cut edges touch to keep them from fraying.
Totally change your lantern's look by covering its exterior with cloth. For this version, swap out the wooden pallet for a circular wooden coaster to hold your LED candle. This swap is so that the corners of the pallet don't project past the fabric on your final product.
Along with fabric, grab scissors, a measuring tape, and craft glue. Also, purchase some ribbon like these patterned selections for trim to cover the cut edges. Measure the lantern's circumference, and cut the fabric to match, including a bit of extra length and width. Wrap the length of fabric around the frame. Glue it lightly at three of the four corners, and apply generous glue where the cut ends touch. Glue the ribbon around the top and bottom where the two fabric ends meet. Slide an LED candle into the lantern and enjoy the glowing fabric pattern.