Give Your Boring Office File Cabinets A Stylish Makeover Using A Clever Glue DIY
We may receive a commission on purchases made from links.
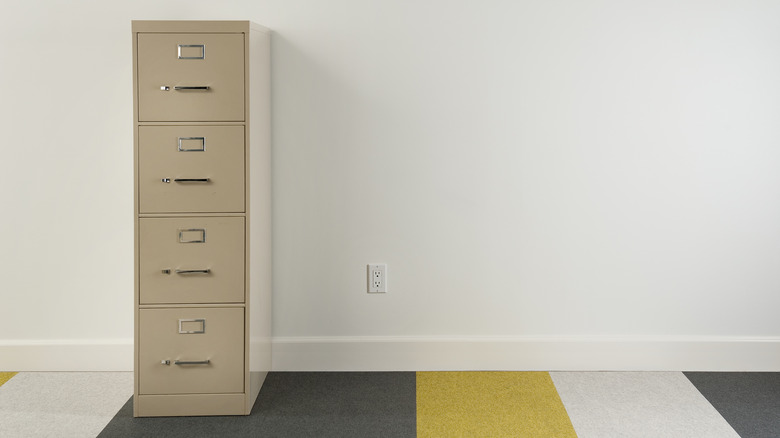
Do you ever glimpse a filing cabinet and shudder? The looming gray-ish metal just screams cubicles and fluorescent lighting, but what if you could upgrade a filing cabinet to make it less corporate-eek and more shabby chic? You might not be able to completely forget these pieces are the amalgamation of work and business products, but covering something in a layer of paint and some clever crafting can make it less boring. The key word here is clever, because this glue hack can upgrade those filing cabinets into literal works of art and might make them your new preferred home piece. After you've coated these metal monsters in your preferred paint color, grab some Weldbond glue, a few small decorative frames, and some scrapbook paper to create a backdrop and border for your cabinet's handles.
DIY isn't limited to building garden potting stations with wood pallets from scratch or creating stucco to add texture to your walls: It can also be upgrading "boring" or un-aesthetically pleasing pieces to make them more decorative to suit your space. Office supplies can sometimes fall into the "it is what it is" category, but they don't have to. With so many clever hacks online, your office can become the most stylish area in your home if you want it to. For your filing cabinet, gather your supplies and watch how it completely upgrades your perception of "business casual."
Paint your filing cabinets to upgrade them
In order to jazz up your filing cabinets, you'll need Weldbond glue, which you can find on Amazon for under $20. If you haven't already painted your filing cabinets ahead of this glue project, look for direct-to-metal paints that will reduce the chance of chipping and rust and produces a smooth finish. Spray paints will stick to the metal in a smoother finish, too. Blush pink, charcoal, and lavender shades look great with the handle additions featured in this project by @DIYwithShantelle on TikTok. If you happen to mess up the paint job, don't worry: You can always repurpose your old filing cabinet into a planter (we jest). Let the paint dry completely before adding the frames.
You can also decoupage the entire cabinet if you'd rather change this DIY up a bit. Decoupaging will give you more variety with prints and styles, instead of limiting your preferred design to a small square. Regardless of what you choose, keep the color palette in mind when purchasing your frames. Gold will go with a lot and elevates almost any item, and this Amazon pack of 4-inch-by-6-inch frames is great for this particular trend. If you stick with just the smaller squares of paper, it could still be wise to purchase a few pieces of the same printed pages. You will need 4-inch-by-6-inch cutouts for these; otherwise, make sure to purchase enough to decoupage the entire cabinet and plenty of Mod Podge.
Glue down your scrapbook paper and frames
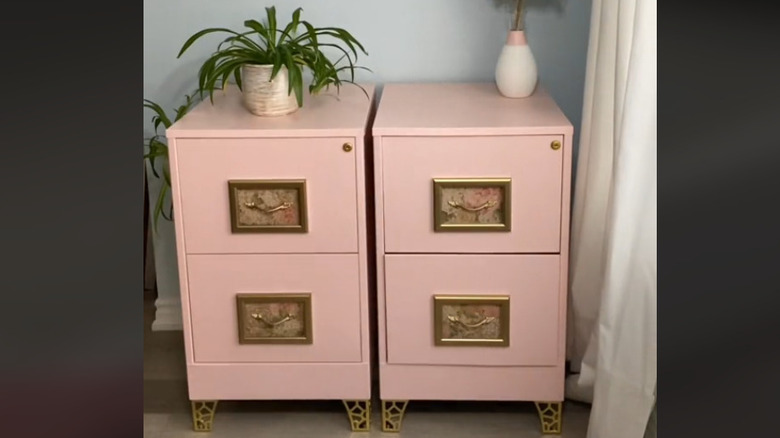
Once you've assembled everything, make sure to measure your scrapbook paper to fit the frames, and then use your glue to adhere it to just the top portion of your frame. The glass, plastic, and backing can be disposed of or saved for other projects. After you've allowed this to dry, you're ready to stick your frame to the painted filing cabinet. You will want to use the Weldbond again for this, since it's super strong and can adhere to most surfaces and materials, as well as the Mod Podge. Measure out the middle of each drawer, or wherever you plan to place the framed paper, and where your knob or handle will go.
Cover the back of the paper in Mod Podge, and then cover the back of the frame in Wellbond. Stick this to your filing cabinet or pull out the entire drawer and use a heavy object to press it down while it dries. The official Weldbond website recommends allowing the glue to dry for at least an hour, but check it to ensure it has adhered properly. Add one more layer of Mod Podge to the top of your scrapbooking paper, which will prevent scuffs, tears, and general wear, since it acts as a sealant and shield. You can then drill holes in these decorative squares to attach your knobs, and your cabinets are complete!