We DIYed A Birdbath Dripper With A Syrup Bottle. Sweet Hack, Or Was It For The Birds?
We may receive a commission on purchases made from links.
If a birdbath isn't part of your backyard habitat, you're missing a major opportunity. Not every bird eats seeds, but every bird needs to drink and bathe, and a basin for them to splash in could lure in birds that you normally don't see. The birdbaths that are the most attractive to feathered visitors involve moving water, though, and while these are lovely, there are drawbacks to adding a fountain to your birdbath. Above all else, they can be an expensive hassle to maintain.
So how can you achieve the joy of moving water without the pain? An easy fix is to install a dripper. This clever contraption hangs over the bath and delivers a steady drip of water that many birds can't get enough of. There are scores of birdbath drippers that you can purchase, but many of them are either not particularly attractive or too expensive.
That's where the excitement of a good DIY project raises its head. Over here, my birdbath was already getting consistent visits throughout the day from my avian friends, but if I could add extra appeal to lure in more visitors, why not? To make it better, there's no need to buy anything new when you have free supplies like would-be trash and gravity. In my case, I decided to make a DIY birdbath dripper using an upcycled plastic maple syrup jug and a standing hanger, with the goal of achieving a kitschy-yet-functional water feature. Here's how it turned out.
Gather and prepare the materials for your DIY birdbath upgrade
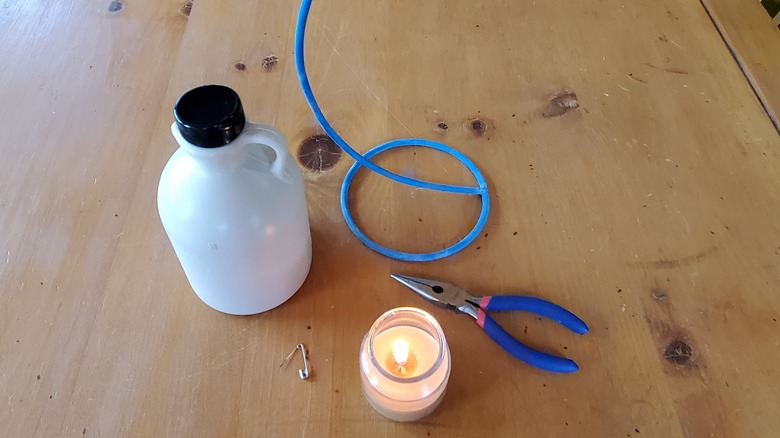
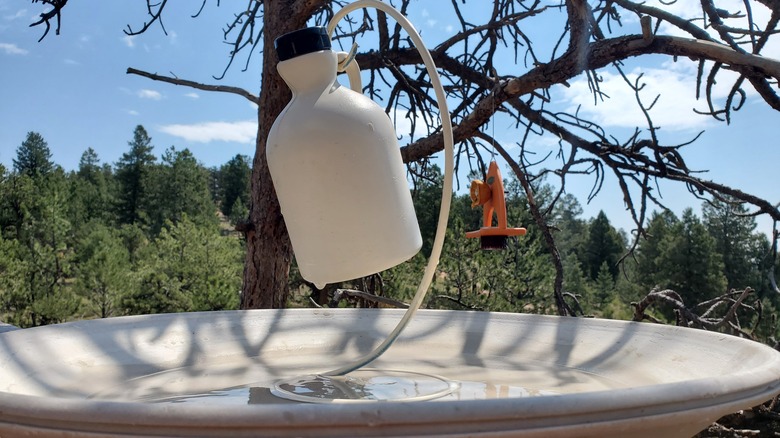
Just like the far-too-big pile of empties in my recycling bin, there's no shortage of plastic bottle upcycling DIYs online. There are easy ways to repurpose your plastic water bottles around the house. There are numerous ingenious ways to reuse them in your backyard garden. Truly, the possibilities are endless. This was DIY for me, though, and so with the last of my maple syrup soaking into a stack of pancakes, the empty syrup jug's less-obvious qualities began to stand out. Its adorable shape and handle made it not unpleasant to look at, and its thick HDPE plastic sides foretold a long life outdoors. So, after a quick soap-and-water treatment and label removal, the 1-quart jug was ready for surgery.
Frankly, it took longer to assemble the tools and materials than it took to whip up this birdbath accessory. The other things I needed were some needle-nose pliers, a safety pin, a lit candle, and something to hang the dripper from. I opted for a standing lantern holder that I already had. These 10-inch or 13-inch ornament display racks from Etsy are a great tool to hang a dripper as well, as one can sit in or next to the basin and let the dripper work its magic. A bit of ribbon or jute twine would also do the trick as a cute way to hang the jug from a tree branch over the bath.
Poking the hole for your DIY birdbath upgrade is trickier than you'd think
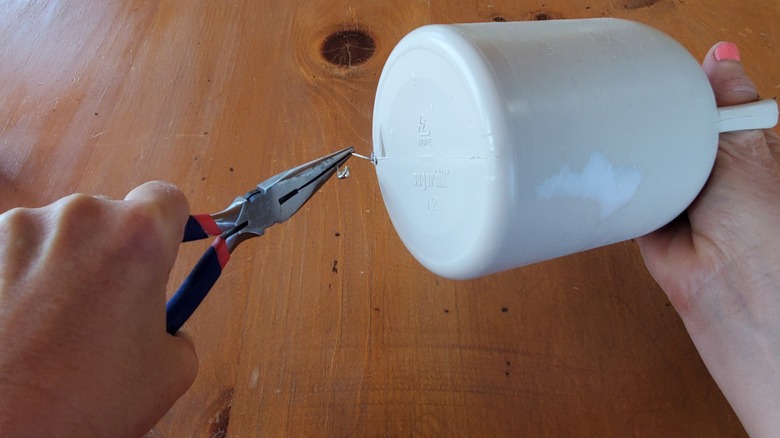
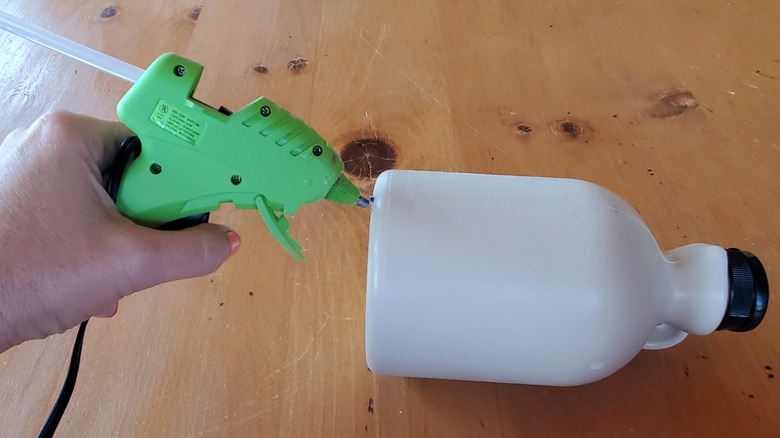
My supplies for my DIY birdbath upgrade were all laid out, and it was time to get started. First, I needed to know where the water would drip from once it was hanging, since that would tell me where I should punch the hole. I dangled the jug from my finger to see how it would hang and where the water would pool as it drips. Once I found the sweet spot, I heated a small nail over the candle flame for about five seconds and then pressed it into where the water would drain. Initially, I thought that something as fine as a pin wouldn't make its way through the thick bottle wall, even if it were right out of the flame. I used a thin nail, but it left me with a hole large enough to empty the jug too quickly. I grabbed my hot glue gun. Some glue around the edges of the hole slowed the water flow to a drip. The glue isn't ideal for long-term use, and I needed to touch up the hole again to adjust the drip speed.
The second try with a safety pin on another part of the bottle pierced the perfect hole for consistent drips, and the safety pin's shape was easier to hold in the pliers than the nail. Learn from my mistake and be careful not to make the hole too big. Fill the jug with a bit of water to test the drip. If it drips too slowly, you can enlarge the hole a bit with the heated pin.
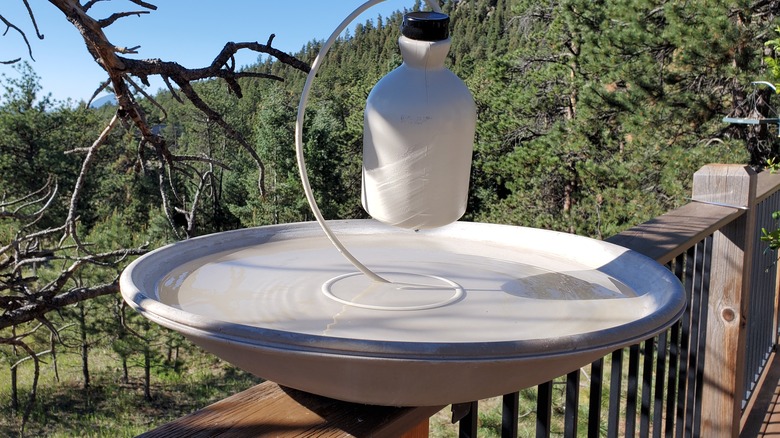
Here's how the DIY birdbath upgrade turned out
All in all, the DIY came together without too much trouble. Initially, I placed the stand next to the birdbath with the dripper hanging over it, but it didn't hang far enough over the water. Instead, I set it in the middle of the birdbath. A lick of paint for the lantern stand made the dripper seem like it was meant to be part of the birdbath. I was concerned that a quart of water suspended from a standing display hook would tip over, but when I tried it, it stood firm. The whole contraption did take a tumble during a wild windstorm, but it survived the fall from my second-story deck. When you give your own DIY a try, give your stand a trial run by hanging a full jug from its handle to make sure it can stand upright.
The birds took a few days to get used to the dripper, and I had to refill the bottle daily to maintain the drip. After about two days, the birds returned to their pre-dripper frequency of visits. It's hard to say if more birds are visiting than before, but I hope the number will grow once they realize there's a great new water feature.
All in all, is this DIY birdbath dripper worth making?
While I haven't noticed an increase in visits to the birdbath since I set up the dripper, I don't feel that it was a waste of time. First, I'd like to keep an eye on traffic over a few months, including during the winter on our sunny Colorado days. Second, I loathe plastic waste, but maybe not as much as I love maple syrup. Since the lovely stuff comes in these handy, super-thick bottles, I'm happiest about keeping one more thing out of post-consumer purgatory while I await more birdy guests. The hanging syrup bottle has been as durable and sturdy as I'd hoped.
When you give your own DIY a try, give your stand a trial-run by hanging a full jug from its handle before you start, since it may not stay balanced in the bath. Definitely start your hole-making endeavor with a pin rather than a nail, and know that you'll need to refill the bottle daily. I must admit that there have been days when the dripper sat empty, so if you are more attentive to your setup, you may see better results.