DIY A Freestanding Pantry For The Organized Kitchen Of Your Dreams
We may receive a commission on purchases made from links.
Keeping a busy kitchen organized is only possible if you have a dedicated storage space for all the spices, ingredients, containers, jams, pickle jars, and other important cooking items. Pantry cabinets solve this problem nicely. They offer plenty of shelving and keep the kitchen essentials at hand but out of sight. Some of the nicer pantries can even add some visual interest to the home's decor. But purchasing a pantry cabinet presents two issues. First, you may struggle to find a cabinet with dimensions that fit into the designated location and let you make the best use of your kitchen. Second, pantry cabinets aren't cheap, with average prices ranging between $150 and $900, depending on where you look. But if you have basic DIY skills and a few essential woodworking tools at home, you can design and build a custom freestanding pantry yourself in just a few hours. Better yet, you may well spend less than $100 on the materials for this DIY project.
In a nutshell, a pantry cabinet is a wooden box with shelves and doors, and all you need to build it are some planks and plywood. These inexpensive types of wood products are relatively easy to work with. Below, we'll walk you through the basics of crafting a pantry cabinet frame, cladding it with panels, as well as making and fastening the shelves and doors.
How to design and build the freestanding pantry frame
Before you build the frame, determine the desired height, depth, and width of the unit. The standard pantry cabinet height is 84 inches, but you can tweak this measurement to make it easy for your household members to reach items on the top shelf. The width of the unit is dictated by the intended shelf capacity and the kitchen layout. Finally, the typical pantry depth is between 20 and 36 inches, but you can tailor this measurement to your liking. When determining the depth, consider what items the cabinet shelf will hold.
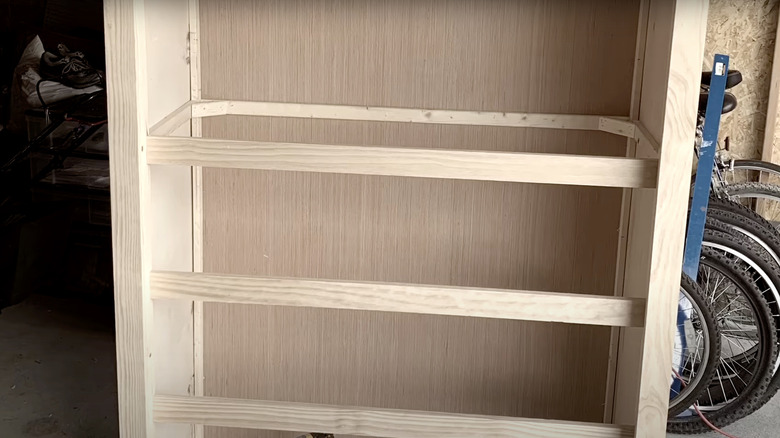
Now, it's time to head to the shop. You can make the frame out of one by two, one by three, or even one by four planks if you like. Start by cutting the vertical frame members to the correct height. Then, lay the two back vertical members down and connect them with horizontal planks. You can use these planks as cleats for hanging shelves later, so the number of planks should match the number of shelves. Also, the planks' length should match the design width of the unit, less the width of the two vertical pieces. You can make the connection using pocket screws. Next, attach the horizontal pieces that correlate to the unit's depth perpendicularly at the top, bottom, and middle joints. Finally, fasten the two front vertical pieces at the same locations, also using pocket screws. The frame is now ready for panels, doors, and shelves.
How to make and attach the pantry panels, doors, and shelves
You can build the side panels and doors out of ¾-inch plywood, then use one by two or one by three planks as trim around the doors for aesthetics. To save money, opt for simple, ¾-inch utility plywood for the back piece and the shelves — no one will see these elements anyway. Meanwhile, use a more visually pleasing plywood type for the side panels and doors. Maple and oak are excellent options, as these boards come with an attractive grain. To save time, determine the exact dimensions of the back, top, and side pieces, as well as the doors and shelves, and get the store associate (at Lowe's, Home Depot, or elsewhere) to cut the plywood for you. Back in your shop, you can nail the panels to the frame using finishing nails. Next, hang the shelves inside the unit. If the frame has enough horizontal planks, you can use them as cleats — just add another plank to the front of the unit to serve as nosing. The nosing should be flush with the horizontal side and back pieces.
For a more interesting design, use stain-grade wood planks (like oak) to add trim to the doors. To create a seamless, smooth finish, use a good adhesive to attach the trim, then clamp the pieces and give the wood glue time to dry. Next, you can hang the doors using simple, decorative hinges, like these ones from Home Depot, then attach handles that match the hinges' color.

