DIY A Stunning Macrame Plant Hanger That Doubles As Wall Art
If you're a plant parent with an empty wall you've been meaning to fill, why not incorporate some macrame art in your home? Using some cord in two colors of your choice and a dowel stick, you can DIY an on-trend, fun way to show off your favorite houseplant.
First thing's first, choose your macrame cord colors. Anything goes, but it's a good idea to look for something at least 4 milimeters thick. You'll also need a minimum of 100 feet per roll. Amazon stocks a ton of options for around $16. Next, you'll need a 12-inch dowel stick. These are available on Amazon as well, but for the lowest price (and an option that doesn't require you buying several sticks at once), your best bet is to head to a local craft supply store or wood shop.
Once you have everything, cut 12 100-inch pieces of cord in each color. Arrange each of those pieces so that you have six of one color, then six of the other, and so on, and attach each cord to the stick using a lark's head knot. Do this by folding the cord in half, then folding it over the stick, and securing by pulling the two ends through the loop side. With that out of the way, you're ready to start creating your macrame masterpiece!
Create a pattern using different knots
When each of your cords is attached, you can decide how creative you want to get. Strictly speaking, you could skip this altogether. However, if you do feel like getting fancy, you can create a more intricate pattern.
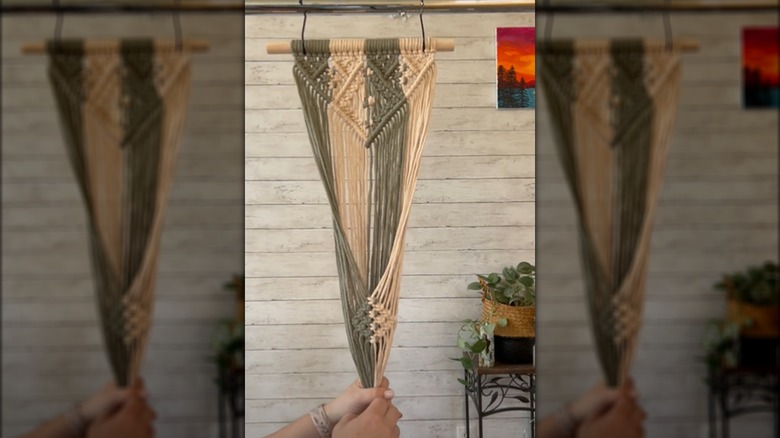
One option would be to follow YouTuber AngsCraftsnCreations' lead and create a pattern starting with inverted triangles. You'd start this by creating three square knots in your first row, then two in the second, and one in the third. Not a pro at knot-tying just yet? The Crochet Club has a great tutorial for beginners. Once you've created inverted triangles in each of your sections, edge them off neatly using a diagonal clove hitch knot. These are super simple, and essentially all you'll need to do is use the first strand on either side of your inverted triangle to loop all the remaining strands around it twice. However, once again, The Crochet Crowd has a super easy tutorial if you need to see that in action.
AngsCraftsnCreations used more square knots to connect each section together, which created a diamond shape, and then went on to add in even more details. Take a leaf out of her book or feel free to play around with a design of your own. However, like we said, this could work just as well as is, so if you're a macrame newbie, base this on your personal comfort level.
Clever square knots will keep your plant in place
As for turning your macrame creation into a stable pot holder, you'll need a few (hundred... just kidding) more square knots. Start by measuring 10 inches from the bottom of your pattern. Once you've identified that point, bring two strands from each side of the craft forward and tie a square knot with them. Continue that process using the cords hanging down from that square knot and the sides of your macrame piece, until you have three of each color in square knots, in addition to that first, mixed square knot. Knot the remainder of those hanging down from your initial square knot until all of them have been used. You should be left with a diamond.
When your diamond is complete, it's time to measure your plant. Grab all the ends, hold tight, and using your other hand, place the pot between the diamond side and the back cords of the craft. When you're happy with how everything looks, remove the pot. Using a leftover 50-inch piece of cord, create a small loop with one end, then tie the remainder around it and the hanging cords until it's just about used up.
Pull the last bit through the loop you created, trim where necessary, and your DIY pot holder is ready to be hung! With macrame firmly back in style, your home is about to get a chic refresh, and you'll know you did it all on your own.