TikTok's Wood Pallet DIY Gives Your Dog The Full-Sized Backyard Retreat They Deserve
Whether it's hot or cold, our pets love to enjoy time outside, and if you're seeking tips on creating a dog-friendly yard, this DIY is perfect. With some wood pallets and plywood, you can craft your own dog house so that your pet has their own space to relax in your backyard. This project will also require various tools, such as a drill or nail gun, sandpaper, and a saw, depending on the pallets you're working with. For skids and plywood that are rough, make sure to sand them so that they're smooth. You might also consider adding some insulation or roofing to ensure your dog's retreat stays dry and comfortable. Since this project is customizable, you can make a shelter that's the perfect size for your furry friend and decorate it to fit your style. Paw prints, bones, or your pet's name could be painted onto the house, and you might also add beds and blankets inside to make it more comfortable.
While there are many places to find free pallets near you, you'll likely have to purchase some supplies for this DIY. You might consider getting wood stains, protective coatings, or paint to make your dog house look more professional. At The Home Depot, you can find plywood sheathing panels for under $16 each, and if you want to protect your structure from the elements, the hardware store also carries a roll of black asphalt roof repair fabric for about $16.
Constructing your pallet dog house
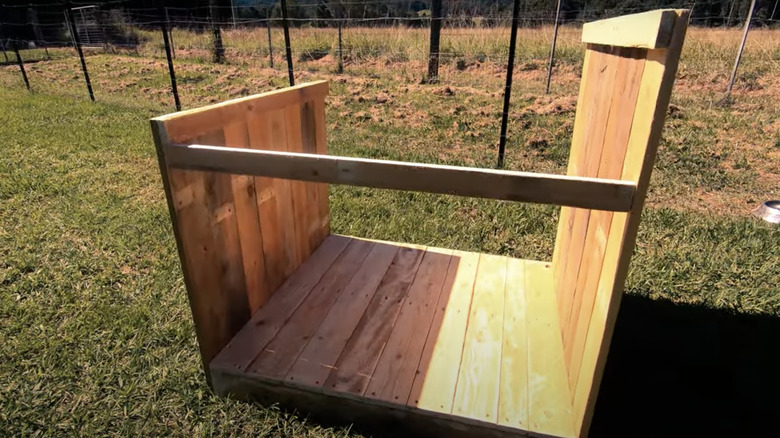
You'll need at least four to five pallets for this project, depending on how you want to structure it. When constructing your dog house, ensure that it's large enough for your pet to stand and turn around. For the floor, use a pallet that's about the size you want the dog house to be, and if the slats of the skid stick out on the sides, you can saw them off for a cleaner shape. Nail or screw a sheet of plywood onto the top of the pallet so that it's even for your dog to walk on. For those who like the wooden plank look, you can dismantle another skid and cut the boards to fit between the slats on your floor and secure them.
Now, you'll need to decide on the look for the walls of your dog house. You may want to leave one side open so that your pet has lots of room to look out, or you might choose to have four walls with an opening for your pet to go in and out. For a more rustic look, take more skids, stand them upright on the sides of your floor, and nail them in place. If you want four walls, you can cut out a section of the front pallet for a door, or choose one that's a bit shorter than the rest to leave a gap as the door. Secure a sheet of plywood to the outside of each wall.
Completing your dog's DIY backyard retreat
If you don't like the look of the pallet walls, you can take the skids apart and attach the support beams upright to form the structure of your walls. Then, nail the wider planks across the supports for more of a wood cabin aesthetic. The back or front wall of your dog house should be slightly taller than the other so that the roof is sloped and rain runs off more easily. If your pallet walls are perfectly even, use a few pieces of scrap wood to boost the height of one wall. For those who want a more temperate dog house, place pieces of foam board insulation (about $25 each, or less depending on size, at The Home Depot) along the interior walls before screwing plywood sheets over them. Now, you can make your roof.
Choose another skid that's about the same size as your floor and screw a plywood sheet over it. If you'd like, you could pick a longer one to create an overhang above the entrance. Now, place this pallet atop your structure and secure it with nails or screws. To make your dog house more weather proof, nail roofing material onto the top skid. For better coverage, you can also bring it down over the sides a little bit, especially if there are gaps between your walls and roof. Finally, paint or stain your dog's retreat however you like. With this unique DIY, you can make your home patio more pet-friendly.

