DIY A Movable Laundry Basket Holder To Declutter Your Clothes

We may receive a commission on purchases made from links.
Laundry baskets are meant to keep your place tidy, but having several of them sitting around the house is just an invitation for chaos. Laundry basket holders are designed specifically to eliminate this issue — these units essentially turn the baskets into vertically stacked drawers. Alas, these units aren't cheap. Despite a rudimentary design comprising nothing more than planks fastened together into a frame, laundry basket holders can cost as much as $240 at online retailers. Well, fortunately, with a few basic home woodworking tools, you can easily build a movable basket holder and bring order to your laundry room.
A DIY laundry basket holder really has to do just one thing — hold up vertically stacked baskets and allow you to slide them in and out. To build a unit like this, you'll need side frames with supports to hold the basket, back bracing to connect the side frames and keep them upright, and boards to secure the unit at the top and bottom. 1x4 or 1x6 planks work well for the top and bottom, while narrower, 1x3 planks can be used to make the frame, bracing, and supports. Below, we'll explain how to design the unit, figure out its dimensions, assemble it, and give it additional functionality with a set of caster wheels.
How to design and construct a DIY wooden laundry basket holder
First, measure the dimensions of the laundry baskets and decide how many of these you want to fit. The length of the basket dictates the distance between the two side frames, while its width determines the side frames' length. Meanwhile, the depth of the basket tells you the correct spacing between horizontal support planks. These supports sit on the inside face of each side frame and hold the laundry basket in place. Once you know the length of the side frames and the distance between them, you can figure out the dimensions of the top shelf and bottom piece.
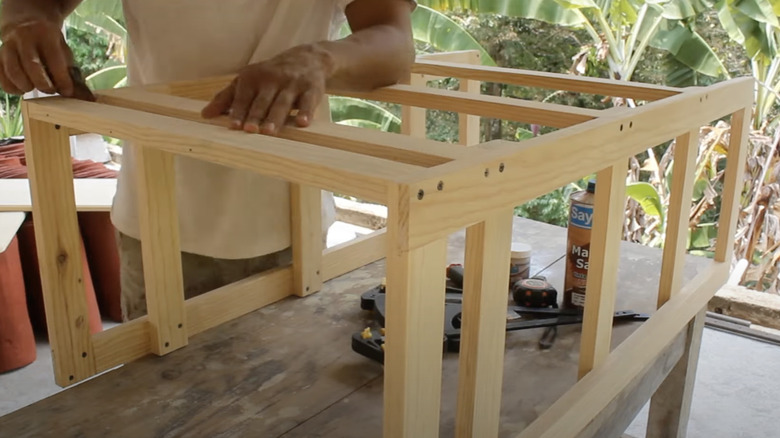
Make these top and bottom pieces by sawing 1x6 planks to size and joining them at the edges with wood glue. While the planks are clamped to give the wood glue enough drying time, construct the side frames. Cut 1x3 planks to the right height to make the four legs. Next, join them at the top and bottom with a plank of the same size, using half-lap joints with glue and screws. Then, cut the same planks to match the width of the frame, and screw them on the frame's inside to make basket supports. Saw a few more planks to span the length of the laundry basket and use them as horizontal bracing at the back of the unit. Finally, attach the top shelf and bottom piece you made earlier with glue and screws.
Putting finishing touches and making the basket holder movable
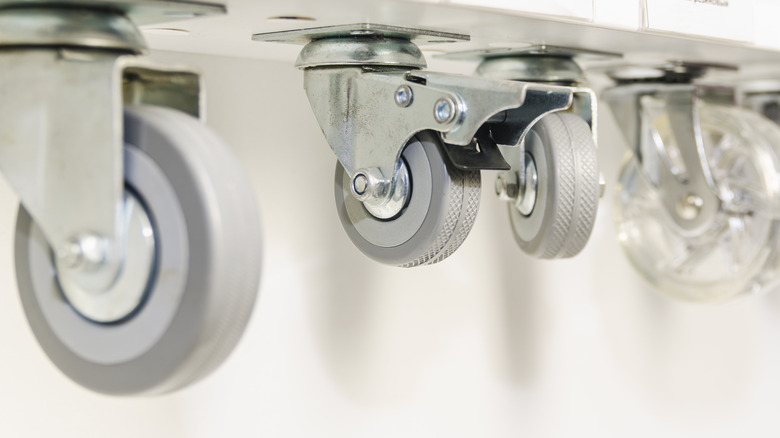
Not that you have a unit that's ready to receive laundry baskets, there are a few things you can do to make it more functional and aesthetically appealing. To give the unit mobility, you can attach four caster wheels to the bottom. For this project, the best caster wheels to use are those that swivel, lock, and come with a mounting plate, like these ones for just under $11 from Lowe's. The mounting plate makes installation a cake walk, and you can move the unit around as needed, then lock it in place. To install the wheels, turn the unit upside down, then screw a wheel to each corner of the bottom piece. Do you prefer to conceal the wheels? Then go a step further and make a "skirt" for the basket holder by vertically attaching 1x6 planks to the bottom piece using butt joints reinforced with angles. Then, you can screw on corner-mount casters like these $20 ones from Amazon.
Apart from making the basket mobile, feel free to make a few aesthetic upgrades to its design. For example, you can round the top shelf corners with a hand-held jigsaw, then smooth the edges with a sander. Depending on the type of wood planks you used, you may also choose to stain or paint the unit. And if you want to protect the new basket holder from water and possible staining, apply a coat of sealant to its surface.