TikTok-Inspired Ideas To DIY A Makeup Vanity Out Of Wood Pallets

We may receive a commission on purchases made from links.
There's nothing quite like a new DIY project to get the creative juices flowing. It can be a rewarding experience (as long as you don't pull your hair out), not to mention relatively easy on the budget. Experienced crafters are familiar with the variety of ways wood pallets can be upcycled into smart, stylish pieces for organizing a gardening station, increasing your closet storage space, or elevating an outdoor area, to name a few. Plus, it's an eco-friendly way to repurpose leftover items you already have but don't know what to do with.
But, if you're new to DIY, turning wood pallets into a makeup vanity might look much more difficult than it actually is. This project is a relatively simple and super affordable DIY that has even amassed a slew of helpful TikTok videos, showing exactly how the creative creators design theirs (some with step-by-step instructions) and the materials they use to help you make your own.
Whether you want your DIY wood pallet makeup vanity to look like a pretty garden window like TikTok creator @christopherh77, one that's rustic but beaming with modern details like @maddzzz._, or one that's just as understated and minimalist as the rest of your home like @gypsygirl92, the basic process is pretty much the same. With a little time and patience, DIYers at every skill level can complete this project. The overall price will depend on which items you already have and the extra options you intend to add.
Wood pallet makeup vanity materials
Depending on how elaborate you want your makeup vanity to be and the features you plan to add will determine the materials you use. The first (and most obvious) item is to get your hands on two to three wood pallets (more if you want a larger vanity or for optional add-ons). The most common pallet size is 48-by-40 inches, but they can come in other sizes, too. Make sure to take the measurements before loading them into your vehicle, so you don't come up short.
Some places are usually more than willing to give you their wood pallets for free, like local grocery and hardware stores, construction sites, furniture stores, or warehouses, for example. You're doing these businesses a favor because they almost always have an overabundance of wood pallets they're happy to part with. You can also check out free listings on Craigslist, Facebook Marketplace, or Freecycle.
Regardless of the fabulousness you sprinkle into your DIY makeup vanity later on, you'll also need some essential materials if you don't already have them in your toolbox. This includes wood glue ($12 at Amazon), an electric sander ($45 at Amazon), wood screws ($9 at Amazon), a hammer ($8 at Amazon) to pull the pallets apart, a drill ($60 at Home Depot), and a back saw ($16 at Home Depot) for adjustments. After you've collected the materials you want to use, it's time to start building your functional, custom-made makeup vanity.
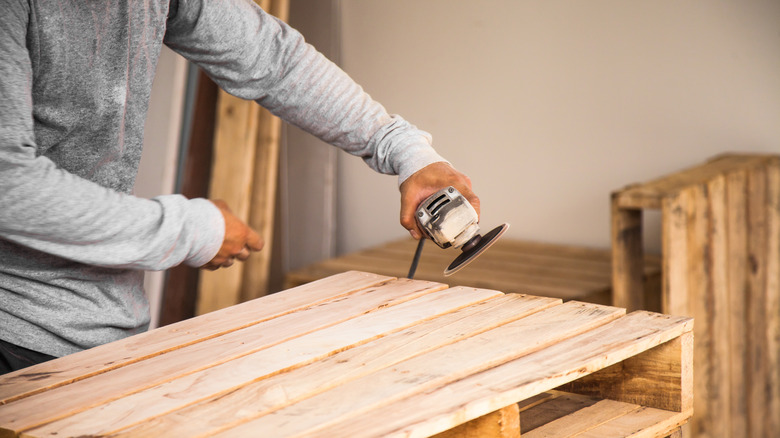
Steps for building a wood pallet makeup vanity
The first step is to pull the pallets apart with a hammer. Then, use an electric sander that is best for wood to smooth the lumber's rough edges and remove splinters or leftover nails. This is perhaps the most important part for your safety and the vanity's aesthetic. Next, decide how tall you want your vanity table. Most standard vanities are between 30 and 34 inches, but you can adjust that based on your preference. Use the saw to cut the wood slats that'll be the for sides of the vanity. Figure out how deep you want your vanity and cut the wood slats to fill the gaps between the legs. Then, use the drill to connect them to the legs. Another option is to add feet to the bottoms of the legs for an even more polished look (or to add more height).
To make the tabletop, screw the cut wood planks to the tops of the legs. Attach a mirror to the wall above the vanity or between the longer wood pieces with wood glue and screws. Finally, decide what color you want your vanity to be. You can enhance the wood pallet's natural color with wood stain, paint it in a hue that speaks most to you, or leave it completely bare. Other optional add-ons are LED lights for a smidge of glam, drawer handles, shelves, and a glass or acrylic sheet for the top. The possibilities are endless.