Beautiful DIY Railing Planter Ideas To Brighten Up Any Deck Or Balcony

We may receive a commission on purchases made from links.
Railing planters afford an easy way to beautify your balcony or patio railing with plants, while decluttering the deck at the same time. Unfortunately, just seeing the prices of store-sold railing planters is enough to make one's eyes water. With price tags ranging between $20 and $130 (and that's for basic plastic options) it's all too easy to throw in the towel and give up on the idea altogether. But did you know that you can easily build a gorgeous DIY railing planter at home with a few tools for woodworking at home, some cedar boards, glue, and nails? Then, all you'll need to do is stain or paint over it and put in some bright flowers to show off.
Home and garden stores charge exorbitant prices for railing planters because most gardeners just don't have the time, patience, or know-how to build these units on their own. As you'll see below, the "know-how" part is easy — the skills needed to construct a wooden railing planter are rudimentary. In essence, all you're doing is building an open-top box. Hanging the planter safely on the rail is also easier than it sounds, since there are several commercial and DIY options for making this connection. The construction process doesn't make much time, either, not counting how long it takes the wood glue to dry. Below, we'll walk you through the easiest way to construct a DIY balcony planter and explore three options for hanging it securely.
How to build a railing planter box
First things first, head off to the local hardware store or lumber yard and pick up some wooden planks. Several 1x6s or 1x8s should work well, depending on the planter size you have in mind. Cedar planks are an excellent option because it's resistant to moisture and various pests. Before you buy the wood, consider the total length of board you'll need. For example, if building a single, 3-foot-long planter, buy at least 12 feet of board. This will give you enough length to create the bottom, the long sides, and the short side. Keep in mind that such boards are usually sold in 8-foot lengths and plan your calculations accordingly.
Back in your shop, cut the three long pieces to the length you want. Use a hand saw, table saw, jig saw, or miter saw; any of these will do. Alternatively, ask the store associate to cut the boards. Next, consider how the long sides will attach to the bottom piece — on its top or at its sides — and measure the width accordingly. Then, use this measurement to cut the two short size pieces. Finally, you can glue the pieces together to create a planter. Use clamps and nails to keep the pieces together as the glue cures. You can now stain the planter if you like, attach decorative angles (like these from Home Depot) to the planter's corners, and drill a few drainage holes at the bottom.
How to mount railing planters on the railing
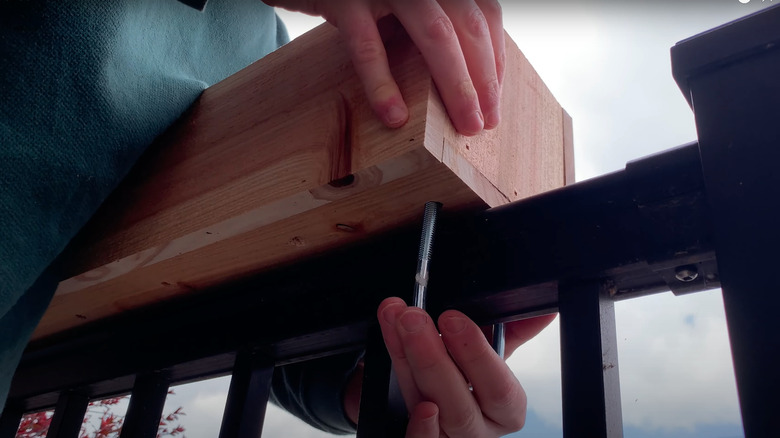
With the planter box built, you have a few mounting options for affixing the planter to the railing. If the railing surface is flat, you can have the planter sit on top of it using u-bolts, like these ones sold at Lowe's. Simply drill pilot holes sized to receive the bolts at both ends of the planter. Then, place the planter on top of the railing, slide the u-bolts into their holes, and tighten the nuts until the planter no longer wobbles.
If the railing surface isn't flat, or you'd prefer to hang the planters on the inside of the railing, you can make DIY cleats or use angles to make the connection. The cleats are easy enough to make if you have a miter saw, but may be a challenge if you can't make a bevel rip cut. To make cleats, rip a 1x3 or 1x4 plank at a 45-degree angle. Attach one of the pieces to the railing, with the longer side of the bevel facing away — now you've got a cleat. Next, glue and nail the second piece, bevel-down, to the planter.
Once the glue cures, you can hang the planter onto the cleat. If this sounds like too much work, and you don't foresee yourself removing the planter often, just screw it onto the railing with heavy-duty angles. After you're done building your railing planter, you can paint or decorate it and fill it with your favorite flowers.