8 Genius Ways To Use Old Jars To Level Up Your Gardening Game
We may receive a commission on purchases made from links.
Jars are a dime a dozen around most homes. They're inexpensive to buy brand new, but they're more than likely all over your house as well. Plastic and glass jars are vessels for common household ingredients and products, which means our pantries, fridges, and recycling bins are typically full of them. Although recycling glass jars is an excellent way to cut back on your environmental impact, jars can also serve as inspiration for a plethora of DIY projects, especially in the garden.
Jars of all shapes and sizes are super handy if you're looking to level up your gardening game, and reusing them can help you reduce waste and save a bit of money. From small projects like propagating fresh plant cuttings and drying your herbs in an easy, eye-catching way, to bigger undertakings such as creating hydroponic gardens and growing sprouts, glass jars can serve various purposes with just a little creativity. Reusing glass jars is a sustainable way to upgrade your garden, they are inexpensive (or free), and very aesthetically pleasing when paired with natural elements. Here are eight ways you can use spare jars to supercharge your gardening hobby.
Create a hydroponic garden with glass jars
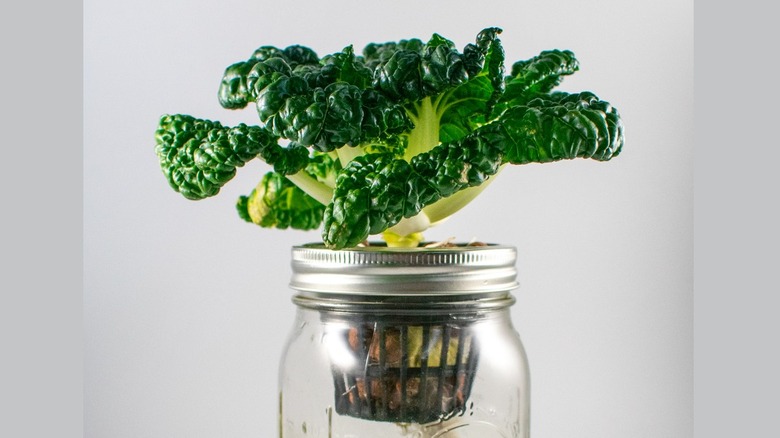
Glass and plastic jars of various sizes make the perfect containers for homemade hydroponic gardens that can sit on your tabletop or even thrive on your window sill. This method allows you to grow several types of plants year-round in a miniature garden that doesn't require soil. Begin with an empty jar and paint the exterior or cover it in tape to protect the roots from light exposure. Next, fill the jar halfway with water. To keep the plants from sitting directly in the water you can use net pots. These 3-inch, wide-rimmed ones from Amazon will fit snugly into wide-mouth mason jars. Submersion is not a bad thing for roots in hydroponic gardens, but you will need to regularly change the water to prevent your plants from developing root rot. Without a growing medium, you will also need to give your plants a source of nutrients. Nitrogen, potassium, phosphorous, and trace elements are crucial for healthy leaves and root development. Fortunately, you can easily add these to the water via a spray or premade solutions, such as this natural hydroponics combo fertilizer from SimplyGro.
This form of gardening is wonderfully simple. Even unskilled gardeners can partake thanks to the easy steps. Simply put, a hydroponic garden doesn't require soil, which means plants will thrive in just water or low-maintenance soil replacements, such as peat moss or clay pebbles. Herbs, such as basil, mint, parsley, and cilantro, and most leafy greens are usually perfect candidates for hydroponic gardens. Keep your mini hydroponic garden jars near your stove and never go without fresh herbs while cooking again.
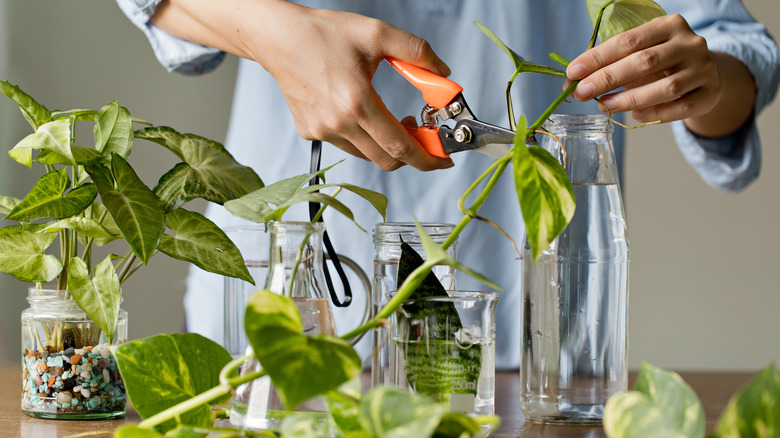
Plant cuttings in jars make perfect gifts
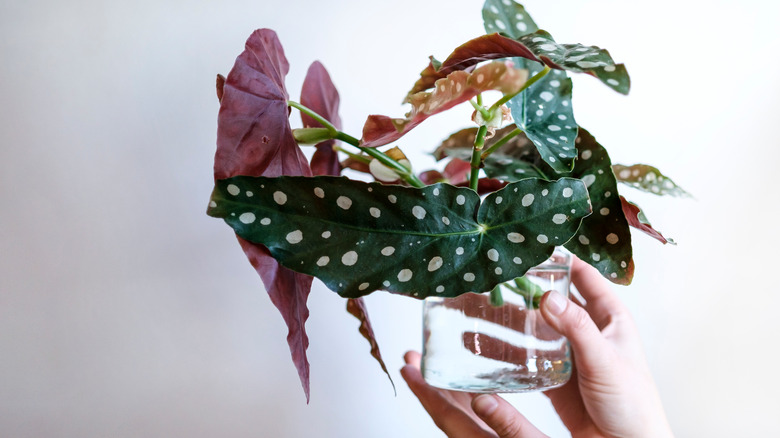
Using empty glass jars of various sizes can be ideal and adorable for plant cuttings. To begin propagation, simply start by cutting your plant just below where a leaf branches from the stem, also known as a node. Cut the stem on a slight angle and stick the vine or branch in a jar that is half filled with water. Be sure to keep any leaves out of the water and regularly replenish it until new roots are established. When roots are visible through the glass jar and are about two to four inches long, you can then transfer the cuttings to a pot with pebbles or rocks at the bottom and damp soil. Species that require good drainage should be planted into pots with holes. However, if you're propagating houseplants that don't need drainage, you can even pot them up in glass jars.
Perfecting your plant cuttings is a really rewarding skill. This simple trick allows you to expand your garden without spending money on new species and it can give your dying house plants new life. In addition, occasionally trimming and pruning your plants can also make them stronger and healthier in the long run. And rerooting a few stems into fully grown specimens can be so satisfying to watch. Clear jars allow you to easily monitor root growth and remove some of the guesswork that comes with cuttings. If you're gifting cuttings, for the final touch, wrap the jar in twine, tie a colorful ribbon around the rim, or even paint it, and you can give away healthy, adorable plant cuttings for just about no money.
Effortlessly dry herbs in jars
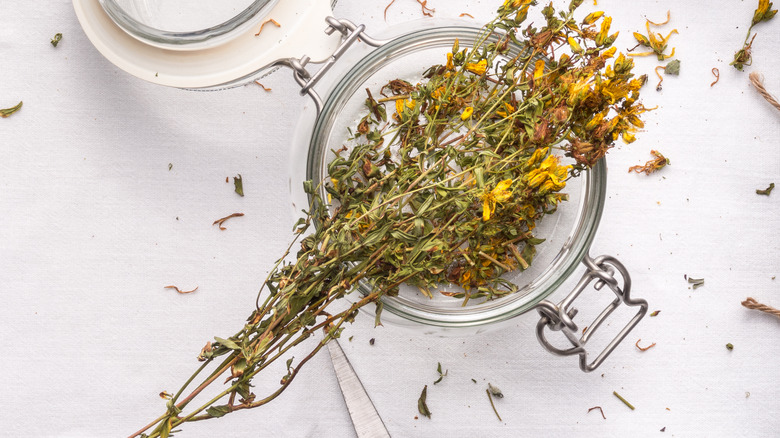
Glass olive oil bottles or slender jars with narrow openings offer a simple way to hack your herb drying process. When you've harvested fresh herbs from the garden, you can either cook with them straight away or dry the leaves out to use at a later time. For an effortless process, let the leaves remain on the stem and cut the stems near the ground. This is a great trick for the end of the season when you know the weather is about to change and you want to salvage your remaining herbs. Remove the bottom leaves and stand the stems up in a glass jar. Once the bundle of branches is standing, you can tie them together with twine and leave them there to dry. Avoid moving the jar around to keep the leaves from dropping off. A dry place is ideal, but avoid too much sunlight as condensation or moisture could gather in the jar, which will encourage mold to grow.
This trick will keep your herbs organized as they dry out, which can take a few weeks and become cumbersome if they're spread around your house. It's also a fantastic way to adorn your home with freshly picked aromatic plants. As the herbs are drying, you can also pluck leaves for immediate use. When they are completely dry, strip the leaves away from the stems, and crumble them back into the jar for easy storage. Jars with bundles of dried herbs also make for excellent housewarming gifts. Add a few sprigs of lavender or other flowering herbs and a ribbon around the jar, and this earthy gift will impress.
Make hanging propagation jars with just a piece of rope
This hack only requires two simple materials: Any type of jar and a piece of rope about 18 inches long. Hanging baskets are such a fun addition to your home, and with a few simple turns of a rope, you can securely hang just about any jar from your ceiling or a hook. As shown by @CrochetbyJen on YouTube, you can begin with an empty jar and a piece of sturdy rope or cord. Lay the rope out on a flat surface and tie the two ends together to create a loop. Cross the rope once to form a smaller loop (that is about the same length as your chosen jar) inside the large loop. Place the bottom of the jar directly over where the rope crosses. With a few more crosses and overlaps, the rope will cradle the jar securely while making two convenient straps to hang your new planter.
This hanging jar project is easy and inexpensive, and the final result will give your home a bohemian, natural feel. If you're an avid plant mom or dad, you might notice that your shelves and floor are running low on space for new plants or cuttings. If this is the case, this simple trick will free up more room for propagation, while keeping burgeoning plant babies off the floor. You can also plant in your hanging jars, just make sure you select species that don't need drainage holes, such as pothos and snake plants, use a well-draining growing medium, and water sparingly to avoid oversaturating the soil and potentially causing root rot.
Create a mini greenhouse for small plants with jars
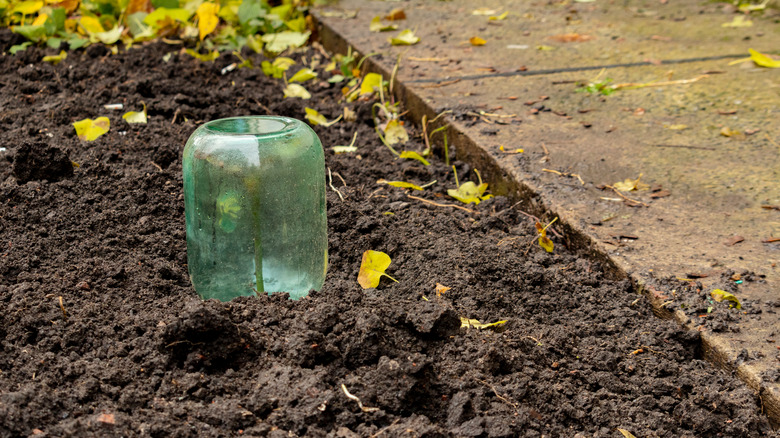
Getting your seedlings started at the beginning of the season can be a bit challenging. Thankfully, there are various ways you can create a mini greenhouse by upcycling see-through containers, such as glass jars. After you've planted your seeds or seedlings in the ground, give them a hearty watering. When the ground is moist, find a jar with a wide mouth and simply place it over the seedling or the soil where you planted the seed. The glass or plastic jar will create the perfect growing conditions inside for young plants, similar to a traditional glass cloche. You can remove the jars once a day to water the plants, but you can also leave the jars and water the surrounding areas extra well. This should keep your plants hydrated while protecting the collar of the seedling stem from excess moisture that can contribute to damping off, and it may even encourage stronger roots as they spread out in search of water. Remove the jars once the seedlings are well established and start to outgrow the space inside.
As the sun passes through the plastic or glass jars, it will keep the environment inside warm and signal to the plant that the conditions are right to keep growing. Condensation will also gather within the jar and help your plant thrive with just the right amount of moisture. These warm, moist conditions are perfect for young plants and can speed up seedling growth. This hack also protects your seeds and young plants from predators, such as birds and other pests who are on the prowl and could either stunt your plant's growth or devour it whole.
Make your garden magical with jars and candles
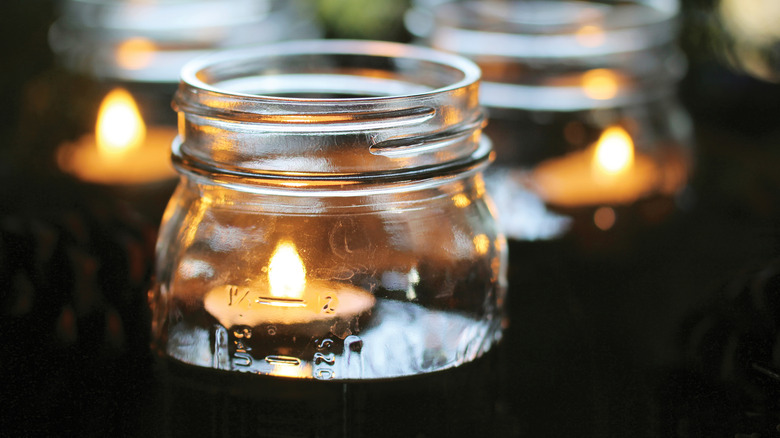
Your garden is more than a place to grow plants, it can be an outdoor oasis that brings you joy and is overall beautiful to experience. With a few fairy lights or candles and a handful of glass jars, you can add some ambiance to your garden that feels truly magical. For a rustic look, consider using mason jars as candle holders in your garden. Real mason jars are ideal for this hack because they can handle the heat from a candle flame without cracking. Place the jars around your garden at varying heights to create some depth. Consider arranging a few on the ground near your chairs, along your pathways, and a few up higher on stones. Light your candle and carefully drip some of the melted wax into the jar. Once a small pool of wax has formed, blow out the candle and position it inside the jar. The candle will stick to the wax and stay in place.
This hack creates a low-budget, magical lighting option outside. The glass jars will not rust or deteriorate in the changing weather. You can also easily move the jars around. Another bonus is that citronella candles are already a must when spending time in your garden. Place them in the jars and they'll effectively keep bugs at bay and look stunning. If real candles are too tedious, you can put battery-powered candles inside the jars or invest in solar-powered tea lights (a pack of 6 costs under $20 on Amazon) that will charge during the day and power up at night. You can hang the jars, fill them with pebbles, or even fill them with water and use floating candles for a bit of variety.
Create a terrarium in a jar
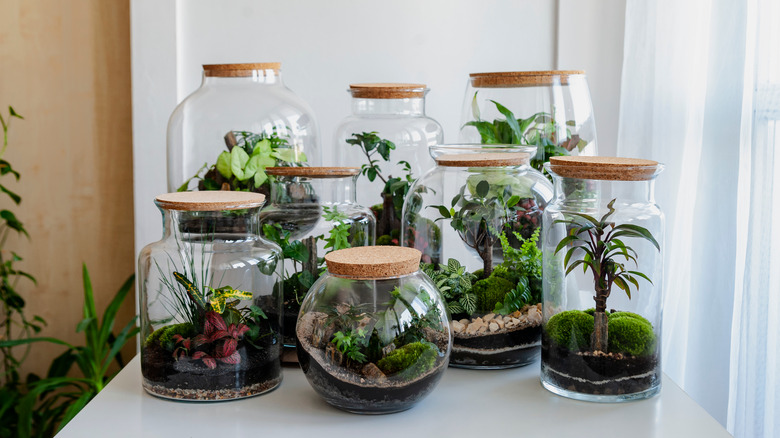
Repurpose jars of all sizes and build your own terrariums to grow plants with minimal maintenance. Begin with a bit of research. There are various types of terrariums, but open and closed gardens are the most common. Both types are excellent options for small plants that do not have a large growth rate and require high humidity. Closed terrariums have a tight lid and do not need watering or any other maintenance if prepared properly. Open terrariums typically have a small opening like the mouth of a jar and require some watering to maintain the humidity and soil moisture. The type of terrarium can be determined once you know what species you wish to grow, and thankfully there are various types of terrarium plants that anyone can take care of. Tropical, woodland, and desert are three options to begin with. Just be sure to choose plants from the same family as they require similar growing conditions. Next, layer your glass jar with the required growing materials, which usually involves a layer of charcoal and stone or pebbles for drainage, peat moss, soil, and other growing mediums, and then add your plants.
Terrariums are an excellent option for bringing a bit of the outside in. The glass containers make viewing and enjoying the mini-environment that much more exciting. Not to mention these scientific marvels look sophisticated on a desk or around your home. Terrariums can function as décor or just a reminder of what nature is capable of. Small additions, such as shells or beach glass can add a unique look to your terrarium. With little to no water required, this hack is the perfect solution for those who have a hard time keeping plants alive.
Grow sprouts on your countertop
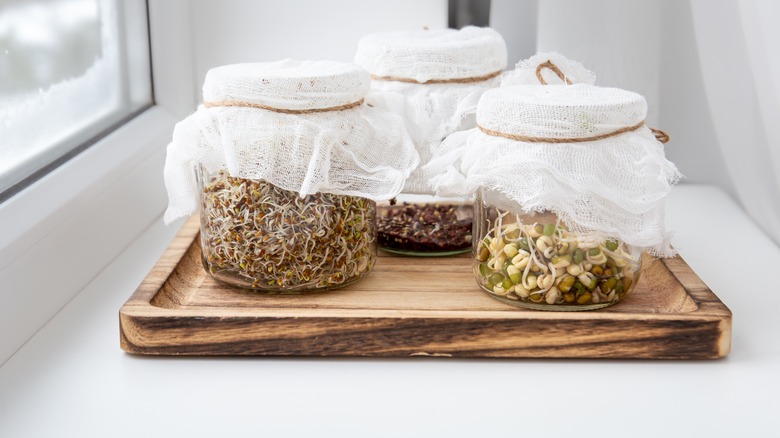
Fresh, crunchy sprouts are delicious and simple to grow right on your counter with just the use of a jar, some seeds, and water. Microgreens and sprouts are the result of certain seeds, beans, or legumes when they are exposed to moisture and begin to grow. To make your own sprouts, begin by choosing a medium-sized glass jar. Take the lid and poke small holes across the surface of the metal or plastic. You can also toss the lid and use a piece of cheesecloth or purchase a sprouting lid for around $10 on Amazon. Next, thoroughly wash the jar and place a spoonful of your chosen type of seed inside. Cover the seeds with an inch of room-temperature, filtered water and soak overnight. For the next four to five days, rinse the seeds and the sprouts, draining away the excess water through the lid.
The small sprouts that will begin to grow are a perfect combination of crunchy and tender with an earthy fresh flavor. These tiny plants are delectable in salads and sandwiches and pack plenty of health benefits. A few seeds can go a long way and there's nothing better than cultivating your own food. Some of the most common seeds to grow are alfalfa and mung bean sprouts. However, lentils, chickpeas, peas, and broccoli sprouts can also be grown using this method. While it's possible to grow and care for microgreens in jars, they require more ventilation, and often do best germinated in trays with a growing medium. So if you're looking for easy success, you may want to stick to making sprouts in your spare jars.