Create An Affordable And Professional-Looking Fence With This Wood Pallet DIY
Do you have a stash of used pallet wood planks lying around in your shed or workshop? Perhaps you thought they were too good to just throw away and that you could use them for a future DIY wood pallet project. They may just be the perfect material for building a professional-looking, cost-effective fence for your property. In one of his videos, YouTuber Joe Mills @diggingfordinner demonstrates how you can construct a neat and functional outdoor partition with the right tools and methodology.
The design utilizes pallet wood mainly as picket boards, while more solid timber pieces serve as framing, holding the assembly upright. Recycled or leftover nails and screws that are still in decent condition can be used to fix the individual members together. Apart from these materials, you will also need digging tools, a nail gun or a hammer, and a wood saw. You will have to consider the distance you intend to cover, as your fence length will depend on how much wood you have. The height, on the other hand, will be based on the length of your pallet boards. Done correctly, it presents a budget-friendly solution for adding protection and privacy to your property. At the same time, it is a creative way of upcycling wood pallets for your garden, lawn, or backyard.
Building the structural frame for your pallet-wood fence
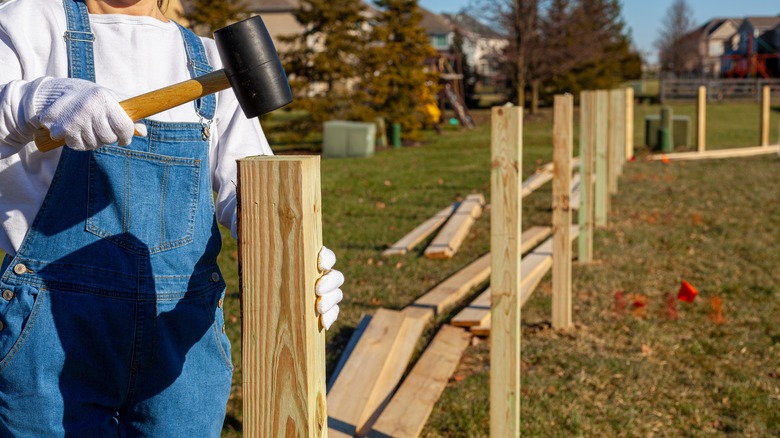
The first thing you have to do is to set up your fence posts. Thick construction wood such as four-by-four timber will do great for the job. Cut them to lengths at least 50% longer than your pallet boards. If your pallet woods are four feet long, for example, then you must prepare posts that are six feet long or more. That will leave enough allowance for the post section that will be buried underground. Fit them into holes two feet deep, or a third of the post height, to ensure a secure footing.
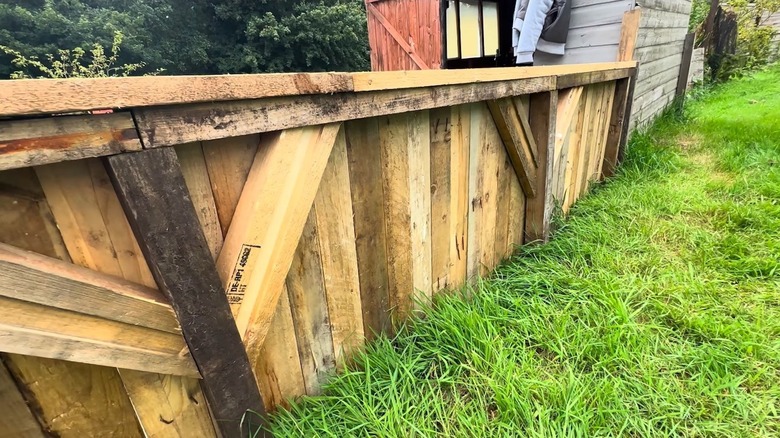
After setting up your posts, you then need to add your horizontal framing members. These can be slightly thinner than your posts, but thick enough for nails and screws to sink through. Attach beams into the bottom part, fixing them perfectly in between posts. Set another horizontal piece at the top part, running from one post top to another to form rectangular sections. For extra stability, add knee bracings or corner brackets crossing diagonally between the upper beams and the vertical posts. You have to make sure that the side face of your frame is aligned so your pallet slats can stick flat onto it when you start nailing them in later.
Adding pallet wood slats to your timber frame
Before punching the pallet boards into the frame, remove old nails or splinters sticking out from the wood so they are safe to handle. It is also best that you cut them into uniform lengths following the height of your frame. You can then begin to secure them in place, nailing each piece into both the frame's upper beam and the lower beam. Position the slats close to each other in a neat row. However, leave a small gap of about half an inch between the pallet boards and the ground line. This will avoid the wood from sucking in rain water.
Above the upper beam, you can affix a flat board to serve as a top piece. This flat board should be slightly wider than the beam so that it creates a small overhang. This overhang will cover the top sectional ends of the pallet slats, providing a clean finish and adding more character to your fence. You can also be more creative by adding accessories or features like a planter box or a small gate.