Creative Ways To Reuse Pillowcases For Closet Organization And Storage
Finding new ways to repurpose household items is always best, as this reduces waste and keeps your hard-earned money in your wallet. When it comes to organizing your closet for maximum storage, you'll discover there are a ton of clever ways to repurpose unwanted pillowcases, as they can be used in a variety of ways to make the space tidier and more functional. In the event that you don't currently have any pillowcases facing retirement, you can always find a collection of used shams at your local thrift store.
Surprisingly, transforming pillowcases into practical closet aids is easier than you might think. They work well as a replacement for garment bags, as the cases provide a layer of protection against dust and spiders. They can also double as liners for storage baskets or be used to reduce the amount of space extra hangers take up in the closet. In the event that your wardrobe lacks a door, a curtain made from old pillowcases can quickly be assembled to keep the closet's contents concealed. There really is no limit to what you can do with a set of pillowcases and a little creativity, ensuring that your closet stays tidy and stylishly functional.
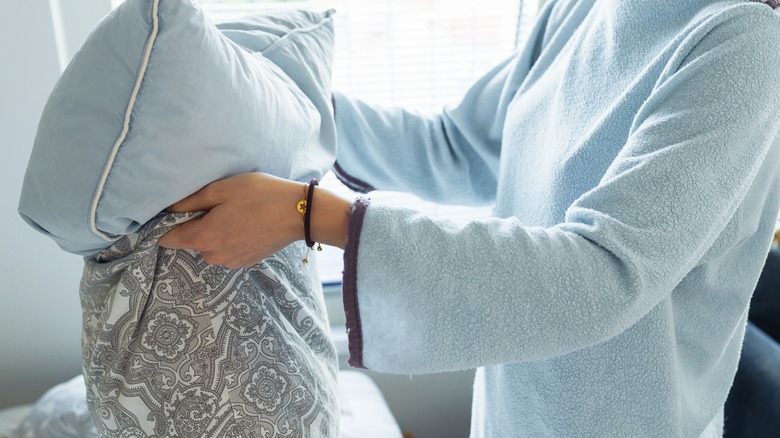
Create a hanging garment bag
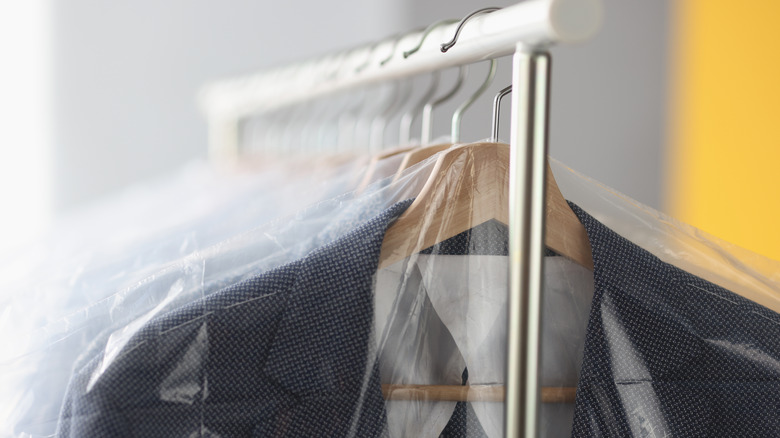
Whether you have a fancy suit, bridesmaid dress, or work outfit to hang, a garment bag is a must. Garment bags not only protect clothing items from dust, but they also keep the pieces from getting wrinkled or damaged during travel. Additionally, garment bags help keep a closet neat and organized. But instead of purchasing them, you can make them out of old pillowcases for free.
It's a fairly easy DIY and doesn't require any sewing. Begin by laying the pillowcase in front of you and folding it vertically. Use a pair of fabric scissors to cut the crease's top corner, which will act as the opening for your hanger. Open the bottom hem of the pillowcase and attach a 2-inch strip of Velcro. This will allow you to secure the clothing item once it has been placed inside the garment bag. Set your suit or collared shirt on a hanger and slide the garment bag over it, bringing the hanger's hook through the opening at the top of the garment bag. Attach the Velcro before hanging the item in your closet. Note that this is best used for shorter items, such as blazers or shirts, since a longer dress will need to be folded over the hanger to fit inside the bag. This can create wrinkles on some materials.
Store extra hangers in them
Having extra hangers on hand is great for adding new items to your wardrobe or hanging delicate items to dry. However, if not properly stored, the hangers can be a nuisance. They clutter up a closet, take up space, and become tangled within each other, often causing frustration when trying to pull them apart. An inexpensive way to organize and store extra hangers is to create a tote bag using a pillowcase. The bag can then be hung in the closet from just one of the hangers.
To make a no-sew tote bag, lay the pillowcase in front of you vertically, so that the open end is at the top. You want the closed seam part of the pillowcase to be on the bottom, so you don't have to sew the bag closed. Create a U-shape on a piece of paper to act as your template, and trace it on either side of the upper portion of your pillowcase. This will create a center handle. Tie the top two pieces of the handle together to form the bag's handle. Place all but one of the extra hangers inside the tote bag. Slide the handle of the tote bag over the remaining hanger and place it in your closet.
Create a drawstring storage bag
While some items, such as board games or old photos, can be stored in plastic totes, it's best to keep seasonal clothing and extra linens tucked away in a breathable bag. This allows the air to still circulate, ensuring they don't smell musty when you take them out. Creating a drawstring storage bag for this purpose is possible using an old pillowcase.
In order to turn your old pillowcase into a drawstring storage bag, you'll need to turn it inside out. Next, fold over the edges of the case's opening. You want to make sure you've folded far enough to create a channel for your string or ribbon to go through, with extra room for sewing beneath the channel. Sew all the way around the bottom either by hand or with the aid of a sewing machine. However, leave a small gap open to accommodate for the string. Turn the pillowcase inside right, and insert a ribbon in one end and pull it out the other. This can be accomplished with the help of a safety pin. Insert the items you wish to store, pull the string to draw the top closed, and then tie the string to secure the contents.
Organize your sheet sets in them
Having extra sheets in your home is necessary not only to accommodate visiting guests, but also to have an extra set while the others are in the wash. While you can simply store your collection on a shelf in your laundry room or bedroom closet, you can also keep your linen sets organized with a simple pillowcase hack. In order to keep the sets together — from top sheets to pillowcases to mattress sheets — place them inside a pillowcase as a makeshift storage case.
Gather all of the pieces for your bedding set and place them in front of you. This may include a flat sheet, fitted sheet, two pillowcases, and two shams. Take the largest pillowcase and turn it inside out. Fold each of the sheets and then slide them inside the pillowcase all the way to the bottom. Fold the other pillowcase and two shams and place them on top of the sheets. Add a dryer sheet to linen sets that aren't used as often, as this will help keep them smelling fresh. Bend the remaining half of the pillowcase over itself and then store the set on your shelf.
Protect footwear from dust
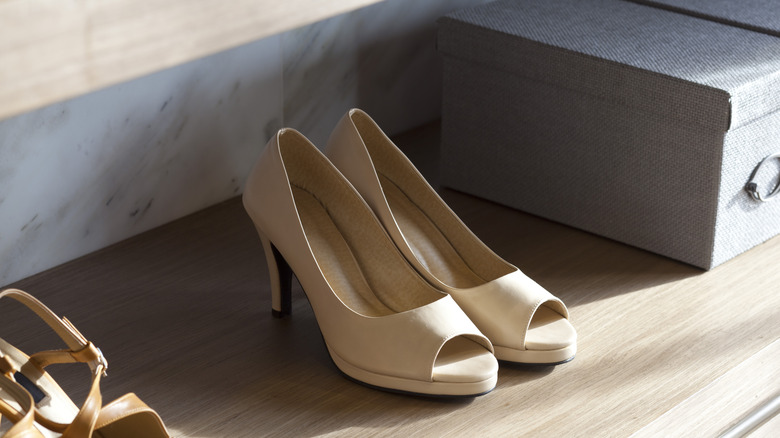
Dress shoes require much more care than traditional footwear. They should be cleaned carefully, and depending on the material, conditioned. A great way to protect them is by storing them them inside a cloth bag like an old pillowcase. This not only keeps dust at bay, but also prevents scuffs or scratches that could be caused by bumping into other items in your closet. The soft fabric of the pillowcase acts as a cushion, maintaining the integrity of the shoes.
Before you place the dress shoes inside the pillowcase, you'll need to clean them well. Follow the proper care instructions for the specific material your shoes are made from. Afterward, slide the dress shoes to the back of the pillowcase. Fold the front end of the pillowcase over the top of the bottom end. Place it on a shelf in your closet or on a shoe rack. You can also use this hack to store your shoes in a suitcase. It will help keep the dirty soles separate from the rest of your clothing.
Create a liner for your storage baskets
Baskets are an excellent addition to any closet space, as they not only keep items tidy and neatly grouped together, but also add a decorative touch. When opting to use storage baskets, whether wicker or plastic, it's best to add a fabric liner. This liner adds a layer of protection, no matter which items you plan on storing inside the bins. However, there's no need to purchase fabric, as you can transform an old pillowcase into a basket liner.
To add it, all you have to do is open the pillowcase and push it down inside the bin. Fold the ends over the edges of the container. You can leave them as they are or add a bit of hot glue to keep them in place. If the pillowcase is oversized, you can cut it down first. Then fold the edges inward and secure them with a little hem tape. This gives the edges more of a clean look.
Cover drawers to protect more fragile items
Typically, closet drawers are constructed with wood or MDF. This is great for storing your general items like sweaters or sweatpants, but it might be a rough surface for more delicate items, such as jewelry or sunglasses. For those items, you'll want to give the drawers a fabric liner. Just like with the storage bins, you can use an old decorative pillowcase to accomplish this task.
Remove the drawers you need to cover from the closet. Measure them, and then cut down the pillowcases so they fit those specific measurements. To adhere the fabric, add Mod Podge to the drawer and spread it across the entire surface using a paint brush. Carefully put the pillowcase fabric on top, and then smooth it flat by using a credit card, working from the center out to the edges. Allow it to dry, and then reinstall the drawers.
Create no-sew curtains for your closet
Smaller homes and apartments may have closets that lack doors. Depending on where the closet is located, guests may be able to see all of its messy contents. To conceal the items, you can install a practical curtain made from a set of old pillowcases. You will need to sew a few cases together, which will create a patchwork effect. Choose cases whose prints or colors look good together to add a touch of style to your home.
Measure the width and length of the closet, so you know how much fabric is needed. Add a few inches to the length to account for the channel that will be used to hold the rod. Cut the pillowcases into rectangular pieces and sew them together to match the length and width requirements. Place the curtain in front of you with the decorative side facing down. Set the rod across the top and fold the upper fabric over it. Pin along the bottom so you know where to sew. Remove the rod and sew across the bottom to create the channel. Slide the rod back through the completed channel and hang the curtain.
Make a scented sachet to keep the closet smelling fresh
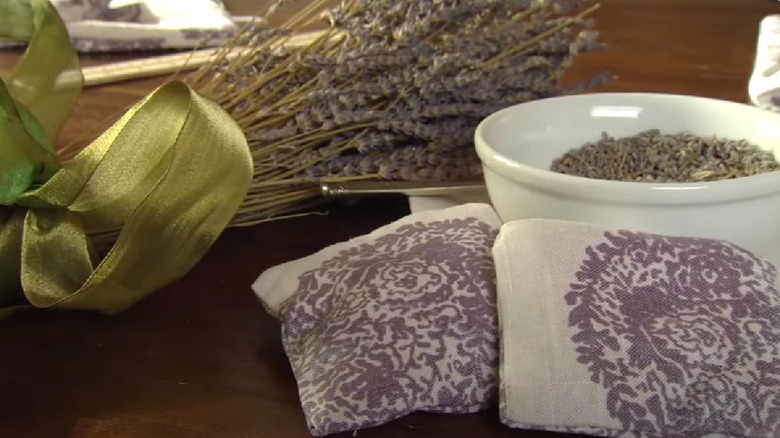
Given that closets often lack proper ventilation, the air inside them can become quite stagnant, and some stored items, like old sneakers, can leave an unpleasant odor. One way to combat this problem is to introduce a few scented sachets. These not only freshen the air, but they can also perfume your clothes with your favorite scent. The best part? You can easily make these sachets using old pillowcases, and no sewing skills are required.
To create your scented sachets, cut out two 6-inch by 6-inch squares for each scent bag that you'd like to make. Place the squares on top of each other so that the pattern sides are in the center. Use hem tape to attach three of the sides. Turn the sachet right-side in and add potpourri. Drip in a few drops of your favorite essential oils to increase the scent. Fold over the top edges and secure the final side with another piece of hem tape. Set the sachets on your shelves or place them in the bottom corners of the closet.