How To Safely Remove Your Oven Door In Just A Few Steps
There are plenty of reasons you may need to remove an oven door. For one, not having one makes it that much easier to clean the appliance's hard-to-reach spots. What's more, getting rid of the door is a must if you need to troubleshoot a strange oven noise or other malfunction. Now, taking it down on your own may seem like a lot of trouble if you've never done it before. After all, there are screws, bolts, hinges, and who knows what else that needs disconnecting, right? The truth is removing an oven door is one of the simplest DIY tasks — one that entails only a few straightforward steps and just minutes of your time.
That's because in most ovens, doors are designed for simple removal. To unfasten yours from the range, all it typically takes is locking the hinge latches and pulling the door out. With latchless hinges, the process is even easier — the door simply slides out when you open it to a specific angle. Replacing is generally just as easy. That said, there are a few nuances you should keep in mind — and a few basic tools you must assemble — before you proceed with the door removal. We'll walk you through everything below.
Removing an oven door with latched and latchless hinges
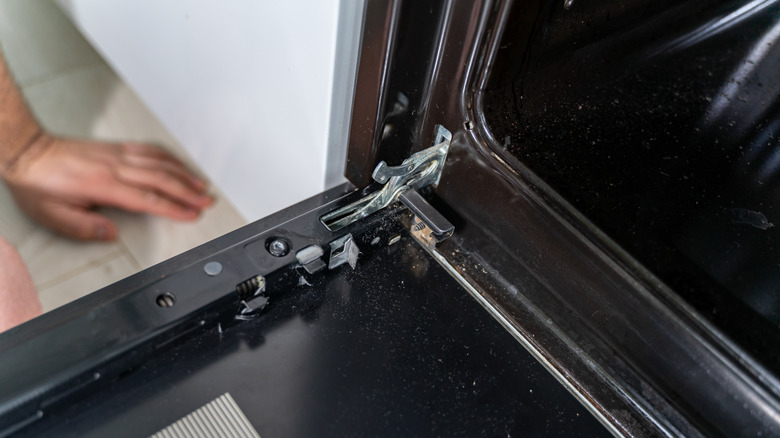
Before you start detaching the door from the oven, equip yourself with the right tools. Crucially, you'll want gloves that offer some grip and protect your hands — the piece can slide down under its weight and cut you with its edges. Keep a lubricant handy in case the hinges don't operate smoothly. If they get stuck during the removal, a Phillips-head screwdriver will help you pull them out. Finally, you might need an allen key to lock the hinges into their removal position.
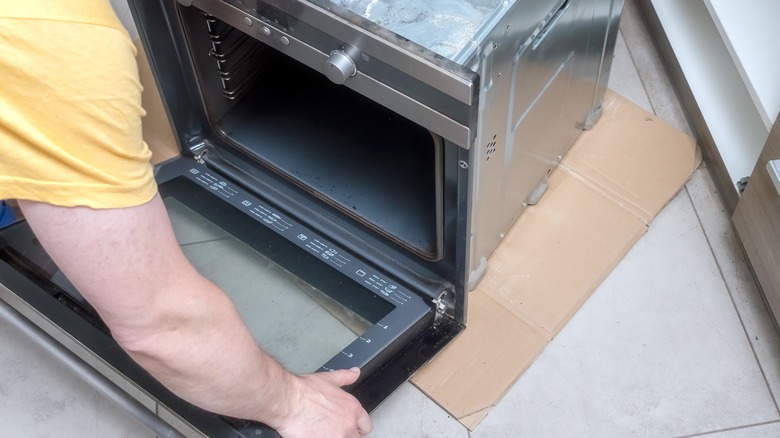
With these tools assembled, turn the oven off at the circuit board. Then, open the door and determine what types of hinges you have. Most models have latched designs — the latches fix the door to the joints or release it. You should be able to lock them by rotating the latch toward the door. In some ovens, you'll have to turn the device's screw with an Allan key or insert a pin into it — the manufacturer's instructions should specify this procedure. Next, rotate the door to the closed position — it should lock partway through. This is your cue to pull the door out. You're done! Now, if your oven door hinges don't have a latch, bring it within 4 inches of the closed position (this will vary by model) and pull it out.
Replacing the door
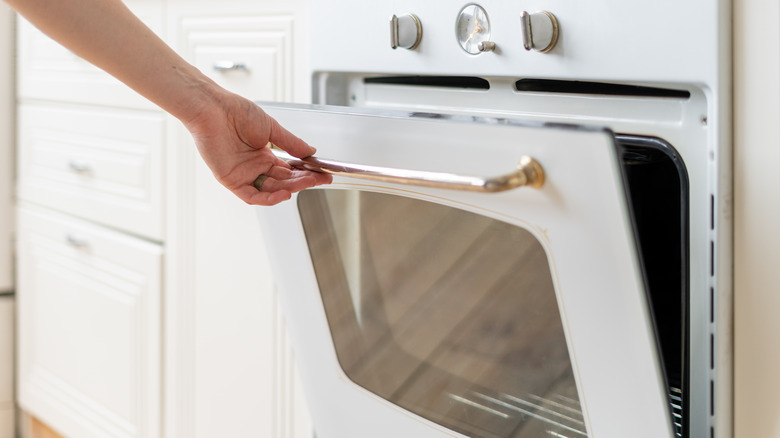
Once your oven cleaning routine is complete — or the fault is fixed — replacing the door is just as easy as taking it off. Again, the process will differ a bit depending on the hinge configuration. If you have latched designs, start by picking up the door by its sides. Then, find the same angle you used to remove it — the hinges should slide into the sockets easily once you do. With the joints seated in their sockets, you can bring the door down to the fully open position. Now is a good time to lubricate the hinges. Otherwise, use the same method you relied on to lock the latches, only in reverse — doing so will effectively secure the door back in place.
Replacing a latchless model is even simpler. Pick up the door, holding it with each hand on either side, then align its sockets with the hinge arms protruding from the oven. Let the piece slip down the arms, then give it a good downward push to lock it in place. Whether you've got latched or latchless hinges, make sure that the door is aligned squarely in its original spot. Try opening and closing it to confirm that it pivots and seals correctly when in the closed position. Now, you can reconnect the power supply and continue using the oven as usual.