Crown Molding Installation Mistakes To Avoid During Your Next DIY Home Upgrade

We may receive a commission on purchases made from links.
Crown molding completes the interface between the ceiling and the walls and injects a much-needed touch of elegance into your space. Installing crown molding also boosts a home's resale value. If you're thinking about upgrading your home's aesthetic by installing new cornices, you're probably tempted to undertake the project yourself, without professional help. After all, how hard can it be to paint and nail boards to a surface? All you need to properly install new crown molding is a tape measure, a saw, a nail gun, and some paint, along with brushes. Crown moldings themselves aren't too pricey either, typically starting at under $3 per linear foot at Home Depot. But there's more nuance to this DIY undertaking than meets the eye, and simple mistakes — like not properly preparing the boards before installation or leaving defects on the trim and wall – can easily derail your project and necessitate tedious overhauls.
Some of the most common errors DIYers make when installing crown molding stems from poorly measured cuts and failure to finish the boards properly. Likewise, incorrect painting techniques and reluctance to touch up minor flaws can leave the crown molding looking unprofessional — or even downright unsightly. Worst of all, some of these installation gaffes will only become apparent once you've installed the molding and there's no longer an easy fix. Below, we've compiled a list of the most egregious errors DIYers commit when they install crown molding, along with tips on how to avoid them.
Not properly preparing crown molding boards before installation
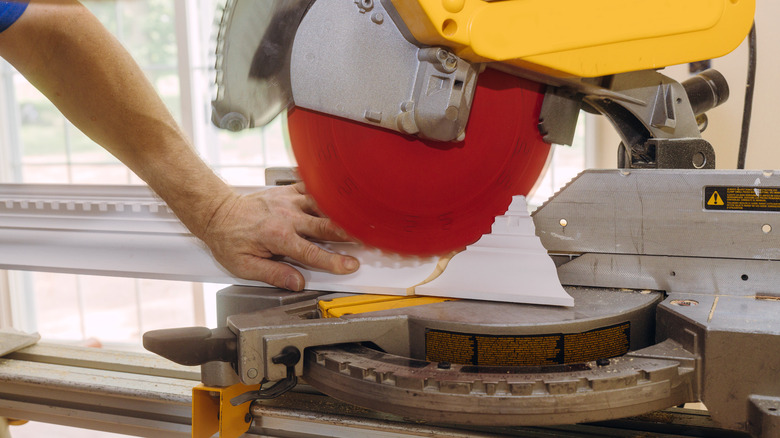
Crown molding typically comes in boards of 8 to 12-foot lengths, so a bit of field-cutting is almost inevitable as you try to fit these sections on your wall. Not measuring the boards to the correct size is a common — and major — mistake. With cuts made based on inaccurate sizing, you're bound to end up with two possibilities — sections that don't fit at all, or gaps between them after installation. Getting the corners right is one of the trickier tasks, as you have to measure both the ceiling and the wall to figure out the correct angle. Often, the wall and ceiling will not interface at a 90-degree angle — and that's a flaw you must account for in your calculations. Be sure to triple-check the measurements before you make the cuts to save yourself from time-consuming do-overs.
Not sanding the crown molding boards is another mistake DIYers make while preparing for installation. Since even the tiniest of imperfections can prevent the cornice sections from aligning well, the edges of the boards should be smooth. Moreover, boards with a smooth surface will bond better to the adhesive, if you decide to use it. To this end, sand the cornice segments with 120-grit sandpaper. Focus on the edges along the cuts you've made, but don't neglect the rest of the board surface — it should be smooth enough for painting, too. If the edges are rough, opt for sandpaper with a coarser grit, like 80.
Leaving defects on the trim and surrounding wall surface
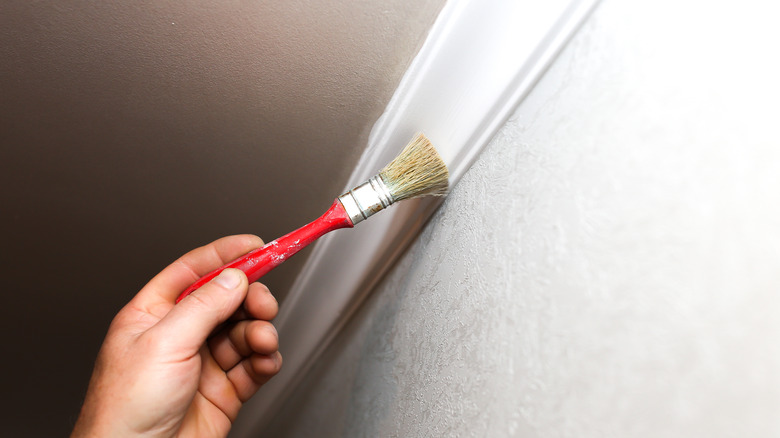
Some DIYers prefer to install the crown molding first, and then paint it. Structuring the installation this way almost guarantees that you'll end up leaving paint marks on the wall. That's because painting small surfaces that are high up near the ceiling is always more difficult than applying a coat of paint to the same board while it's resting on the floor. To avoid smudging the walls with paint, it's best to paint the trim after you've cut and sanded it. Don't try to rush the process, either. Crown molding should generally get two coats of paint, just as the walls do. You should give the boards ample time to dry before you proceed with installation, otherwise you risk smearing surrounding surfaces in the process.
Even the perfectly cut, sanded, and painted crown molding boards will end up with some imperfections after you've fastened them to the wall. Nail holes may be tiny, but don't leave them as they are — without proper masking, they'll stay highly visible to anybody in the room. Likewise, despite your best measuring efforts, some joints between crown molding sections will remain discernible after installation. To rectify these small cosmetic imperfections, start by covering any joints and nail holes with a wood filler like this one from Home Depot. Next, paint over the patches of filler with a small brush. Small dabs of paint should suffice for this purpose — no need to repaint the entire board.