9 Mistakes To Avoid When Making Homemade Hummingbird Nectar
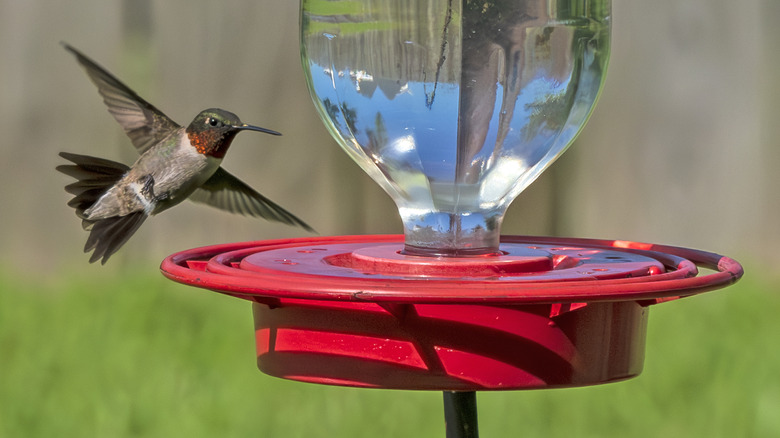
Hummingbirds are one of nature's most fascinating creatures, so there's nothing quite like watching them flit around your yard. One of the best ways to attract hummingbirds to your garden is to supply them with a fresh, reliable food source. They need a surprisingly large amount of calories to survive, often stopping at 1,000 to 2,000 flowers in a single day. When done properly, your nectar feeders provide these small, high-energy birds with supplemental food during times when nectar in nature is more challenging to find. Although you can purchase pre-made food, making your own nectar is easier (and less expensive) than you may think.
While making sure hummingbirds always have a place to eat is extremely helpful for our colorful feathered friends, there are a few simple mistakes you don't want to make. Unfortunately, even small errors throughout the process can lead to spoiled nectar and damaged feeders or could even put the birds at risk. All you need is a little knowledge to avoid some of the most common errors that come with making homemade nectar. Once you know what to watch for, keeping your feeders safe and hummingbird-friendly becomes second nature. Let's get into everything you'll want to avoid and what to do instead.
Not using the right sugar-to-water ratio
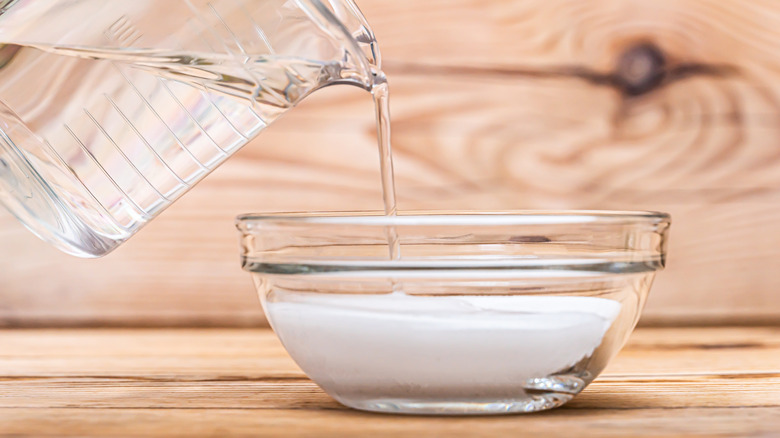
Although you've probably seen hummingbird nectar in the outdoor section at retail stores, you can easily make your own for less with just two ingredients: sugar and water. The sugar gives them energy to fuel their high metabolisms, while the water is important for keeping them hydrated, especially during hot weather. When making it yourself, you want to properly measure the mixture so it's as healthy as possible. Weak batches won't supply enough calories, and they may skip your feeder in search of a sweeter food source. However, if they consume too much sugar at once, it can damage their kidneys or liver. Plus, the sugar can thicken the water, making it more challenging for them to lap up.
It's best to stick with the recommended ratio of one part sugar to four parts water, as it best mimics their natural habits. When flitting around in search of flowers, hummingbirds tend to prefer those with nectar that's made up of 20 to 25% sucrose. According to research from The Cooper Ornithological Society, hummingbirds favored this range more than lower and higher concentrations. That said, you can increase the sugar content a bit more in winter, adding no more than one part of sugar to three cups of water. The higher concentration makes the liquid less likely to freeze over while giving hummingbirds some extra calories to keep them warm.
Using the wrong water or boiling it too long
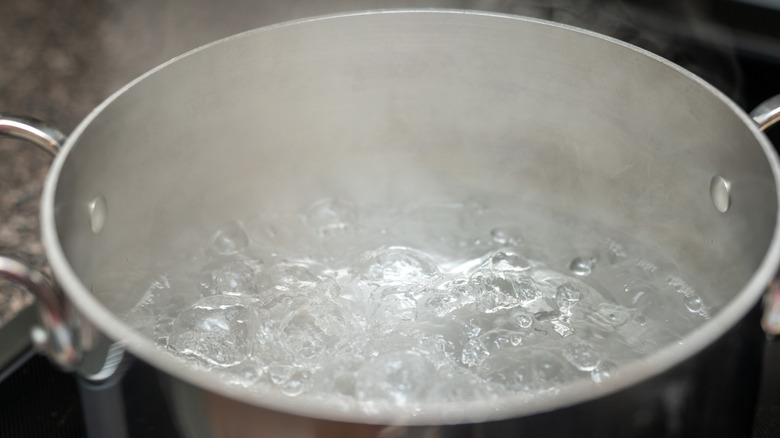
If you only have tap water, you may wonder if you have to boil the sugar water for DIY hummingbird nectar. Well, there's some debate. Boiling the water helps to remove any impurities and makes it easier for the sugar to dissolve. Although using boiled water can keep the mixture from fermenting as quickly, it'll no longer be sterile the second the bird's beak touches the liquid. So, if the water straight from your tap isn't the best quality or you want to make a batch to store for later, boiling it is a good idea. However, you don't want to let it sit on the stove for too long. The longer it evaporates, the less water will be in the mixture, creating more of a thick syrupy mix that's harmful to hummingbirds but can be more appealing to wasps and bees.
The best option is to use filtered or spring water when making hummingbird nectar. If boiling tap water, only let it roll for about a minute, which is all the time it takes to remove impurities. Mix in the sugar after you boil, not during, and let the mixture cool down completely before adding it to feeders. Avoid softened water or distilled water. Softened water often contains too much salt, while distilled water is completely stripped of its minerals. Nectar naturally has a little bit of salt, so a happy medium is best for the birds.
Using the wrong sweetener
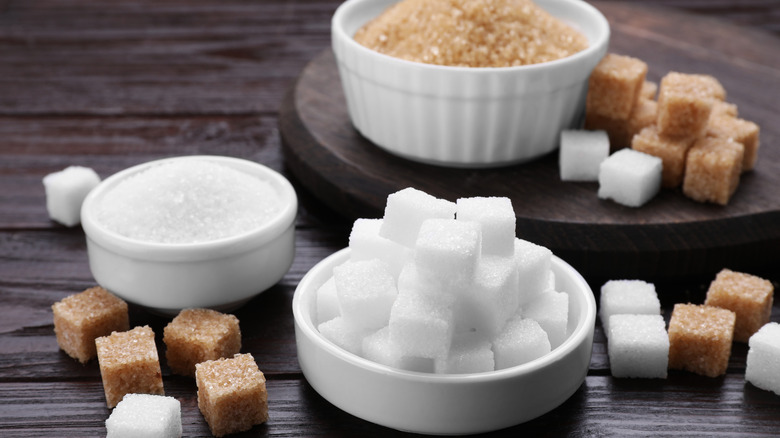
If you've checked your pantry to find that your remaining sugar went into your famous cookie dough, you may be tempted to try using a different sweet powder you have on hand. After all, how much different can it be? While we may not notice a big difference, even small variations can have a big impact on hummingbirds. Other types of sugar have additives that can be harmful to our tiny feathered friends, and artificial sweeteners lack the nutritional value required for their metabolisms. For example, brown sugar contains elevated levels of iron from the molasses, which is toxic to hummingbirds, even in trace amounts. Powdered sugar isn't great either, as it's often combined with ingredients like cornstarch. Although honey seems like a safe bet, it'll actually speed up the fermentation process.
The only sugar you should be using in your DIY hummingbird nectar is what you likely usually buy anyway: pure granulated white sugar. As it's processed, it's stripped of molasses, making it completely safe for the birds. Table sugar is basically pure sucrose, so it's the closest alternative we have to what's found in natural flower nectar. While raw or organic sugar may sound more natural and healthier for hummers, it's actually the opposite. They aren't as refined as pure cane sugar, so they contain trace amounts of molasses.
Adding harmful red dyes
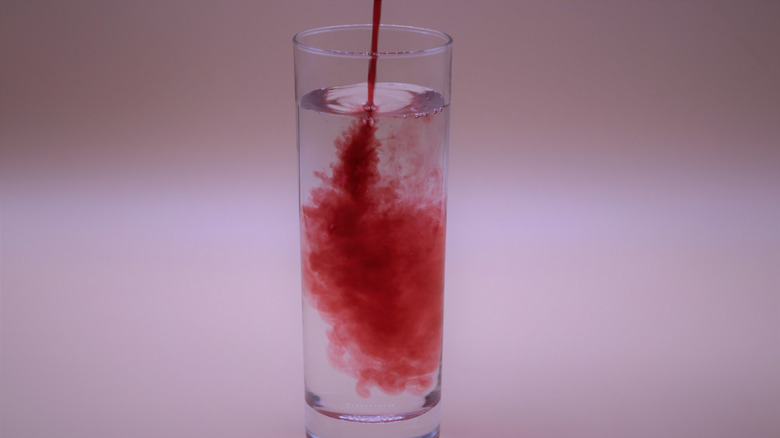
When it comes to attracting hummingbirds to your garden, using the color red is one of the easiest ways to catch their attention. Although using a bright red feeder is a great way to lure them in, it's not a good idea to use additives to change the color of the nectar. Food coloring and other dyes may contain toxic chemicals, like red dye 40, which can be harmful to the little hummers. Seasoned, licensed wildlife rehabilitators have reported heartbreaking cases of hummingbirds developing tumors and even dying prematurely, which they trace back to the use of red-dyed nectar. Plus, the nectar they find naturally in flowers is clear, so there's no benefit to changing what already works.
Feeders in bright, warm shades are more than enough to stand out to hummingbirds, so there's no reason to mess with the color of the nectar. While the bright red is what initially draws them in, what keeps them coming back is the quality of what's inside. They're surprisingly picky, often bypassing feeders with low-quality nectar. So, focus on keeping their food safe and inviting by using plain, clear nectar and regularly cleaning the feeder. They have excellent memories and will remember where their favorite nectar sources are. So, once they see that your yard offers the best food, they're likely to keep coming back for more.
Pouring hot nectar into feeders

As you finish making your batch of hummingbird nectar, it may be tempting to fill up the feeders immediately and watch the birds flock in. However, whether you've boiled your water or used hot tap water, you'll want to wait it out a bit. Many hummingbird containers are made of plastic that may warp if exposed to hot liquids. Plus, the warm nectar will expand and put pressure on the seals, which can make it leak over time. It may take a few occasions for you to notice any issues, but it's still best to let the mixture cool off first. If hummingbirds fly to the feeder as soon as you fill it, they could burn themselves as they drink.
Always let the sugar water sit at room temperature until it's completely cooled off before pouring it into the feeder. If you don't want to wait as long, you can speed up the process by popping it in the fridge for a bit. However, you don't want it to get too cold either. When nectar is chilled, hummingbirds have to burn extra energy just to warm it up to their body temperature. You can maintain a warm, but not too hot, temperature by placing your feeders in a shady area of your yard. This will help keep the sugar water from getting overly hot but not too cool for them to drink. Keeping it out of the heat also prevents the nectar from fermenting as quickly.
Storing leftover nectar incorrectly
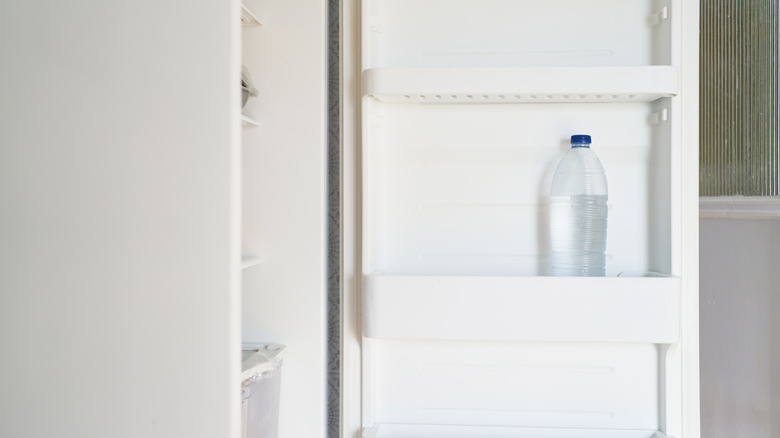
Between making the nectar, filling up feeders, and keeping everything clean, there's a bit of maintenance that comes with a hummingbird feeder. If your backyard has become a hot spot for hummingbirds, you can make a large batch of nectar to store for later. Although you want to let the sugar water cool to room temperature before filling the feeders, you don't want to leave the leftovers sitting on the counter. If left out, there's a higher risk of bacteria or mold growing much more quickly than they would in the refrigerator.
When storing an extra batch of hummingbird food, use a food-grade, airtight container and keep it in the fridge. You can expect it to stay fresh for about a week before it starts looking funky. If you notice any cloudiness, discoloration, or mold growth, toss it out and make a new batch. It can be easy to lose track of time, so label it with the date so you know when it's time to pitch it. Don't add fresh nectar to what's already in the fridge, and always use a new container for each new batch. Even if it's only been sitting for a few days, mixing old nectar with new can shorten the overall lifespan of the batch and lead to faster spoilage.
Adding fresh nectar to unclean feeders
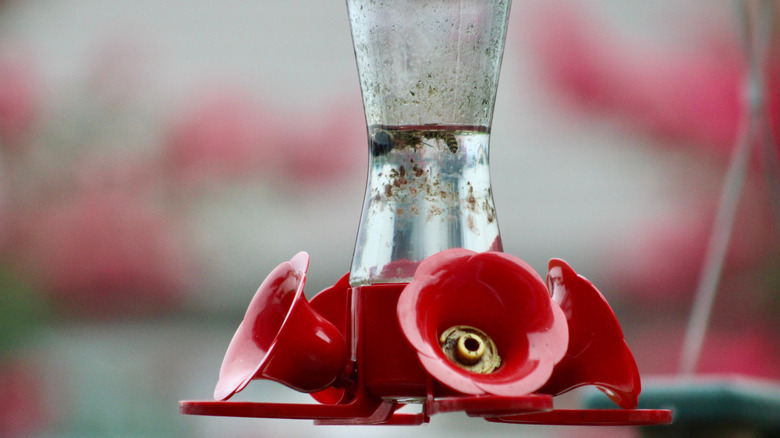
Just like you shouldn't mix old and new nectar when storing it, it's just as important, if not more so, to avoid adding fresh sugar water to a dirty feeder. When nectar sits out in the heat all day, it's especially prone to spoiling. Even if the feeder looks clean, bacteria or mold can build up in hidden spots, like seams or around the feeding ports. Pouring fresh nectar into a dirty feeder means it'll be contaminated right away, undoing your effort and putting the birds at risk.
The frequency you'll need to clean your feeders varies, but a general rule of thumb is to clean them at least twice each week in hot weather and once per week during cooler months. If you're able to get it done every other day, that's even better. When it comes time to clean your hummingbird feeder, avoid using any soaps and detergents, which can leave a residue behind. Instead, use a mixture of warm water with hydrogen peroxide, diluted vinegar, or diluted bleach, and scrub it thoroughly with a scrub brush. Take the feeder apart so you can work the brush through all the cracks and crevices. Rinse all of the pieces well and let them dry before putting them back together. Because hummingbird feeders need to be cleaned frequently, it's a good idea to rotate a few so you always have a clean one ready to go.
Letting the sugar water get cloudy
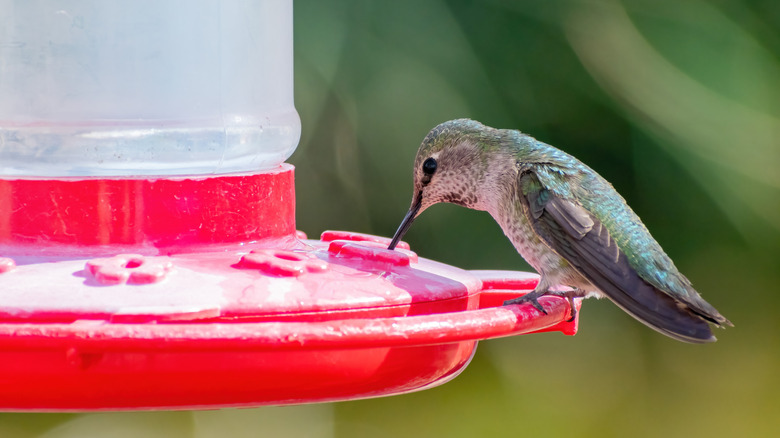
Even if you clean your hummingbird feeders often, there are times when you'll have to work in an extra cleaning session. Although it doesn't look especially dangerous, you should be concerned if the nectar in your hummingbird feeder is cloudy, as it's one of the biggest signs that your sugar water is spoiling.The murkiness indicates that bacteria, mold, or yeast have started growing, especially in warm weather where sugary water makes the perfect breeding ground. As it ferments, it can produce harmful byproducts that are extremely dangerous for hummingbirds. Not only does it lose nutrients, but spoiled nectar can also cause serious infections for your feathered friends. Plus, the birds may stop visiting your feeder altogether if they sense that the nectar isn't clean and fresh.
Check your feeders regularly for signs of spoilage, even if you just washed them recently. Aside from cloudy water, you may notice mold growth or dead insects floating inside. It's also a good idea to keep an eye out for any hummingbirds that look sick, as they can spread diseases to other birds that drink after them. If anything looks off, it's time to dump out the old sugar water and give the feeder a good cleaning.
Putting hummingbird nectar in open containers or unsafe feeders
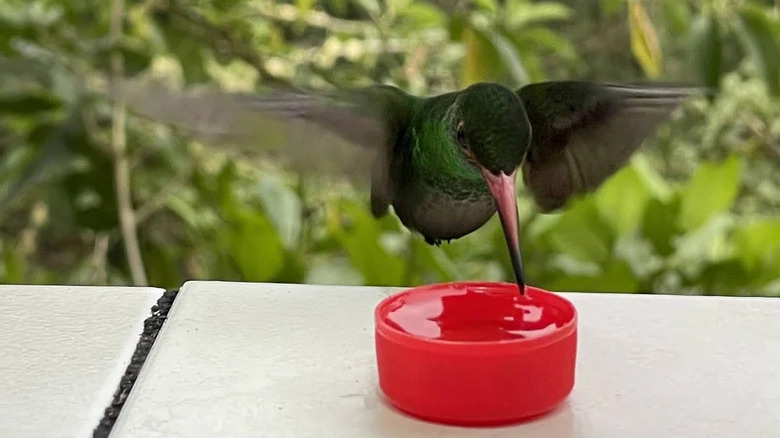
If you're already making the nectar yourself, you may want to attempt a homemade feeder while you're at it. While some designs work well for hummers, others can cause dangerous issues. One of the biggest problems with some homemade feeders is their tendency to leak. As a hummingbird hovers to feed, the nectar may drip instead, landing on their feathers. If this happens, their feathers can stick together or fall out, making it extremely challenging for them to fly. Similarly, any open container puts the small birds at risk of tipping it over and dumping the sticky liquid all over their bodies. Plus, any easily accessible nectar is basically an open invitation for ants, bees, and wasps.
When DIYing your own hummingbird feeder, aim to build one that mimics safe, store-bought designs. Ideally, they should have an area with tiny, bee-resistant ports and a tight seal that prevents any leakage. Use food-safe materials, and make sure it's easy for you to disassemble and clean. If you notice any leakage, take it down and fix any issues that may be causing it, or switch to a safer design.