The Underutilized Spot In Your Home That's Perfect For Extra Storage Space
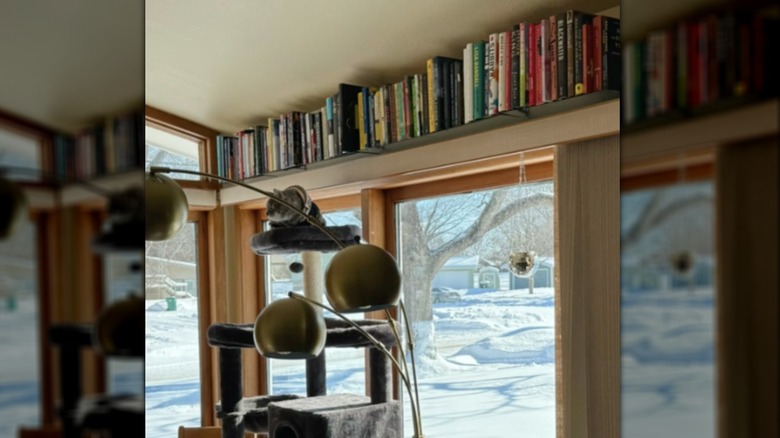
Storage space is a hot commodity. It's tempting to build an extension to your home just to fit all of your goods. However, before you extend the backyard or add another floor, there is a spot in your home that is perfect for extra storage and doesn't require a city permit to utilize: the top of your windows. This area is ideal for adding a shelf to house decor or seasoning items. The extra shelving is easy to DIY, and can maximize storage space in a small home or create a functional focal point in any room.
Depending on your ceiling height you can even add two shelves above the window. Keep in mind that it is open shelving, so your items will be on display. This is not the place for random electrical cords and toys. Instead use it like a bookshelf to store magazines, pictures, and ornaments. It's important to note, however, that above the window is not the most accessible spot. Cchances are you'll need a step ladder to reach the items, so it's best to store goods you won't need access to everyday.
How to DIY an above-window shelf
To take advantage of that unused space above your windows, you'll need a stud finder, screws, screwdriver, 2-by-4 planks, and a wooden board. First, if there is trim around your windows you should reinforce the top piece with extra screws, since it will now partially bear the weight of the shelf and what you store on it. Next, cut the wooden board slightly longer than the window's length to create the base for the shelf. The shelf can hang an inch or two longer than the window and should be 10 to 12 inches wide. Use your 2-by-4 inch planks to create two anchors for the shelf roughly 8 inches long and cut at a 45 degree angle on both ends.
After all the pieces are prepped, it's time to assemble. For windows with trims, place the wood board on top of the edging and screw the board to the trim. Then, use the stud finder to locate the studs nearest the ends of the window. This is where you'll screw the 2-by-4 anchors above the shelf into the wall on one end and to the board on the other. If your window is trimless, attach the anchors to the wall studs first before laying the board on top of the 2-by-4s and screwing it in place. Once the anchors are secured to the board and wall, your window shelf is complete. Just like that, you can transform wasted space into a stylish and functional area.
How to style an above-window shelf in your home
Because over the window is an uncommon place to add shelves for extra storage it will instantly become a focal point in the room. So why not take advantage of the eyes it will draw by letting the shelf be a stylish element too? You can paint the ledge to match the window trim or wall color to help it blend into your space for a subtle touch. However, if you want it to be a statement piece, paint the shelf a hue that contrasts with its surroundings. It can be a vibrant pop of color or pattern, if you wrap the board in wallpaper.
Another way to stylize the shelf is to switch the wood anchors for metal posts or chains. This will give the storage unit a modern, industrial design that pulls away from the natural rustic and homey look of wood. You can create an above-window shelf for as many windows in your home as you please, and even mimic the design for a shelf above the door too.