Tips For Growing Tasty Okra In The Garden
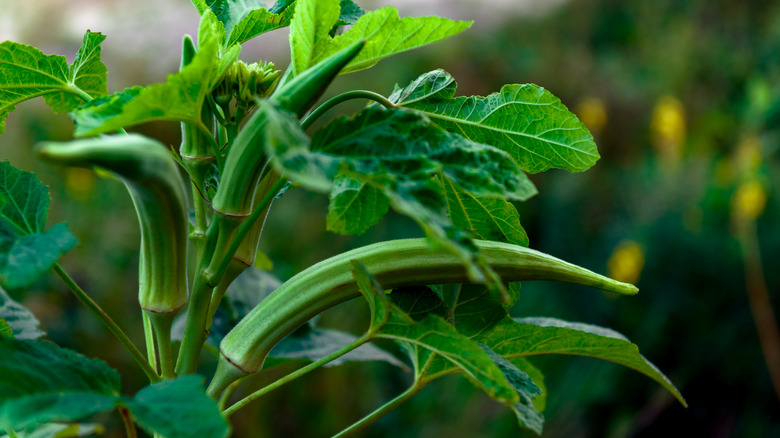
Okra (Abelmoschus esculentus) blooms gorgeous, red-eyed, hibiscus-resembling yellow flowers, adding ornamental beauty to our gardens while we wait to harvest its juicy fruit pods for stews and sauces. Unfortunately, the garden-to-table cycle can feel quite long, as directly sown okra can take up to 90 days to ripen, depending on the variety. However, you can shorten the cycle to approximately 40 to 70 days by beginning with seedlings — it's the better choice for northerners with short summers.
The trouble with okra begins at sowing. First, you must verify the seeds are new (check the label!), as the ones nearing expiry are unlikely to sprout. Next, you must soak them overnight in water or sand them down. This is because these seeds are hard-coated, delaying adequate and uniform germination. Once satisfied, put them in the ground — around two to three weeks after the last frost. But if you want a head start, you must start the seeds indoors around five to six weeks before the expected last frost and transplant them as you would the seeds. However, as okra doesn't like transplantation, it must be planted in biodegradable or peat pots you can place in the soil. Ensure the seedlings appear short, have sturdy stems, and are colored dark green. Fan and harden them to stave off diseases before relocating for better performance.
Okra demands full sun, fertile soils, and good drainage

Since okra is a tropical native, it demands full sun for healthy growth. So site its seeds or transplants east to west in rows for full exposure. Don't forget to thin them to around 18 inches apart once the seedlings grow 3 inches high. Also, don't risk planting them in cool soils, or the seedlings will damp off, dying prematurely. Thus, ensure the soil temperatures are at least 60 to 65 degrees Fahrenheit if not warmer, down to a depth of 4 inches. If unsure, solarize the soil by laying down a clear plastic sheet two weeks before planting. Even better, place the transplants in open-ended tin cans for added wind and cutworm protection.
Another tip to get tasty okra is to grow these sun-hungry vegetable plants in well-draining, organically-rich soils. Ideally, a soil test will direct you to the best course of action. If not, work in aged chicken or horse manure 3 to 6 inches into the soil — this will also improve the soil's permeability while keeping weeds out. Alternatively, you can feed it a balanced 10-10-10 fertilizer — a good balance for food plants. When the seedlings are ready to bud, side-dress with a nitrogen-heavy fertilizer (21-0-0). Don't go overboard, as it may act contrarily, stimulating leafy growth at the expense of the fruit. Pay attention to the soil's acidity because highly alkaline soils (with a pH over 7.0) — as found in Utah — must be amended with sulfur.
Water, harvest, and ratoon at the right time
Watering is another limiting factor when growing okra. Although okra plants are prized for their drought tolerance, they must be soaked 6 inches deep with 1 to 1.5 inches of water every 7 to 10 days if it hasn't rained. You must water them daily if the temperatures exceed 100 degrees Fahrenheit, especially during pod development. Look out for yellow flowers, as they imply your pods will be out in another 2 to 3 days.
Nailing the right harvesting time is essential or else you'll end up with woody, hard okra that's better off composted or used in cut-flower arrangements — round-podded cultivars are an exception. To get tasty okra, inspect the plant every other day and harvest the tender pods, which should measure 2 to 4 inches long. Better yet, follow Thomas Jefferson's hack of bending the pod; if it breaks, know it's good to be pickled, fried, or enjoyed raw.
In case you miss the bus, don't keep the over-mature pods on the tree, as they'll impede new flowering, unless you want to keep a few to save seeds for the next season. Always shear the pod-containing stems at their base to prevent damaging the plant. Ideally, the harvesting season should last around 10 to 12 weeks, but if it slows down, practice some ratoon cropping — cut back the plant to 6 to 12 inches above the ground. This will trigger new growth and another crop season around fall.