How To Turn Old Chair Spindles Into A Soothing Wind Chime For Your Lawn
We may receive a commission on purchases made from links.
The next time you purchase an old Windsor chair at an estate sale or thrift store, know that you have just scored some of the materials you need to build a beautiful rustic wind chime for your lawn. It may seem unusual, but wooden chair spindles and the top panel from a wooden chair can be removed to carry out this easy DIY project. If you're a fan of the raw and rustic look, you may choose to leave the wooden pieces bare. However, you can also paint the pieces a color of your choice if you prefer to get more creative.
To build your own wind chime with these pieces from an old chair, you will need spindles, the top panel of the back of the chair (also known as a crest rail), a pack of screw eyes, an electric drill, acrylic paint in the colors of your choice, engine enamel spray, and penetrating oil. This project would be the perfect addition to a lawn, backyard, garden, or even a front porch. Those living in apartments may choose to hang this wind chime on a balcony. This is a great option for renters because it can be hung up and removed easily without any damage. You might decide to follow @our_upcycled_life's TikTok tutorial on how to assemble this wind chime, which should make the process easier.
Build this rustic wind chime in only a few steps
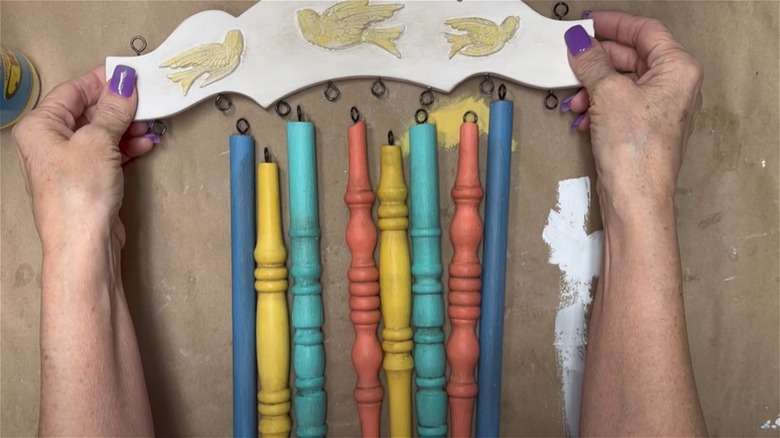
After you have gathered all of the materials to assemble your wind chime, you will first need to attach your screw eyes to the chair's crest rail, as shown in @our_upcycled_life's TikTok. Starting at one end of the bottom of the crest rail, use your electric drill to make holes for your screw eyes. Attach one screw eye for each spindle, spacing them evenly. Next, attach one screw eye to the top of each spindle. You will use these screw eyes to attach the spindles to the crest rail later on.
For the next step, paint each spindle a color of your choice. You may skip this step if you prefer the unpainted look. After you have painted the spindles, spray them with engine enamel to protect them from the elements outside. Apply penetrating oil to the crest rail to protect the wood. Finally, attach each of your finished spindles to the crest rail using the screw eyes you installed earlier. You may notice that @our_upcycled_life shows the finished product hanging up outside, but does not show how to attach a string or rope to accomplish this. You can visit a craft store to pick up a piece of hanging wire or rope and hooks to attach it to the wind chime. This should allow you to hang it anywhere you choose.
Where to find the materials you need

The materials you need to build this wind chime can be found at most craft or home improvement stores. If you do not already have an old chair with spindles and a crest rail, you may be able to find one at an estate sale, antique store, or thrift store. Home Depot has a wide variety of screw eyes, but @our_upcycled_life shared that she actually purchased hers from the dollar store. Acrylic paint can be found at craft stores like Michaels, which offers a set of 24 for only $9.99.
Joann also has a 12-pack of acrylic paint for $8.00. You can snag the engine enamel spray and penetrating oil from Home Depot as well. The clear Rust-Oleum spray from Home Depot is priced at $10.48, and the Behr Premium penetrating oil is $36.98. If you are a fan of the jute cord @our_upcycled_life used to hang up her wind chime, you can find similar cord at Joann for $3.79. You might find it easier to purchase all of the materials you need from one place. If you prefer that convenience, Amazon also sells all of the items needed to build this wind chime.