The Chic Bargain Block Art DIY That Uses Scraps From Around The House

We may receive a commission on purchases made from links.
If you were around in the 1970s or just enjoy looking at retro pictures of interior design, you might be familiar with some era-specific trends. The predominant scheme was earth tones, so lots of rich brown and green, particularly avocado, goldenrod, and rust colors filled people's homes. There wasn't just an abundance of wood-paneled walls and orange shag rugs, but the colors and overall aesthetic extended to kitchen appliances, phones, and even wall art. It just so happens that HGTV's "Bargain Block" hosts Keith Bynum and Evan Thomas are reviving a '70s craft called "string art." If making chic wall decor appeals to you, string art turns out to be a perfect use of the wood scraps left over from your stellar DIY projects.
As a DIYer, you're likely to have blocks of wood lying around. Instead of tossing them out, upcycle them into a personal, handmade statement. Here's the thing about this craft — you could enjoy this fun project by yourself. Or, because it's relaxing and easy for any skill level to complete, you could involve kids and other family members. Of course, always supervise children if you allow them to use nails and a hammer. To get started, you might gather all your wood leftovers to see what you've got.
How to make string art with leftover wood remnants
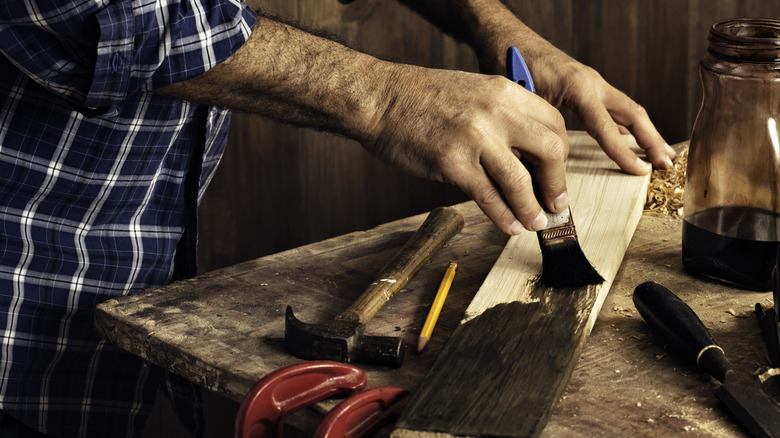
If you haven't seen it before, there are three foundational pieces common to all string art. Aside from wood planks, you'll need one-inch nails hammered into a pleasing pattern and decorative, colored string that's wound around the nails to create woven effects. With that in mind, your first design choice starts with your wood scraps. What do you have available and do pieces need to be combined to construct a large enough canvas? Move your planks around to come up with a shape you prefer. Do you like the color of the wood or would you prefer to stain or paint it? Sand first, apply a wood stain color you love, and then finish with a sealant or polyurethane if you like.
Consider practicing on a small piece of wood first. Identify an easy shape like a tree or a coffee cup. On paper, use dots to draw the outline of, let's say, a tree. When you're happy with it, tape the paper to the wood to secure it, then hammer your nails into each dot. Don't hammer too deeply; you need to be able to wrap string around each nail and you don't want sharp points poking out the back. Remove the paper, tie a knot around any nail, and start weaving your string. When done, tie it again and snip off any excess from the knot.
Additional ways to approach this project and materials
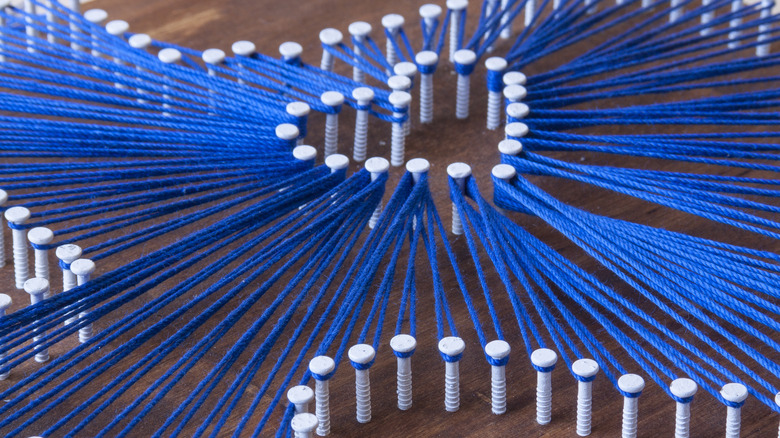
Your wood canvas could be flat, like pieces of a puzzle, or you might stack one or more blocks of wood for a collage effect. Then your nails will be at different heights, creating a more dimensional result. Also, have a look at your existing decor and the predominant colors to help you choose warm or cool hues, perhaps mixing lighter and darker wood. When choosing a pattern, another idea is to take a photo with your smartphone, print out a black-and-white image of it on your home printer, and then draw dots in pencil to capture what you want. Do an online search for pictures of string art to get an idea of how people weave the string — what works well? What looks messy and unfocused? The standard distance between nails is ¼ inch, but you could experiment with all kinds of spacing.
As for supplies you don't already have, a small craft hammer like this one from Amazon is better than a heavyweight beast capable of building houses. To avoid hitting your fingers, hold each nail in place with a pair of needle-nosed pliers. The "Bargain Block" hosts like to use embroidery floss which is strong thread in metallics or other glittery colors like this grouping from CHICIEVE, also on Amazon. Another great string choice is hemp cord like this rich blue from Hemptique.