How To Revive A Yellowing Russian Sage Plant
If you have a Russian sage plant, you may have fallen victim to the plight of yellowing leaves. This phenomenon can be frustrating for even the experienced gardener, but fortunately, there are typically a few causes of this issue. First, yellowing leaves may be a sign of nutrient deficiency, particularly a lack of nitrogen. Nitrogen is essential for the production of chlorophyll, the green pigment responsible for photosynthesis. When nitrogen is in short supply, leaves turn yellow as the chlorophyll content decreases. Identifiable characteristics include pale yellowing of the older leaves, with the lower leaves typically affected first. The leaves often appear uniformly yellow and may lack the vibrant green color typical of healthy plants. To address this issue, consider fertilizing your Russian Sage with a balanced, slow-release fertilizer that includes nitrogen.
Another common cause of yellow leaves can result from water-related issues, such as overwatering or poor soil drainage. Overly wet soil can lead to root rot, which impairs the plant's ability to absorb nutrients and water, causing leaves to yellow. Identifiable characteristics include yellowing leaves, but these may also appear wilted or have a drooping appearance. Excessive moisture may lead to the development of mold or mildew on leaves. To address this problem, ensure that Russian Sage is planted in well-draining soil and allow the top few inches of soil to dry between waterings. Consider amending the soil with organic matter to improve drainage if necessary.
How to fertilize Russian sage properly
When choosing a fertilizer for Russian sage, you must select a balanced, slow-release fertilizer. Specifically, you want to look for a fertilizer with a nitrogen-phosphorus-potassium ratio of around 5-10-5. Moreover, only fertilize once a year or less, as over-fertilizing can create an unhealthy plant.
To apply the fertilizer, start by carefully reading the instructions on the packaging. Typically, you will sprinkle the fertilizer evenly around the base of the Russian sage plant, avoiding direct contact with the leaves. Use a garden fork to lightly work the fertilizer into the top few inches of soil. Be careful not to damage the plant's roots during this process.
In terms of timing, it is generally recommended to fertilize Russian sage once a year, in early spring or late winter, before new growth begins. This will provide the plant with the necessary nutrients to support healthy growth throughout the growing season. However, if your Russian sage is still showing signs of nutrient deficiency, such as yellowing leaves, you may consider applying a second round of fertilizer in mid-summer. When determining the amount of fertilizer to apply, follow the instructions on the packaging. The recommended amount will depend on the size and age of your Russian sage plant. Remember to water the plant thoroughly after applying the fertilizer to help it absorb the nutrients effectively.
How to improve drainage through aeration
Another key cause of yellowing leaves in Russian sage plants is poor drainage. Poor drainage can be caused by compaction, which is when the soil becomes compressed, making it difficult for water to escape through pores in the soil. Compacted soil can restrict root growth and hinder the plant's ability to absorb nutrients and water.
If you suspect that your Russian sage plant is suffering from compacted soil, then you'll need to gently aerate it to improve drainage. One way to do this is to carefully dig around the plant's base with a hand trowel or garden fork, avoiding damage to the roots. Gently loosen the soil and turn it over to improve aeration and water penetration. Next, add a layer of organic mulch, such as compost or well-rotted manure to improve soil structure and retain moisture. Avoid piling mulch against the plant's stem.
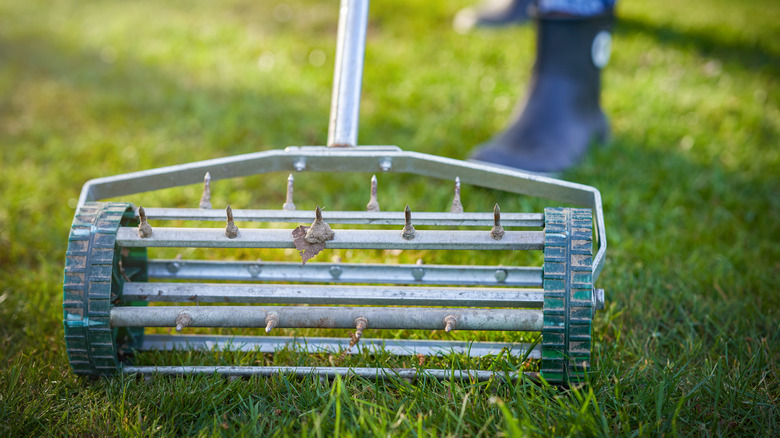
Another option to improve drainage around a Russian sage plant is using spike aeration. Using a spike aerator tool, insert spikes or tines into the ground at intervals around the plant, ensuring they penetrate at least 2 to 3 inches deep. This process creates small holes in the soil, allowing for better water and air infiltration. After aeration, apply a layer of well-draining soil or compost and mulch around the plant to further enhance drainage and promote a healthier Russian sage.


