The Item You Can Use To Create A Perfect Gallery Wall Is Already In Your Home
Do you have a bunch of photos from your favorite trips and nowhere to put them? Perhaps your best friend just had you over for cocktails at their new apartment and showcased their stunning wall of vintage, thrifted frames. Or, maybe you've just had a Pinterest board with gallery wall ideas for years and never got around to putting one up simply because the task is so daunting. No matter your inspiration, a roll of wrapping paper is your key to successfully installing a breathtaking gallery wall and wowing your friends or followers.
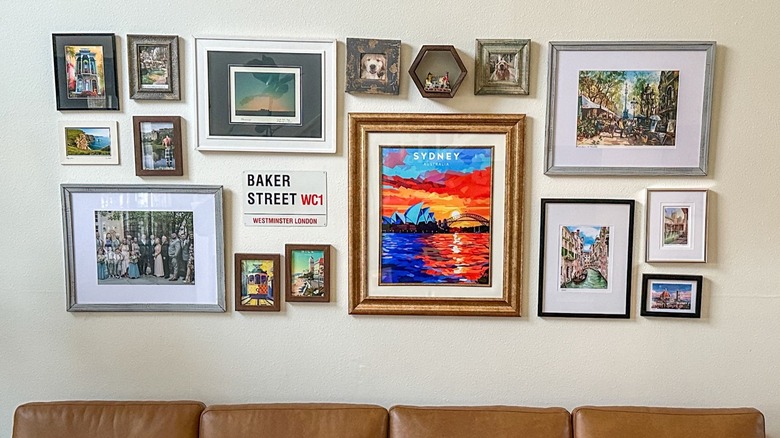
Gallery walls are the perfect way to display your favorite art, memories, or beloved objects while also becoming a statement piece in your home. Whether you have a small wall or cathedral ceilings, your gallery can be scaled up or down to perfectly fit your space. For the spatially disinclined, however, even fathoming how one would start to plan or hang a gallery wall is a formidable feat. This is where the wrapping paper comes in handy. To be specific, you'll need a roll of wrapping paper that contains the grid lines on the back. These same lines will help you organize your art and pinpoint exactly where to put the holes in your wall, eliminating the headache of eyeballing and fixing rogue holes. Nevertheless, be forewarned that this project does take time and patience, but it is absolutely worth the stunning final product that will certainly become a focal point in your home.
How to lay out your gallery wall
To execute this project well, it takes two phases. Get started by measuring the intended wall space. Pay attention to nearby light switches, outlets, and furniture and integrate them into your design. For standard ceiling heights, the center of the gallery wall should be about 57 inches above the floor to be eye level with an average human.
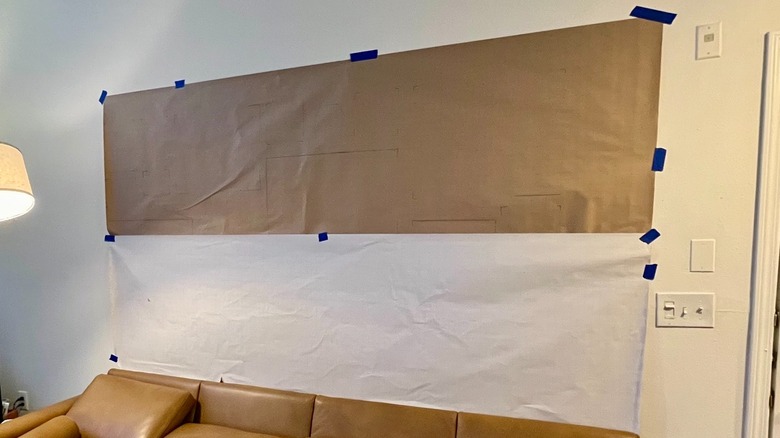
Once you know the dimensions of your wall, roll out the wrapping paper on the floor so the grid lines are facing up. Tape or weigh down the corners, and trim the paper to the exact width of the measured wall space. If your paper isn't tall enough, lay out a second row of paper beneath the first one, tape the two rows together, and trim to the desired height.
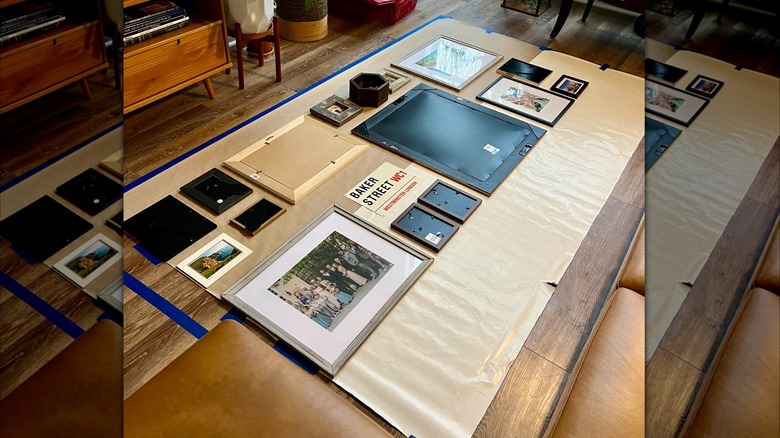
Next, lay out all of your art for the wall on the wrapping paper while it's on the floor to plan your design. Consider playing with different heights, and use the grids on the paper to create symmetrical spacing between items. Allow some space between objects – about 3 inches – in order for each piece to pop on the wall. Once your frames or objects are arranged on the wrapping paper, mark where the wall hooks will need to go for each piece. Be precise by measuring how far the hooks are from the tops of frames. It's okay if your hooks don't fall perfectly on the lines; precision is more important.
How to install your gallery wall
Once your layout looks perfect, take a picture to help you remember where each piece goes. For added help, trace the outline of each object on the wrapping paper. Carefully remove each item from the wrapping paper and transfer it from the floor to the wall.
Tack or use painter's tape to attach the paper to the wall — with the grid lines showing — in the exact place you want the arranged items to go. This step is crucial. Stand back and admire the proposed spacing before hammering in any holes. It is your last opportunity to make any major changes before hanging your art. Be sure to use a level so the paper is even and your art hangs correctly.
Once satisfied, begin attaching the hanging hardware to the marked holes on the paper. You can hammer holes directly through the paper to keep the traced outlines. As you go, hang the art and adjust using a level. Keep the wrapping paper up until you finish installing every piece of hardware and each art piece is displayed. Step back and admire the wall again. Make any minor adjustments if necessary. With a pair of scissors, gently cut the wrapping paper away from the art pieces. Be careful not to pull the hardware out or knock down any fragile or precarious pieces. Once complete, behold your finished product! Thanks to the wrapping paper, you should have a perfectly symmetrical and level gallery wall.