The Genius Way To Make Chic Home Labels Without A Label Maker
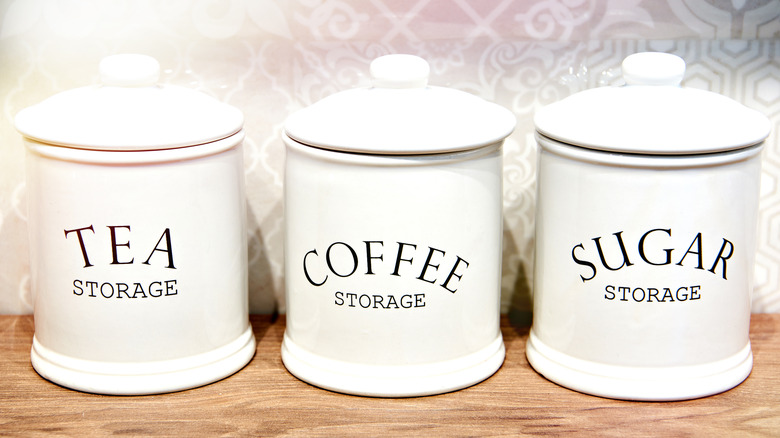
It's all fun and games until someone puts sugar instead of salt in the cake. Then, it's time to admit that labeling things in the kitchen isn't just for fussy control freaks. To solve this problem, you could use a label-maker for that "a laboratory is tracking our batches" look. You could also just hand-write them, but someone will eventually ask why you're putting ground doves in the apple pie. ("For the last time, it's cloves!") It's obvious, beautiful labels can transform kitchen containers from a boring set of canisters and jars to an apothecary's cabinet of culinary wonders-in-waiting. With a simple hack from TikTok influencer @uhh_man_duh, you can make perfect labels by easily transferring custom text from a printed page to packing tape.
Kitchen labels are, of course, nothing new. Pre-labeled containers are frustrating, though; they never seem to match the ingredients or quantities you actually use. This ushered in the era of DIY kitchen labels. The best of them are truly spectacular, but they're time-consuming and expensive to make. With a $300 vinyl cutter, $150 worth of supplies, and 16 hours, you can beautifully label $1.98 worth of baking soda. Vinyl cutters are great and are a must-have for a well-appointed home craft room, but if you have a limited budget or need time for actual cooking, this hack produces great results quickly — and for pennies.
How to pull off the packing tape hack
To begin, you'll want some regular printer paper and high-quality packing tape (cheap tape reportedly has problems sticking and can become cloudy.) Create and print your label using the software of your choice, using the font, size, and any illustrations you prefer. Stick the tape to the page, then cut the label to its final size. Give it a good smoothing, then drop it in a bowl of warm or room-temperature water. After a few minutes, you can rub off the paper and stick the label to your canister or jar.
Others who have used this trick say that a few tweaks make it work even better. Remember that "good smoothing" you gave the freshly taped paper? This is to adhere the ink to the tape's adhesive as well as possible, and burnishing the label thoroughly with the back of a spoon will ensure a good transfer. Be sure to soak the label in water for as long as you can. Soaking for an hour, for example, will make the paper much easier to rub off. And, using the best tape you have available to you, especially a brand that specifically brags about being clear, will give you long-lasting results. Don't get discouraged if it takes a few tries to get just right. Once you have the hang of it, you can also use this ink transfer hack to put labels on other things, like wood crates and candles.