How To Bleach Your Wood Floors Without A Professional
We may receive a commission on purchases made from links.
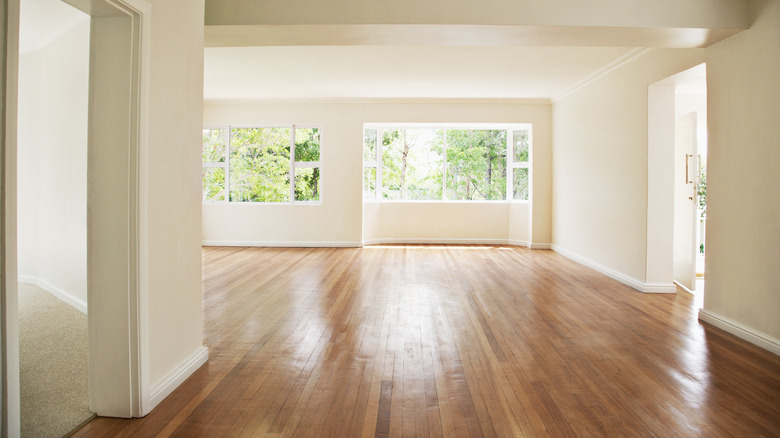
Isn't the unique character and warmth that hardwood floors bring to a home entrancing? From organic textures and grain patterns to varying shades, these qualities set wood floors apart, gracing your home with a rich, timeless appeal. But even the spectacular age beautifully scripted on hardwood floors can give way to unflattering discoloration, a sign of its battle against spills, summer sun, and even time. It's here the opportunity to rejuvenate your wood flooring comes to life — welcome to the world of bleaching hardwood floors. Imagine breathing fresh life into your existing, somewhat weary, stained hardwood floor without the big bucks. Indeed, it could be your ticket to dodge the substantial cost of bleaching hardwood floors professionally, which could set you back up to $550 on labor alone.
So, how do you get started with bleaching a wood floor? The answer lies in carefully selecting a wood floor bleaching kit — a wise choice goes a long way in tackling specific discoloration issues. For example, if iron, rust, water, or even urine stains are the villains, oxalic acid is your best choice. Similarly, if your wood color needs a transformation, a two-part bleach has your back. Of course, this DIY endeavor should be infused with respect for a host of safety precautions.
Steps to bleach your wood floors
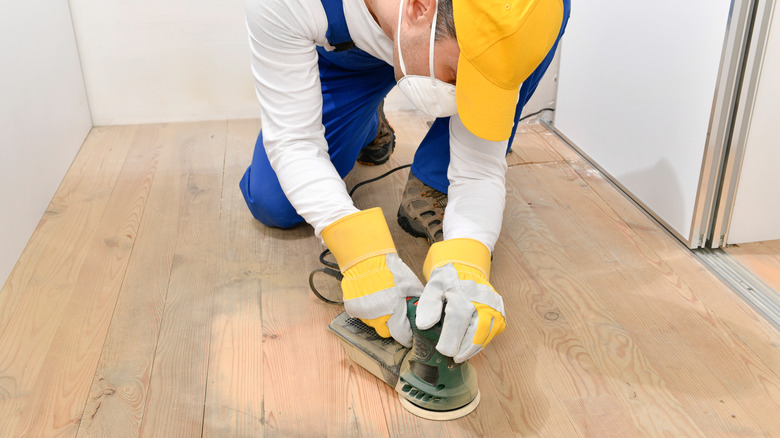
First up is gathering the required supplies: waterproof gloves, a dust mask, safety goggles, a plastic bucket, a shop vac, your bleaching agent, an orbital sander, a scrub brush, and a wooden stick. Dressed in proper PPE, you're ready to charge into the frontline of this transformational journey. This expedition is best undertaken in the open air of a well-ventilated space. Now, wield your orbital sander (The BLACK+DECKER Orbital Sander on Amazon is an excellent choice), going in sync with the wood grain to expose its deepest pores. That allows the bleach to seep in flawlessly. Then, engage your shop vac in a vacuuming spree to remove the dust and dirt that could sour the upcoming wood bleaching process.
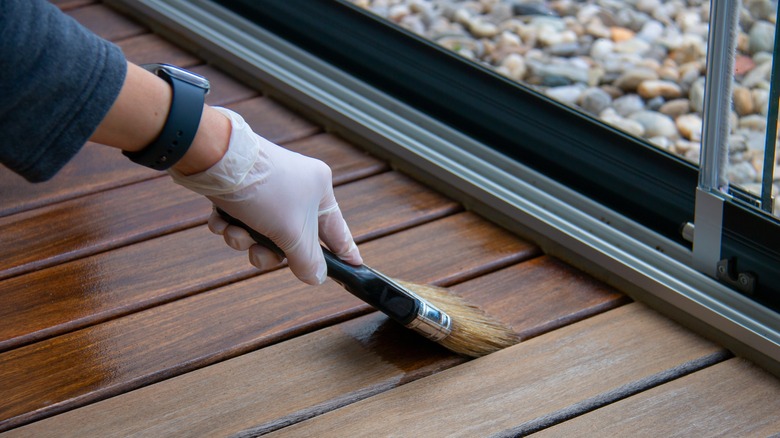
Based on the manufacturer's instructions, concoct the bleaching mixture in your plastic bucket. Why plastic? Metal and a bleaching potion can be dreadfully reactive. And in the same vein, use a wooden stick for stirring. Next, conduct a patch test on a hidden spot. Once ready, unleash the mixture onto your wood floor using a synthetic-bristled brush or a soft cloth, then let it work for about 10 minutes. From there, perform an essential neutralization ceremony by rinsing the bleached floor with an equal-part blend of white vinegar and clean water. A 24-hour air-drying period will suffice following mopping. After that, a final light sanding acts as an encore before the bleached surface can be refinished.
Caveats for bleaching your wood floors
Bringing hardwood floors back to life with bleach is a delicate dance between you, your tools, and the discoloration. It's not a one-size-fits-all solution because certain wood types like Brazilian cherry, cedar, white oak, and mahogany just don't play nice with bleach and might end up discolored. You have better luck with ash, gum, red oak, and beech varieties. In the heat of the moment, avoid cross-contaminating brushes and rags, and if those chemicals splash on your skin, act fast with soapy water. You might think you grasped it all, but a simple glance at your chosen bleaching product's label could be your north star for safe and effective usage.
Whether you're working with oxalic or another bleach type, wear safety goggles first. You never know when a capricious gust could send a powdery plume of the bleacher not into your flooring but into your unsuspecting eyes. That's not the kind of adrenaline rush you're looking for. And here's a pro tip: Dizziness and lightheadedness are the last things you want while wielding a bleach-filled brush, so keep the working space well-ventilated. Some wood floor bleaching kits come with a handy neutralizer, so confirm before preparing the diluted vinegar neutralizer. Before slathering that bleach all over your floors, clear the area of items vulnerable to bleach damage. That includes carpets. Finally, don't be disheartened if your surface proves stubborn: sometimes, you need a few rounds of bleach treatments to achieve the desired results.