Easily Clean A Mini Split With Our Complete Guide
You've invested in a mini-split HVAC system too cool and warm a specific space in your home. Now, the key to maximizing this investment lies in regular maintenance. Specifically, you'll want to focus on cleaning the indoor and outdoor components at least every six weeks. Over time, dust, dirt, and debris can accumulate in critical areas like the evaporator coils and air filters. When this happens, airflow can be obstructed and make the system work harder, thereby increasing its operational strain and the odds of mechanical failure. The result? You may notice a spike in your energy bill too. This increase in energy consumption can be significant, making it all the more important to keep up with regular cleaning. Neglecting it can and even lead to a shorter lifespan for your mini-split system.
Additionally, the accumulated grime and dirt can become a breeding ground for pathogens, a public health concern. This compromises your indoor air quality and poses potential health risks if you have respiratory issues like asthma or allergies. But the list of potential problems doesn't end there. Inefficiencies from a lack of regular cleaning can also lead to increased wear and tear on your mini-split system. Therefore, making a habit of cleaning your mini-split system will help improve its efficiency and preserve its functionality.
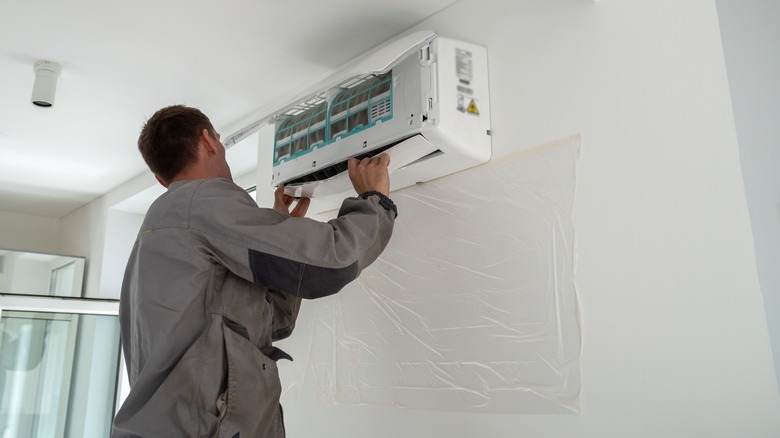
Cleaning the indoor unit of your mini-split

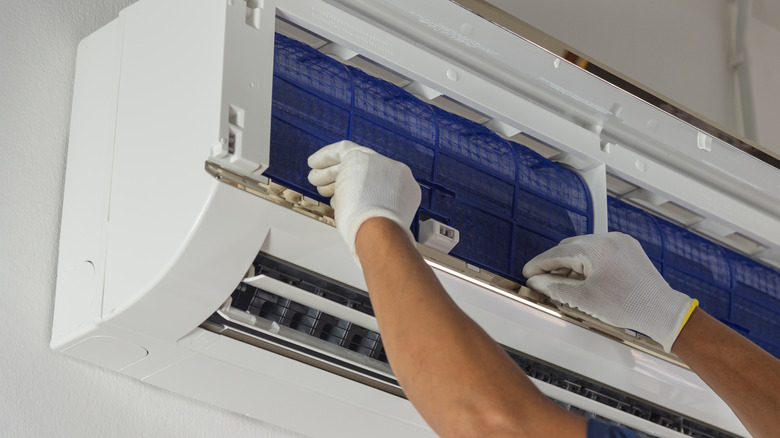
Begin by turning off the power source to your indoor unit. Once you're sure the power is off, lift the front panel to expose the internal components. Your mini-split has air filters that are critical to its operation. Depending on the level of grime present, you can use simple detergent and water to clean the filters. Next, shift your focus to the cooling fins. They resemble thin metallic lines, which you can find towards the back of the unit. These parts are designed to dissipate heat and improve airflow, but they can't perform as effectively when they accumulate dust. To remedy this, you can simply blow on the fins or use a canister vacuum attachment.
Now, you'll need to access the evaporator coils by removing the cabinet. For cleaning these, a coil cleaner and dry cloth work exceptionally well. Lastly, it's wise to use an antifungal cleaner on the coils to ensure a healthy indoor environment. Mold and bacteria can easily develop in moist, dark places, making your mini-split's coils a prime candidate for fungal growth. A quick clean with bleach should suffice. Once you've completed all these steps, it's time to assemble everything. Reinstall the air filters, close the front panel securely, and turn the power back on. Run the system for a few minutes to ensure everything works as it should.
Cleaning the outdoor unit of your mini-split
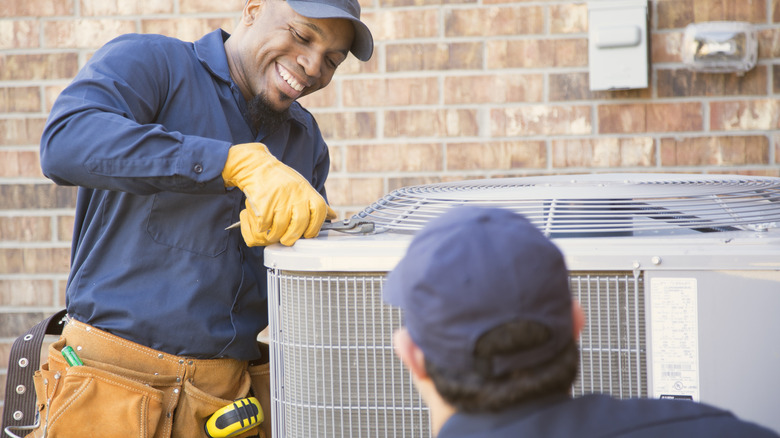
For the outdoor unit, your first move should be to switch off the power. Next, you'll want to look for things like grass clippings or leaves stuck in the system. A vacuum or brush may come in handy. However, you might want to opt for a specialized coil cleaner designed for HVAC systems for a deeper clean. The grill and the unit's base also shouldn't be neglected. For the stubborn grime hidden at the base, try a cleaning brush or a damp cloth to wipe it down. Give it a thorough clean since these spots often host the most grime and are harder to reach.
Next, scrub the grill clean and give it a good wipe. To do a comprehensive job, you'll need to remove the grill to access the fan blades. This is usually done with a screwdriver, so have one handy. Once the blades are exposed, soap and water can effectively clean them. Use a cloth to apply the mixture and wipe down each blade. Be cautious when handling the blades; they are delicate and can easily be bent or twisted, which would hamper their function. Ensure you also dry off the blades completely before reassembling the unit; residual moisture can lead to rusting, further complicating your maintenance tasks. After all your cleaning activities, ensure everything is put back where it belongs. Reactivate the power and give your system a short run to make sure all components are working as they should.
Weekly maintenance and troubleshooting
If you can, each week, it's worth taking a few minutes to dust the unit indoors and inspect the area around the outdoor components. A quick once-over can make a significant difference over time, heading off problems before they escalate. Your mini-split likely comes with a self-cleaning function. If so, you'll want to activate this feature once a month. This built-in maintenance mode takes care of internal cleaning to some extent, helping to maintain optimal airflow and reduce the accumulation of dust and bacteria inside the unit. It's a convenient way to supplement your manual cleaning routine, ensuring the unit is maintained to its highest capacity.
Another detail that's easy to overlook involves the system's hardware. Because your mini-split HVAC system is a mechanical device, it's natural for screws and small parts to become loose from the vibrations of regular use. While you're in cleaning mode, consider tightening these components. Now, despite your best efforts, you might find that your mini-split isn't functioning as it should. If you've gone through the cleaning routine and are still facing issues, it's may be time to seek professional help. Call in an HVAC specialist to troubleshoot the system. They can identify problems that may not be evident to the untrained eye, like refrigerant issues or electrical faults. Experts can diagnose the issue, fix it, and help you install a new mini-split HVAC, if needed. This will save you from bigger headaches and costs in the long run.