Turn A Fan-Favorite IKEA Storage Cabinet Into A Beautiful Window Seat
To make your house seem more upscale, more customized, and more personalized, a built–in window seat is a shockingly underrated feature. Yet window seats are one of those quirky architectural details designers love and realtors use as selling points. Unfortunately, in today's world of pre-planned neighborhoods and identical structures, there are very few mid-range homes with such unusual and eye-catching details. For most homeowners, their only hope of having a house with a window seat is to build the window seat themselves. And fortunately, there's a clever IKEA hack to help them do it. With just some 2-by-4s, plywood, trim, paint, and an IKEA BESTÅ cabinet, you can create your very own window seat for you and your family to enjoy — or to catch the eye of prospective buyers — in as little as two or three days.
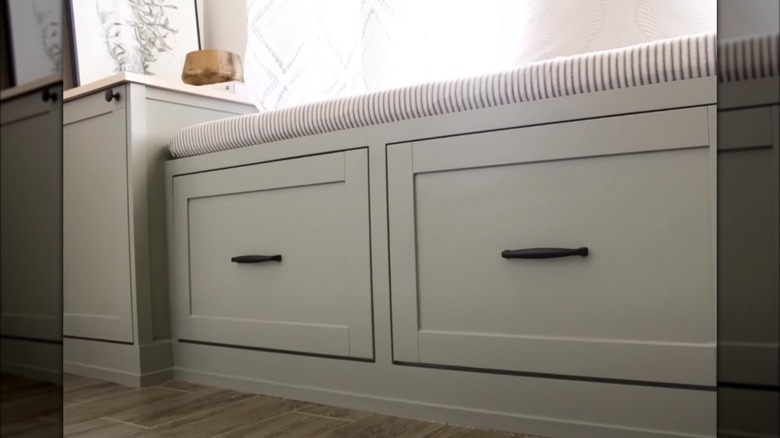
The IKEA Besta cabinet comes in a variety of sizes and configurations to fit your space and style. You can even fit them with drawers if you prefer that to standard cabinet doors, and the available door and drawer front options are numerous, ranging from plain to stylized to even glass. This allows you to truly customize your window seat for your needs and to reflect your personality, adding to the overall aesthetic of such an addition.
How to transform an IKEA BESTÅ cabinet into a window seat
Measure your space and decide how to lay out your window seat, including the size and configuration of the cabinets. Chances are your windows currently sit flush against a flat wall, so the seat itself will jut into your room, making it likely best to place it along a wall where the windows are nestled close to a corner.
To fortify the structure of your seating — which BESTÅ cabinets are not designed to accommodate – construct a frame out of 2-by-4s that your cabinets will rest on, attach it to the wall, and set the cabinets in place without the doors or hardware attached yet. Then, surround the cabinets and the spaces between them with additional framing using 1-by-4s or 1-by-2s if desired. Pre-drill all necessary holes for your wood screws to prevent splitting, and make sure everything is flush. Use ¾ inch plywood — adhered with construction glue — as the outer surface of the seat, and finish the construction with pre-primed trim to create a truly integrated look.
Tape off the floor, wall, and the inside of your cabinets, then finely sand everything down before priming and painting. For the smoothest possible finish, sand everything in between coats as well and allow each one to dry fully. Repeat this process with your cabinet doors, if desired, before installing. Add on handles or knobs as desired, then finish off your look with a decorative cushion and some pillows.