We Tried A DIY Soil Block Maker, And It Gives Jiffy Peat Pellets A Run For Its Money
An old post on Jill Winger's Prairie Homestead blog recently got us interested in the practice of soil blocking again. It sounds like an infomercial-style laundry trick or a way to make a rammed-earth cob house, but soil blocking is actually a way to make little compressed bricks of soil for starting seeds and nurturing seedlings. It has some advantages, like potentially reducing the need for flimsy, disposable plastic pots and near-disposable propagation trays. But the main benefit is that soil-blocked seedlings are naturally air-pruned at the edges of the block, so the roots aren't disturbed when transplanting. The practice entered the American gardener's consciousness around 1989 when Eliot Coleman published his The New Organic Grower. Since then, Coleman has worked with Johnny's Selected Seeds to develop a variety of soil-blocking tools to make the process as simple as possible.
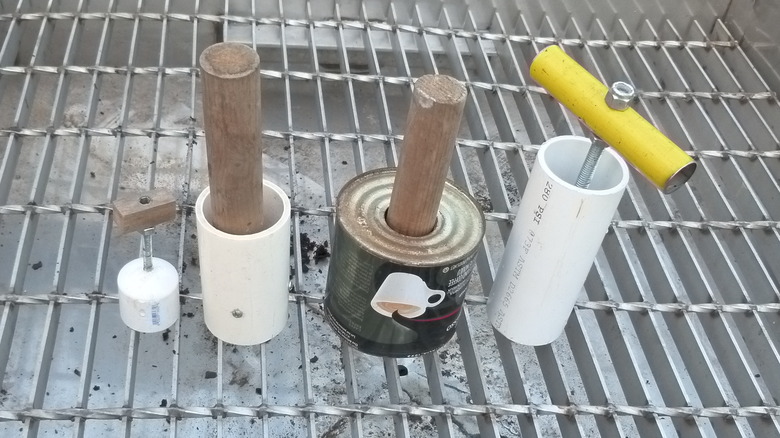
Gardeners are, of course, constitutionally averse to simplicity and by definition, have a penchant for doing things themselves. And so was born, somewhere along the way, the notion of making a DIY soil blocker. Winger discusses two approaches... one built from a tin food can and another design improved by her husband and constructed of PVC pipe and wood.
Now, none of this is new to the gardening world; 1989 was a shocking 34 years ago, after all. And so this was not our first soil-blocking rodeo. But reinvigorated by Winger's enthusiasm, we decided to have another go at the DIY approach.
How to build your own soil blocker
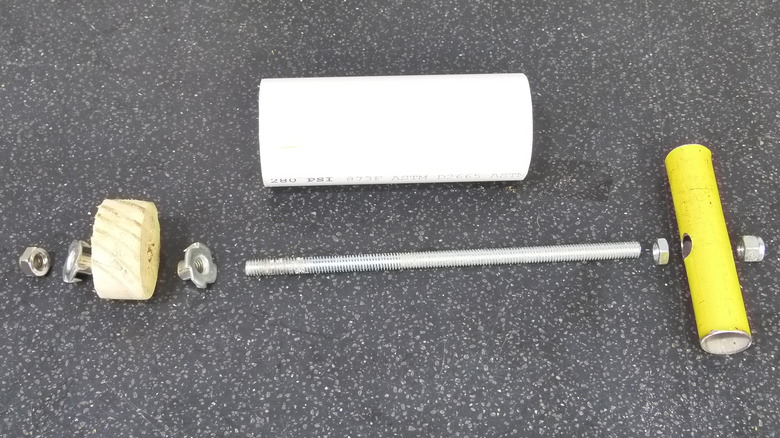
The tin can version of the soil blocker looked flimsy and a little dangerous. In typical DIYer fashion, we alleviated the risk of a minor can-lid cut by skittering a 12,000 RPM metal-cutting blade off a ⅜-inch threaded rod (while, incidentally, wearing a shirt that had once been set on fire twice in a single day using the same tool to cut galvanized channel). We basically built a "new-and-improved version" using PVC (which is detailed on The Prairie Homestead), with a few simple upgrades: a threaded rod in place of a dowel allowed for a more positive connection to the wood disc (the "piston" part of this design). Our 6-inch threaded rod would have cost us about $5.27 at Home Depot for about twice as much as we needed, and the 4-inch length of 2-inch-diameter PVC pipe could be cut (six times) from a $7.96 length of Charlotte Pipe (also via Home Depot). Everything else we used was scrap or recovered: 2 3/8-inch nuts, two 3/8-inch T-nuts, a scrap of 1-inch-thick wood for the piston, a piece of an old work light stand for the handle, and a 3/8-inch locknut.
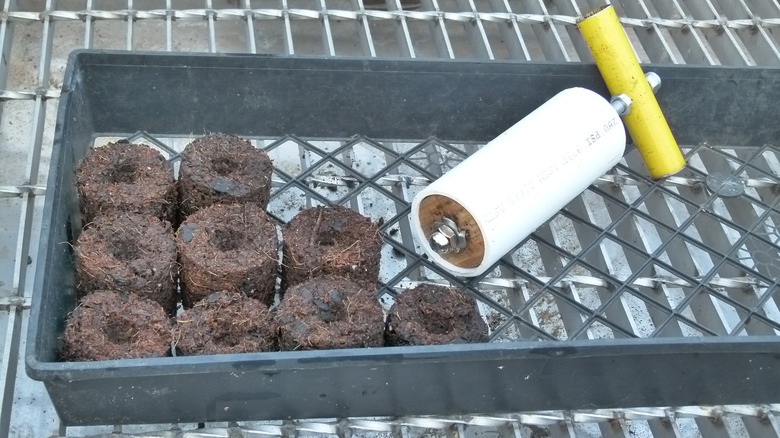
This promised to be an easy build. If it turned out that way, we hoped we could produce blocks of sufficient quality for less than the $119 Johnny's asks for its 4x4x4-inch blocker. We ended up making ours entirely with materials we had on hand, trading the larger 4-inch cube for a 2-inch cylinder.
Some pitfalls along the way
This soil blocker was simple to build and can be made with power or hand tools. In addition to the common tools every DIYer probably has on hand, we made good use of an angle grinder for cutting the threaded rod (you could simply use a hacksaw), a drill press (not strictly necessary), a hole saw to cut the piston end, and a belt sander to shape the piston (also not necessary, though sandpaper is). Assembly was a snap: At one end of the threaded rod, we screwed on the wood piston after inserting a T-nut into each side of it and then added a nut to righten the T-nuts against. At the other end of the rod, we screwed on a nut, a short length of metal pipe for a handle, and a locknut to hold the handle in place. The piston end fits into the PVC pipe, which you can cut with just about anything, from a table saw to a bit of string.
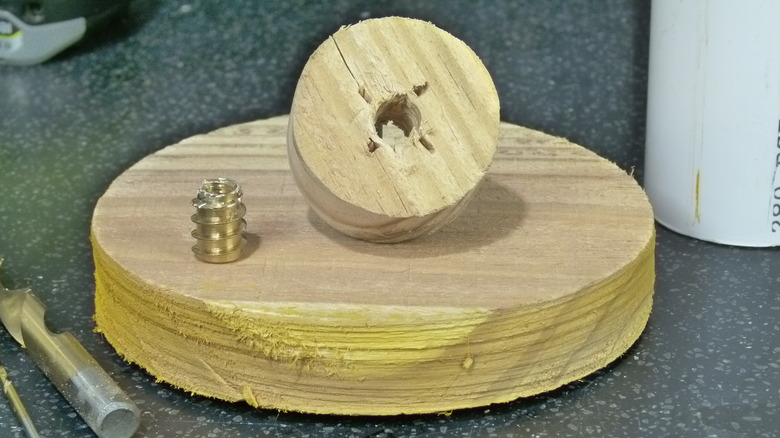
We did run into a few minor construction issues. The threaded insert we originally planned to use to connect our plunger head was flimsy and broke when we were screwing it in (or, one might argue, screwing it up). We remedied this by using T-nuts instead, but the plunger head ended up splitting along its grain when we drove in the T-nuts. We solved this on the second attempt by pre-drilling pilot holes for the T-nuts' wedge-shaped spikes.
It's a simple, effective, adaptable tool
One drawback of using the PVC approach is sacrificing the notion of a "dibble," as Eliot Coleman calls it: a depression in the soil block to receive seeds or smaller soil blocks. One of the benefits of soil blocking is the ability to "pot up" plants as they grow by simply sticking the current soil block into a properly sized depression in a larger one. The original design has no mechanism for creating dibbles, even for seeds. Our threaded-rod adaptation accepts any attachment with ⅜ threading; we used a simple acorn nut, but anything you can devise with ⅜ threading will work. So, it would be fairly easy to create a 4-inch cylinder with a dibble that can accept 2-inch blocks.
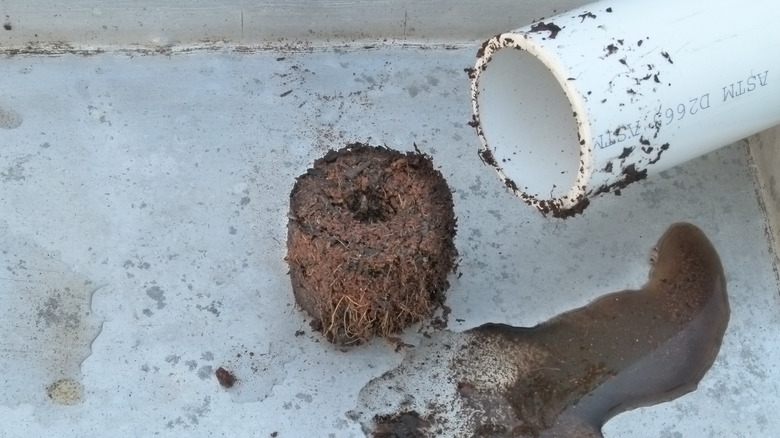
Soil blocks aren't hard to make with this contraption. It worked well and required no more effort to operate than, say, a can opener. Our homemade soil blocks are easier to rehydrate than the Jiffy peat pucks you've seen at Home Depot, are made from potting soil with nutrients to sustain seedlings longer, and are cheaper. There were minor problems along the way. We cut our plunger pistons too large, so when the wood got wet and swelled, it was difficult to push until we sanded it down more. And the position of the locknut on the handle dug into our hands, making it difficult to use one-handed.
But there are some concerns
We do have other concerns, as well. Without the Jiffy puck netting to hold them together, it's fairly easy for these soil blocks to fall apart if over-watered, as noted by Jessica Chase of Sierra Flower Farm. Perhaps worse, it seems like there's some potential for our cylindrical blocks to dry out faster than the typical cubes produced by Eliot Coleman and others' soil blockers. While a 2-inch cube has more surface area than a 2-inch diameter cylinder from which to lose water to evaporation, some of that difference is protected by having more area on the bottom, and most of it is protected by having cubes nestled closely next to each other in a way that isn't possible with cylinders.
Also, you might be wondering why, since soil blocks typically sit in propagation trays, you wouldn't just use a propagation tray full of soil to grow your seedlings in. That would probably work in many cases, but remember that potting up the seedlings would require disturbing their roots in a way that doesn't happen with air-pruned roots in soil blocks. So, any plant that is sensitive to root disturbance would benefit from the soil block approach. For any plant that prefers direct sowing or otherwise has trouble with transplant shock, soil blocks are a great choice. They're probably also useful in a commercial setting where things must be moved around and potted up efficiently. Otherwise, you're probably going to do fine without them.
