The Pantry Staple That Makes Hanging Photos On The Wall So Much Easier
Sometimes we have a beautiful vision in our heads of how a photo or art piece will look on the wall, but when it comes time to hang it up, it doesn't look quite right. Hanging up wall art can get a little challenging, especially if you're dealing with a finicky sawtooth hanger or a heavy frame. But with all the focus on the mechanics of hanging, we can sometimes forget about the very first step in the process: choosing where the nail goes. This is where a cereal box or other cardboard box from your pantry could come in handy.
The complicated, time-consuming method for locating your hanging spot involves measuring both your frame's dimensions and the distance from the sawtooth hanger to the frame's edges, then finding the target point and marking it with either painter's tape or a pencil. This approach works, but there's a lot of room to make mistakes when hanging your artwork, and you could end up with lots of holes or pencil marks on your wall. While you certainly could purchase a picture hanging tool, you really don't have to, because you probably already have the necessary materials at home. With just some cardboard and a thumbtack, you can create the perfect DIY hanging device.
Use cardboard to position your wall art perfectly
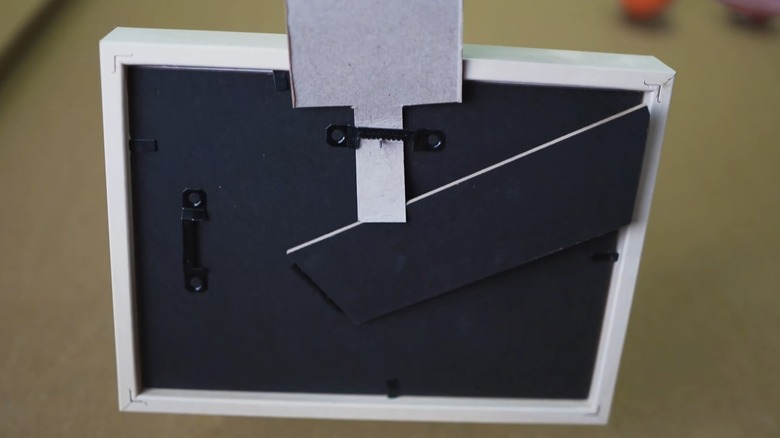
To make a tool for measuring the ideal nail location, you only need some lightweight cardboard and a flat, small thumbtack. For the cardboard piece, a cereal box usually works best in terms of size and flexibility, but any other type of box you find in your pantry can work as well. The steps for making and using this measurement tool are straightforward. First, take your cereal box and cut out a long, rectangular piece. To get an even shape, simply cut out one of the narrow panels on the box. Then, cut a small tab that will allow it to fit through the sawtooth hanger and place it inside.
Next, take a thumbtack, lift the small tab of cardboard that's underneath the sawtooth hanger, and push the tack through the middle of the cardboard with the pointed end facing outward. Slightly lift the cardboard until the protruding thumbtack hits the hanger. At this point, the picture should be hung on the thumbtack with the cardboard sticking out above the frame. Hold the art up to where you want it on the wall and gently push the thumbtack in, then pull it back out. And just like that, you have a little hole that marks exactly where the nail should go.