How To DIY Adorable Sweater Pumpkins On A Budget This Fall
We may receive a commission on purchases made from links.
The change in season is a perfect excuse for filling our homes with fresh décor. But you don't have to break the bank in the process. This budget-friendly sweater pumpkin DIY is the perfect way to get festive for fall and create cozy accents in your home to help you celebrate the season. It involves taking the sleeve of a sweater, stuffing it with some beans and filling it, and wrapping twine around the end to create the stem. The end result is an adorably plush little pumpkin.
You'll need dried lentils or black beans to place in the bottom of your pumpkin. If you don't have any old sweaters to use, head down to the local thrift store and find some in colors that will complement the rest of the décor in your home. You can get polyester fiberfill to plump up your pumpkins on Amazon for between $6 and $25.
The last thing you'll need is twine. This $6 roll of 984 feet of twine comes in white, black, and a natural color on Amazon. Using different colors will give your pumpkin display a little depth and break up the uniformity, but you can go with a single color if you prefer. Other items needed for this craft are rubber bands, a glue gun, and sticks. A heavy-duty needle and thread in clear or a color similar to your sweaters is also needed if you choose to create grooves in your pumpkin if you prefer.
How to make a DIY sweater pumpkin
First, cut your sleeve off. For a smaller pumpkin, cut the sleeve into two pieces. Turn your sleeve inside out. Tie one end off with a rubber band or twine, then turn your sleeve so it's right side out. Pour beans into the sleeve to give it some weight. An inch or two should do the trick, but you can add more if you want a wider shape.
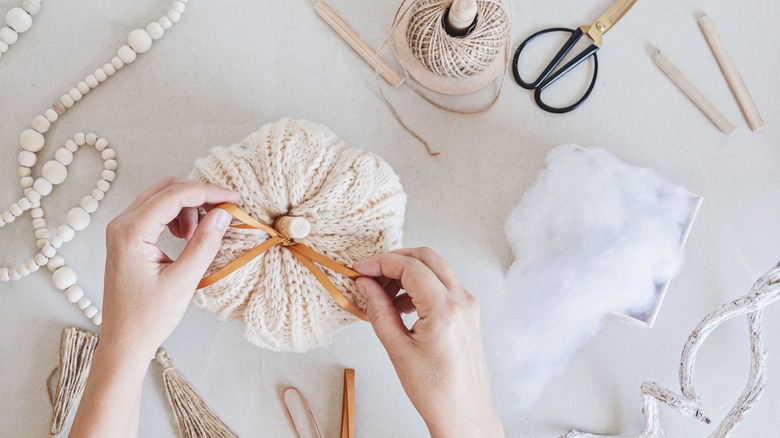
Stuff with polyester fiberfill depending on how fat or as skinny as you like. Just make sure to have enough room to tie off the end and leave enough excess material for your stem. Tightly close off the top of your pumpkin with a rubber band or twine. Cut the remaining fabric above your knot depending on how long or short you want the stem to be or at an angle if you want a tapered stem.
Wrap your twine around the knot so it's covered, and continue wrapping upward so that the excess fabric is covered and looks like a stem. Glue as you go along so the twine stays in place. If you want to create grooves in your pumpkin, thread your need and run it through the middle of the bottom of your pumpkin to the top. Bring the thread over the side of your pumpkin and thread back through the bottom. Pull it tightly to make the groove, and repeat to create more. Place them throughout your home and enjoy.