Easily DIY A Trendy Scalloped Doormat With This Clever IKEA Hack
We may receive a commission on purchases made from links.
Doormats are essential to have in your home for your family members and friends to use before they walk through the front door. Preventing dirt from entering your home can avoid cleaning up messes and having to mop multiple times a week. Even though you don't have to overthink what kind of doormat to buy for your home, sometimes you still want something trendy, like a scalloped doormat. Adding a fun-shaped doormat in front of your door adds a touch of flair and gives your home a welcoming feel before entering the house. It shows guests that you put thought into everything you bought for your house outside of the paint and furniture you chose.
While doormats can be a little pricey, there's nothing better than DIYing your own scalloped doormat. Instagram DIYer Deborah Stubbington found the perfect hack for recreating the beloved scallop doormat using a basic IKEA doormat. It's beginner-friendly, affordable, and quick to make. Stubbington claims it took her less than half an hour to complete her Instagram caption. She used IKEA's Sindal doormat for $9.99 for her project. You can use any woven textured mat with rubber backing to keep it in place. She also used a round glass, sharp scissors, a ruler, a glue gun, and a jute ribbon trim.
How to DIY a scalloped doormat
Instagrammer Deborah Stubbington started her scalloped-edge doormat by tracing scallop shapes on the back of the IKEA mat with the round glass and Sharpie. Draw the scallops side by side; you don't have to trace the entire cup — half the cup will work perfectly. You want to draw the scallops along each side of the doormat's back. Then, using your ruler, measure 5 centimeters from the doormat's edge on each side. It'll help you to cut the outlines much easier.
Once you measure each line, it's time to cut the mat. Start with one of the doormat's corners and cut it into a curved shape following the scallop outline. Next, continue cutting along the lines you made. When you reach the center of two scallops, you'll cut a triangle piece showing where the next scallop starts. Repeat the step until you make your way all around the mat.
After you finish cutting, hot glue your jute ribbon. You'll want the ribbon to fold over both sides, so hot glue the top half of the ribbon to the front side of the doormat and then the bottom half to the other side. Take your time to get every piece glued. When you reach the centers, slightly cut the ribbon to align it with the curve and points of the scallops. Finally, place the doormat by your door when you're done gluing the ribbon.
Why this works
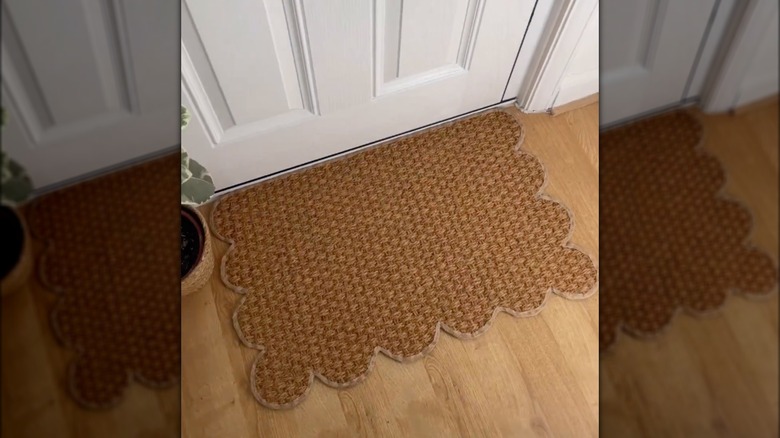
Put your DIY skills to the test with this easy scalloped doormat hack that Instagram DIYer Deborah Stubbington made. While it's beginner-friendly, gluing the ribbon can be challenging for some beginners, so it's essential to be patient and take your time. You'll end up with a gorgeous chic doormat for your home.
This project is excellent for those looking for a fun project to do or want to save money on a doormat. Stubbington's hack works because you're using an affordable standard rectangular doormat as your base and elevating its look. You don't have to use any expert-level machines, such as a sewing machine, to create your own rug, to begin with. Plus, it saves you money instead of buying a scalloped doormat from a retailer like Target for $50.
When designing your doormat, make your own changes to personalize your doormat. For example, Stubbington only adds scallops to three sides of the rug instead of all around so that it lines up with the door. But you can add scallops all around and still rest them against your door. Or, if you want to use a different ribbon color instead of jute, use black or white for a pop of color. DIY your doormat to reflect you and your home.