The Genius Way To Handle Light Fixtures When Painting Your Ceiling
Learning how to paint a ceiling can be a bit of a challenge. It's not fun to work above your head and to have to move the ladder around. You have to move furniture or cover it with tarps. Painting with a long pole and a roller on the end can lead to splatter. And that's all before you reach the light fixture in the middle of the ceiling. Painting around this fixture takes a bit of preparation, but you can make the entire process easier with a simple hack — disconnecting the entire fixture from the mounting plate, hanging it via a strong wire (like a clothes hanger), then wrapping it with plastic.
If you've never removed your light fixture before, you may be leery of doing this as a DIY job. However, you can do it safely as long as you feel comfortable working on a ladder. Just be sure to turn off the power to the light fixture before you begin working on it, eliminating the risk of an electrical shock.
You need to know how to use a circuit breaker box for this step. Start by turning on the lights in the room. Then go to your breaker box and flip off the switch that controls the power to the room where you're painting. If the lights go off, you have the correct breaker. If not, your box may not be marked accurately, requiring a trial-and-error process to figure out the right breaker.
How to remove light fixtures from the ceiling
Although most light fixtures are pretty easy to remove, it can be a little intimidating to do this the first time. Take your time and ask for help if you need it. Always work from a step ladder or a tall step stool rather than standing on a chair or on another piece of furniture — you run the risk of falling or damaging the light fixture while you try to reach up to it without good balance from your feet.
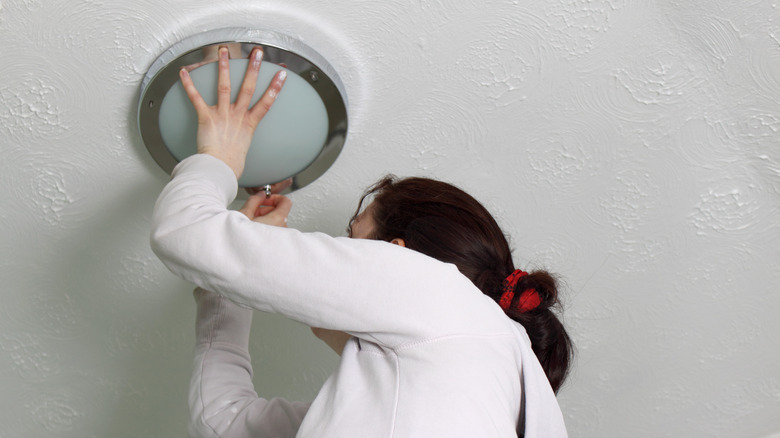
With the power off at the circuit breaker, climb the ladder and remove the light bulbs and decorative light covers. Many light fixtures have a cover that protects the wiring. It should have a couple of screws on the edges that attach it to the mounting bracket. Remove them and slide the cover down and out of the way.
At this point, you should be able to see a hole in the ceiling where the light fixture attaches to the home's wiring and to the circuit box. If you can reach the entire ceiling with your paintbrush now, there's no need to remove the fixture any further. If it is still blocking part of the ceiling, run your support wire or clothes hanger wire through any hole in the mounting bracket. Remove the fixture from the mounting bracket and hang it on the support wire. There's no need to disconnect the electrical wires.
Protect the light fixture from paint with a plastic bag
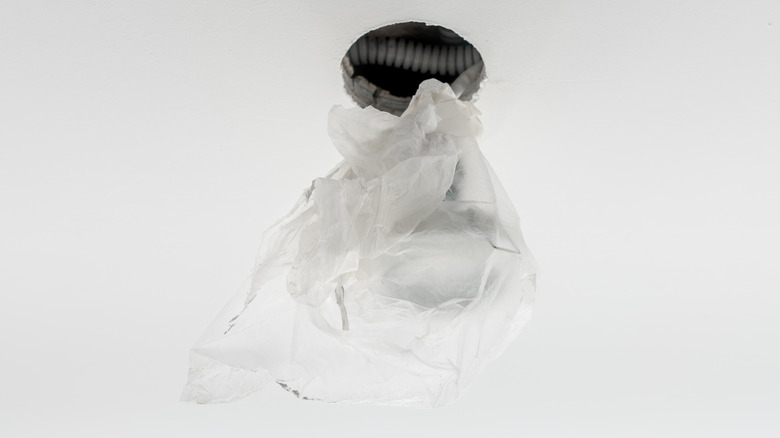
After you pull the light fixture loose from the ceiling, you'll want to cover it with plastic. A garbage bag should do the trick well. Even if you're being extremely careful when painting the ceiling, there's always a chance you could create splatter from the roller, or the paint could drip from the ceiling onto the fixture, so covering it in the garbage bag is a smart idea. You can use some masking tape around the top of the plastic to secure it.
Once you finish painting, check for any bare spots that may need touchups. You may need to bring in extra lights if you can't inspect the ceiling's paint job closely enough without the light from the fixture while its electricity is turned off. If everything looks great — and once the paint is dry — remove the plastic and reattach the light fixture to the mounting box or circuit box. Reinsert the light bulbs and decorative covers and turn the power back on at the breaker box.
Should you decide you cannot remove the ceiling light fixture, you can use the garbage bag hack to protect it. Wrap everything in the plastic and use masking tape to secure the plastic to the fixture. Then carefully apply more tape to the cover near where it meets the ceiling to protect it from paint, just like you'd protect molding or a window frame.

