Brighten Up Your Patio By Transforming An Old Hula Hoop Into A Gorgeous Wreath

Outdoor decor is a great way to infuse personality into your backyard, front porch, or patio space, but the costs for even simple decorative items can quickly skyrocket. Cut those costs dramatically by upping your game with some handy DIY tricks and hacks. For instance, to create a beautiful decorative wreath, pick up a hula hoop at Dollar Tree, Walmart, or another discount department store — or use an old one your kids no longer take an interest in. With a few craft supplies, a hula hoop can be repurposed into a lovely and lively statement piece.
Decorative wreaths have long been a staple of outdoor decor, and they can either be year-round or seasonally themed. They're not just for front doors anymore, either. Place them on an outdoor wall that faces your patio or deck space, use them as creative signage for your utility structure or carport, or just spruce up the look of your she-shed. However you use them, DIY decorative wreaths pack a lot of design bang for very few bucks.
How to make a hula hoop wreath
Once you've acquired your hula hoop, you're going to want to paint it, and you can either use spray paint or liquid paint and a brush. Whichever your preference, select paint that's specifically designed for plastics. This will ensure it adheres well to the hoop and will be able to endure the harsh environment of the outdoors without peeling or cracking. Apply the paint as directed, covering the entire circumference of the hula hoop. Once it has dried and you're completely happy with the finish, you can move on to creating the bulk of the wreath.
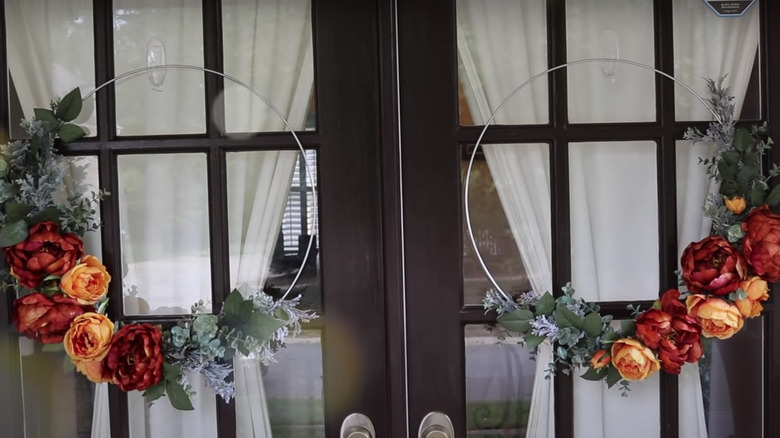
Take your painted hula hoop and gather your other supplies. You're going to need faux greenery and florals, a garland, and florist wire. Weave the garland around half your hoop in a semicircle, securing it with the florist wire. Next you should layer your chosen faux flowers and flora around the garland in a way that looks beautiful to you. Play around with it, then use the wire to secure those in place as well. Add or subtract items as you see fit, then find a place to hang your wreath where you and your guests will get to enjoy your handiwork. Straight up and down or at a jaunty angle, your new DIY wreath is sure to bring a smile to your face for little time and effort.
Tips on completing this hula hoop DIY
As stated, there are two different options for painting the hula hoop, and both have their own pros and cons. The first method is spray painting, and the other is brush painting. Spray painting is quicker and will provide a more even finish free of brush strokes or gaps, but it should be done outside or in a well-ventilated room and your color selections may be limited. Painting with a brush is the more traditional method and can allow for a lot more detail work with infinitely more color options — especially considering you can mix different hues together to create your own custom color. However, it takes longer, requires more materials, and can come out uneven or streaky if done with an unpracticed hand.
There are also a couple ways to make your wreath extra unique. For instance, you could hang a message such as "welcome" or "family" in the middle of the decorative piece. To do this, pick up foam words or letters at a craft store and tie them to the hula hoop with clear fishing line. You also have the option of adding fresh flowers to the mix, which you can replace as needed. To include these, place each stem in a water pick before securing them to the hula hoop with floral wire.