Transform A Vintage Tin Can Into A Beautiful Plant Pot
Regardless of how modernity evolves, vintage decor will always have its place to shine and will always be desirable. All you need is a little creativity and you will see that creating beautiful, eco-friendly, and versatile home decor does not have to break the bank.
In this particular case, we are talking about vintage tin cans. With a few easy steps, you can transform an ordinary tin can into a beautiful plant pot that reflects your personal style. Not only is this project incredibly easy, but it's also a fantastic way to upcycle and make the most of what you already have. Let's see just how exactly you can create your own DIY vintage tin can plant pot.
So what do you need? Well, first we must find and prepare the tin can. You can use something of a vintage kind already or a tin can that may be designed in an interesting or special way. If you are unable to find either, a basic tin from, say, a can of beans will do just fine. Next, we have to remove the label or residual adhesives from the can. The best way to achieve this is to soak the can under hot and soapy water and gently scrub it off. If the can is rusty, use sandpaper or WD-40 to smoothen out any sharp or rusty edges but please protect your hands and use gloves while doing this.
Getting creative with a one-of-a-kind plant plot
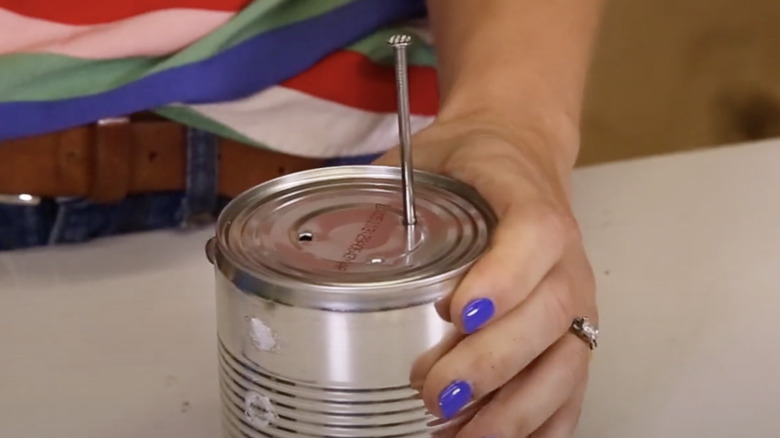
Although this step is optional, it is worth mentioning for those who may have had problems with overwatering in the past. Just like with any plant pot, the tin can may need some drainage holes. You can use a drill or a hammer and nail. Simply make a few small holes in the bottom of your can, three or four should be enough. This will allow for any excess water to properly drain out and prevent root rot or unwanted waterlogging.
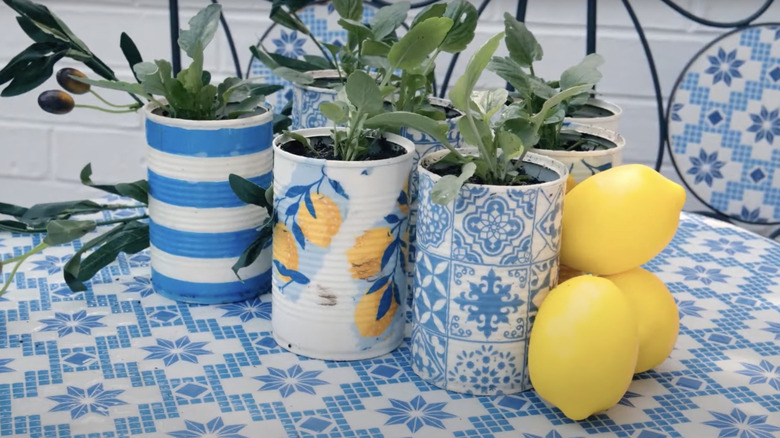
Now comes the creative part. Take out your craft scissors, get that double-sided tape or glue, and start thinking about the personality you want to give your soon-to-be plant pot. This is your chance to personalize it and make it a true one-of-a-kind. Here are some ideas to get you started: a vintage map, old wallpaper, vintage fabrics, scrapbook pages, decoupage, or even old leather! Your options are limitless, so long as you have enough to wrap around the circumference of the can.
It just gets easier. Once you have made your unique selections, take your scissors and cut the material to fit the height of your tin can. Smoothen it out to the best of your ability; this will give it a clean look without any accidental pinches or folds. Then, attach a piece of double-sided tape or glue from one end of the chosen strip to the other.
Final touches before it's fully transformed
Almost there. All that is left to do is the application phase! Oh, and by application phase, we just mean sticking your strip around the can and giving it a good seamless press. That's it. You have turned a tin can into a beautiful plant pot while keeping that special vintage spirit embedded into it. It's hard to believe why anybody would ever have to buy a plant pot again. But let's not just sit there and admire how amazing it looks: Let's add our plant! Start with a layer of potting soil at the bottom of the can, then gently place your plant inside. Add more soil around the plant until it is secure, then lightly press the soil down to eliminate any air pockets, and voila!
You can even consider adding some final touches, like a ribbon tied around the top, a few stickers, or even a sweet name tag for your plant. This is your creation, so let your imagination run wild! It's an upcycling project that anyone can undertake and the result is nothing short of original. Who doesn't want a plant pot that helps give life to a plant and a second life to something that may otherwise have been discarded? So the next time you are about to toss a tin can into the recycling bin, remember that with a little creativity, you can transform it into a beautiful home for a plant.


