Fake A Wooden Doorway With This DIY TikTok Trick
If you're living in an older home or apartment, it's common practice for builders to remove existing doors and open up walls in order to create a more airy and modern space. Unfortunately, however, this practice often results in a loss of some of the home's original character.
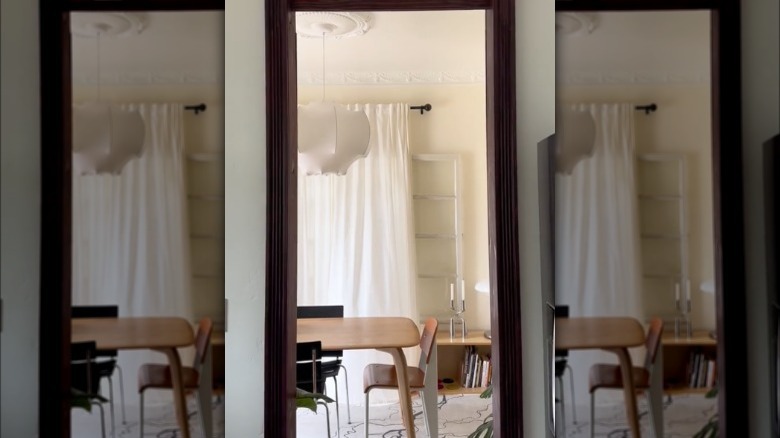
In an effort to bring some of those unique details back, TikTok creator Marco Zamora has been DIYing his own renter-friendly accents to transform his updated kitchen into something that looks a bit more personal. One of his most popular videos is all about adding a custom-built doorframe to a previously-drab archway. And while it might take a bit more effort than hanging a painting or adding some peel-and-stick tiles, it makes a major impact on the final look of the space.
This project requires a few basic carpentry skills to pull off, but installation is simple and easy to reverse if you're renting your home. All you need are a few pieces of wood, some nails, and your stain of choice, and you'll be ready to take on this DIY tutorial and create your own custom doorframe.
How to build your own wooden doorway
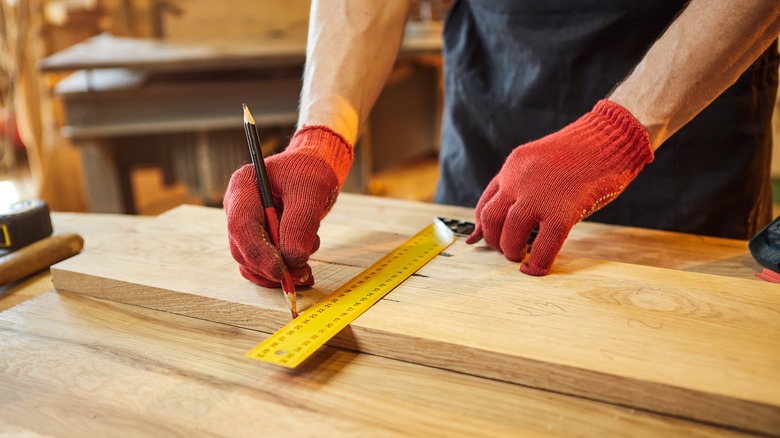
In his video, Marco Zamora works with a basic, finished doorway. It doesn't have any existing trim and it's a fairly simple shape to recreate, so this hack is perfect if you have a similar space in your home. He begins by measuring the existing doorway and heading to the store to pick up some wood and trim, then begins cutting the pieces to fit. If you plan to do this yourself, you'll need two pieces of wood the length of your doorway, one piece that matches the width, and three pieces of trim in those same measurements.
After cutting the pieces to size, he starts staining. Then, once everything is dry, it's time to get to work with assembly. In the video, Zamora assembles a U-shaped frame, then places it on the interior of the doorway. After nailing it into the interior of the doorway, he adds trim to the exterior to give everything a finished and polished look.
What to keep in mind with this DIY trick
Marco Zamora's series is all about creating renter-friendly DIYs, but the exact definition of what that means is entirely dependent on your landlord. In some situations, landlords and property owners allow minor holes in the wall and improvements that can be reversed at move-out. But it's always best to check ahead of time to ensure you won't lose your security deposit. If you don't think you'll be able to get approval or aren't willing to fill nail holes once your lease is up, this DIY is probably better to skip in favor of something less permanent.
If that's not an issue, however, this project presents plenty of opportunity for customization. In the video, Zamora chooses a deep cherry stain to complement his tiling, but you can easily swap this for a lighter stain for a bohemian look or paint if you're itching for a pop of color. There's also quite a bit of room to play around with the specific pattern and texture you choose for your trim. Flat and smooth options are great to achieve a more minimalistic look, while more intricate floral or fluted designs are solid choices if you want to create a statement piece.