The IKEA Hack That Will Transform A Shelving Unit Into A Beautiful Hanging Planter
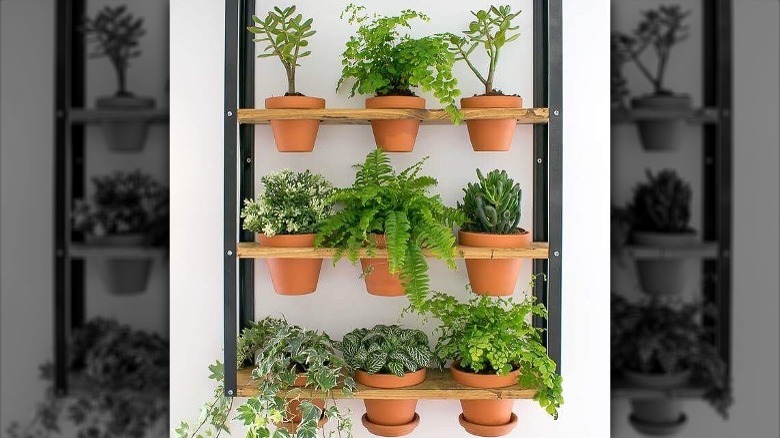
Are you craving a little fresh color in your kitchen, living room, or dining room? If your home needs a bright touch of mother nature, you'll love this IKEA shelf hack created by blogger and DIYer Medina Grillo. At first, Grillo thought about making the planter shelf from scratch using metal pipes, but she quickly realized that IKEA offers a metal shelving unit at a fraction of the cost, per Remodelaholic. With a little creativity, some wood planks, a hole saw kit, and a few artistic touches, she transformed the standard IKEA shelving unit into a charming wall planter that's perfect for indoor or outdoor use.
Whether you need a hanging shelf for fresh kitchen herbs or an outdoor potted plant rack, making your own cute industrial shelf is easy. Here's the step-by-step guide behind Grillo's simple shelving hack, including what you'll need to create your own planter shelves and some other fun ways to use this versatile furniture piece.
How to create the planter shelf
To create the wall planter shelves, Medina Grillo used the HYLLIS shelving unit from IKEA and gathered wood planks, wood stain, a metal-cutting hand saw, a hole saw kit, spray paint, and nine terra cotta pots. She also listed some other touches, including wood filler, glue, and polyurethane spray. Grillo recommends having a helper with you to determine the perfect location for your planter and aid in the process. "I often use my husband to hold things up against the walls before I actually put anything onto them," she wrote on Instagram. "The poor guy — sometimes I can have him standing in one spot for ages while I figure out whether it looks ok or not."
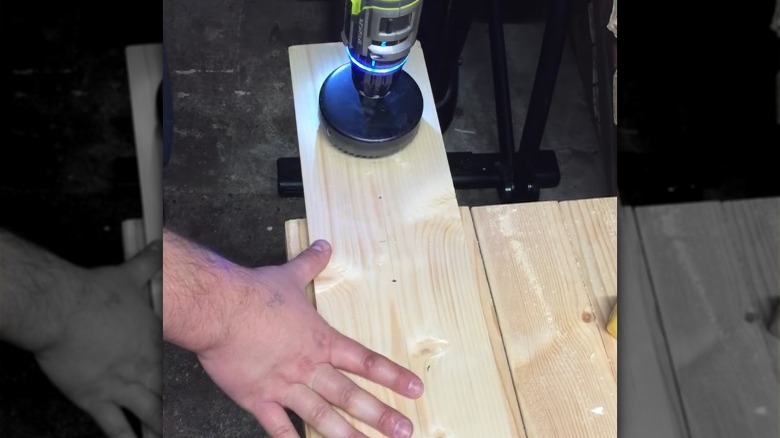
To recreate Grillo's hack, first, assemble the HYLLIS shelf, then cut the corners of the shelf so that they would fit against the wall as if the shelf is hanging upside down from the ceiling. Next, cut the three planks to your desired length for the shelves — Grillo chose to make them 23 ½ inches long and 5 ½ inches wide. Then detach the HYLLIS corner brackets from their original metal shelves, and then pre-drill holes in the brackets for the shelves, spacing them 9.25 inches apart. Drill additional holes to attach the brackets to the wall. Spray paint the corner brackets black, bronze, or whatever other color you'd like. Finally, use the hole saw kit to cut spaces in the wood for the pots, stain and seal the wood with polyurethane, then attach it to the metal frames.
Styling your new shelf
Once the shelf is complete, hold it up so the top touches the ceiling, and attach it to the wall by screwing the pre-drilled holes into studs. Plant your desired fresh indoor herbs, ferns, succulents, or houseplants in their pots, then slide them into the pre-cut space. You can remove the pots later for mess-free watering or leave them in their shelves for outdoor spaces. Grillo keeps her IKEA planter in her dining room, but her followers understood how this hack could easily adapt to benefit a kitchen, living room, or exterior garden. "Looks great," one commenter wrote on Instagram, "[I heard] somewhere that green plants can lift one's mood. I can see why." Another said, "I am so picturing this on my kitchen wall! But I'm worried I'll kill the plants."
If you want to try the hack for yourself but lack some confidence in your green thumb, the planter shelf can be used for much more than just live plants. In the kitchen, try storing utensils, tea bags, or rolling pins in the containers. For an art studio or home office, clear up space on your desk and use the shelf to organize paintbrushes, pens, scissors, and other essentials. Even hanging the shelves in a garage can make it easy to toss in spare screws, nails, nuts, pencils, and more!


