Give Your Furniture An Old Chic Look With This How-To On Distressing Furniture

Distressing is the art of making an object appear aged and worn, which contributes to a character-filled style that's unique to each piece of furniture. Using this technique is the ideal way to give your furniture pieces a rustic, timeless appeal. There are various ways to distress your furniture, but all methods allow you to infuse your furniture pieces with a vintage touch.
Obtaining this effect on furniture takes time, effort, and a few supplies. Don't worry; it's easy once you get the hang of it. It can also be a fun and satisfying do-it-yourself project, and it can be cheaper than buying real antique furniture. Almost any piece of wood furniture, like an old chest of drawers, a coffee table, or a desk you've had for years, can go through this process. The best part is that there is no wrong or right way to do it.
In this guide, we'll expand on these popular methods of distressing furniture. Depending on your desired look, you can choose to use either or both. Let's roll up our sleeves and dive in.
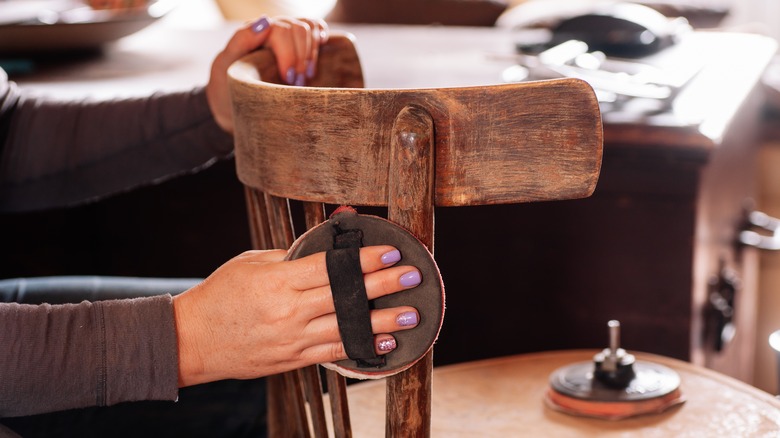
The sandpaper method
Distressing furniture using sandpaper involves layering and removing various shades of paint. You'll need two different colors of chalk paint (one for the base coat and another for the top coat), paintbrushes, a piece of cloth, and sealing wax for the finishing. Start by cleaning your furniture thoroughly to remove dust and dirt that may interfere with your distressing process. Once it's cleaned, apply your base coat. This is the color that will peek through the distressed areas of your top coat.
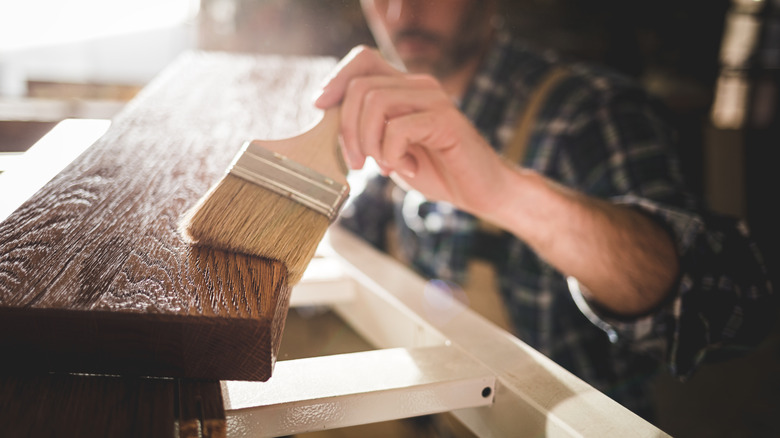
Let the paint dry completely, which may take a few hours. Next, lightly brush the second color, your top coat, onto the piece. Let some of the base coat show through for a naturally worn look. Again, allow this coat to dry completely. Once done, seal the furniture with a wax coat of your chosen finish and allow to dry. This will protect the wood and give your furniture a professional look.
Now comes the fun part — distressing! The sandpaper method is straightforward. However, it would help if you had various pieces of high- and low-grit sandpaper. First, determine the areas where the piece would naturally wear down over time, such as corners, edges, and handles. Take a sanding pad and gently rub it on these areas to reveal the base coat, continuing until you achieve the desired look.
The wet distress method
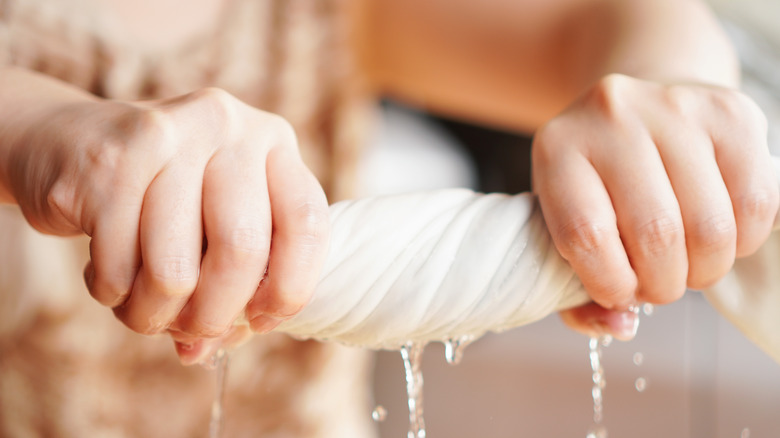
Wet distressing involves strategically removing layers of paint to reveal the base color underneath, simulating a naturally worn-out appearance. Unlike sandpaper, a damp cloth gives you more control over the distressing process. You can easily regulate the amount of paint you are removing, thereby controlling the level of distress.
As always, the goal of distressing is to mimic natural wear, so when using this next method, avoid uniformity. As always, start with a clean surface. Next, apply a coat of paint. Let the paint dry for 15 minutes to an hour, then wipe the still-moist paint with a damp, lint-free cloth. Gently rub it over areas where you want the base color to show through. The pressure you apply and the amount you rub off is up to you and will determine the degree of distress. Once you've distressed your piece to your liking, apply a coat of your chosen finish, which will help protect the wood.
Tea staining with iron acetate
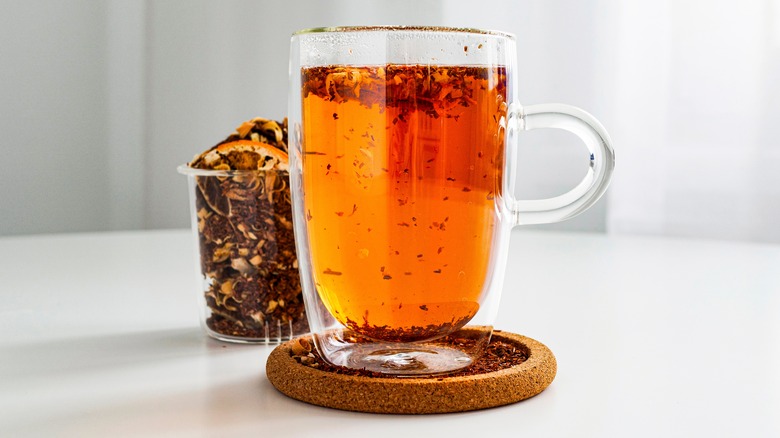
This next method involves a chemical solution called iron acetate, so work in a well-ventilated area, as it can have a strong smell. Start by selecting your piece of furniture. Ensure it's clean, dry, and free of any previous finish. If there's a layer of paint or varnish, you'll need to sand it off to allow the tea and iron acetate to interact with the wood.
Fill a glass jar with steel wool and white vinegar. The steel wool should be completely submerged. Let this sit for 10 hours, ensuring the vinegar dissolves the steel wool. Meanwhile, prepare your tea solution. Steep several black tea bags in a pot of hot water and let cool. The tea will provide tannins that react with the iron acetate to darken the wood.
Once your tea has cooled, apply it to your furniture piece using a brush or cloth, ensuring all surfaces are covered. Allow the tea to dry, keeping in mind that while the tea will darken the wood slightly, the main effect comes after the iron acetate application. After the tea-stained furniture is dry, apply the iron acetate. The vinegar and dissolved steel will react with the tannins in the tea, causing the wood to darken further and achieve an aged look. After applying, let your piece dry completely.
The drybrushing method
Drybrushing is a painting technique that creates a subtle textured effect with a dry brush, or one with very little paint, applying color to a surface. You'll need two contrasting paint colors to work with: one for the base coat, and the other for creating the distressed look.
First, coat the furniture piece entirely with the base coat and let it dry thoroughly. Then dip your dry brush lightly into the second color. Wipe off the excess paint on a piece of scrap paper or cloth until there's very little left on the bristles. Using light, quick strokes, brush the paint onto your furniture piece. Pay attention to areas that would naturally get worn over time, like corners, edges, and raised details.
The key to drybrushing is subtlety. Build up the effect slowly, layer by layer. Once you've achieved the desired effect, let the piece dry completely and apply a coat of clear wax or sealant.
The 'resist' technique

The 'resist' technique creates a barrier between layers of paint using wax or petroleum jelly, which results in a natural-looking worn-down effect. Generally speaking, the magic of the medium lies in its ability to resist paint. Start with a clean and dry surface before painting your chosen base color. Apply a solid first coat, allowing it to fully dry. Next, gather your resist medium and a small brush. Apply it over areas where natural wear and tear would occur over time. Smooth the resist medium with your brush, focusing on those chosen spots. Less is more in this step. After applying, allow it to sit for a few minutes to really seep into the wood.
Following this, you apply your second coat of paint, covering the entire piece, including the spots where you applied the resist coat. This is when the fun begins. After letting the second coat of paint dry, gently rub over the areas with the resist medium using a clean, dry cloth. The paint won't adhere where the coating is, allowing you to easily remove it and reveal the original paint underneath, creating a distressed effect. To finish, apply a clear coat of sealant for protection and let it dry completely.