Creative Ways To Upcycle Your Office Desk Chair
Upcycling is the process of taking old or discarded materials and transforming them into something new and useful. It's a great way to reduce waste and use items that might otherwise end up in landfills. When it comes to office furniture, upcycling is becoming increasingly popular, especially with office desk chairs. Instead of throwing out an old chair that's no longer comfortable or has worn out, you can give it a new lease on life by upcycling it. And using old material to create something new reduces the C02 we produce.
Upcycling office desk chairs can be a fun and creative way to add a unique touch to your workspace. You can customize your chair with your favorite colors, patterns, or designs to make it truly your own. By upcycling your chair, you're not only giving it a new look but also creating something more functional and comfortable for you to sit in. When you sit in a chair that you've flipped yourself, you'll feel a sense of accomplishment and pride, which can boost your creativity and productivity. If you're thinking of upcycling an old office desk chair, here are some inspiring methods you can try.
Supplies you'll need to get started
To start upcycling your office desk chair, you'll need a few supplies to help you transform it into something new and stylish. The first thing you'll need is sandpaper, which will help you remove the old paint or varnish on the chair. Once you've sanded the chair down, you'll need a good-quality primer to help the new paint adhere better to the frame. Then, you can choose a paint color that matches your office decor or one that you love. You'll also need a few different size paintbrushes to paint different areas of the chair. Don't forget to use drop cloths or old sheets to protect the floor and surrounding area from paint spills or drips.
If the chair has a fabric seat or backrest, you may want to reupholster it with a new fabric. To do this, you'll need an upholstery stapler and staples to attach the new material. You may also need a screwdriver to remove the seat and backrest from the frame. And don't forget to wear gloves and eye protection to keep yourself safe while sanding and painting. With these supplies, you can turn your old office chair into a stylish and comfortable piece that will add character to your workspace, all while being environmentally friendly. Let's now see how you can use these supplies to upcycle your office desk chair.
Reupholster the seat and backrest
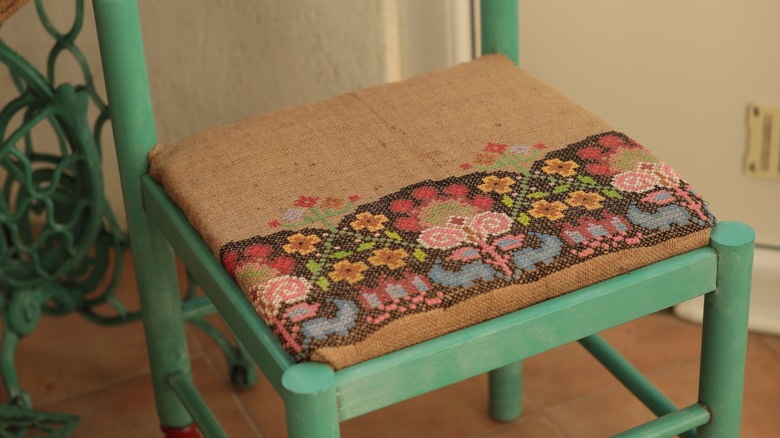
If you want to reupholster your chair, you'll first need to gather the fabric of your choice, a staple gun, staples, a screwdriver, and scissors. First, remove the seat and backrest from the chair frame with the screwdriver. Make sure to keep the screws in a safe place so you can easily reattach them when you're done. Next, use the scissors to remove the old fabric from the chair. Take care not to damage the foam cushion underneath, since you'll need that intact. Then, using the old fabric as a template, cut the new material to the appropriate size and shape. You want to ensure you're cutting enough fabric to cover the entire seat and backrest with a little extra for folding and stapling.
Starting with the seat, lay the new fabric over the foam cushion and staple it to the underside with the staple gun. Pull the fabric tight as you go to avoid wrinkles or sagging, and repeat the process for the backrest. Use the screws you set aside earlier and reattach the seat and backrest to the frame. Finally, use the scissors to trim any excess fabric from the edges. Your new office desk chair is now ready to go. Reupholstering is a simple and inexpensive way to transform the look of your piece, making it uniquely your own by choosing a fabric that is comfortable and in line with your style.
Paint the frame
Upcycling an office desk chair by painting the frame is an easy way to give it a new look and feel. For this project, you'll need sandpaper, a good quality primer, paint in your desired color, paintbrushes, gloves, and eye protection. You'll also need drop cloths or old sheets to protect the floor and surrounding area from paint spills. Remove any cushions or fabric from the chair and set them aside. Use sandpaper to rough up the surface of the frame. This will help the primer and paint adhere better. Using a paintbrush, apply a thin coat of primer to the chair frame. You may need different size brushes to work on specific areas of the chair, especially since you want to cover it evenly.
Once the primer is fully dry, apply a thin coat of paint to the frame. If necessary, apply additional coats until you achieve the desired color and coverage. Make sure the previous coat is completely dry before adding the next one. Once the paint is dry, reattach any cushions or fabric you removed earlier. Then, clean up any paint drips or spills using a damp cloth or paper towel and dispose of any used materials. Painting the frame of your desk chair is an easy and affordable way to transform the look of your workspace. Once it's dry, you'll feel like it's brand new.
Add some bling
If you're looking to add some pizazz and personality to your office desk chair, adding some bling like glitter and rhinestones can be a fun project to do. For this one, you'll need the bling of your choice, glue, and any other embellishments you want to use. You may also want to grab a paintbrush to help you apply the glue to certain areas. Begin by cleaning the chair thoroughly, making sure it's free of any dust or debris. If the chair has any cushions or fabric, remove them. Use a paintbrush to apply a thin layer of glue to the areas of the chair where you want to add the bling. Work in small sections to ensure the glue doesn't dry before you've added the embellishments.
Once the glue is applied, add the glitter or rhinestones to the chair. Be creative and have fun with it. You can create patterns and designs or just scatter the embellishments randomly. Allow the glue to dry completely before using the chair or adding any additional bling. If desired, you can add other embellishments like feathers, sequins, or beads to further customize your chair. You can also add paint to really help the bling pop. After the chair is fully decorated and the glue is dry, it's ready to use.
Add a cushion
If your desk chair is nothing more than a wooden structure, adding a cushion is a simple and effective way to freshen it up, not to mention adding some much-needed comfort and support. To do this, you'll need a cushion or foam piece, fabric, scissors, thread, a needle, and, if available, a sewing machine. First, measure the seat of your chair and cut the foam to the same size using scissors. Then, measure and cut the fabric to fit the foam, leaving a little extra on all sides to allow for sewing. Next, fold the fabric in half, with the pattern facing inward, and sew the two sides together with either needle and thread or a sewing machine. Make sure to leave one end open so you can insert the foam.
Flip the fabric inside out, and slide the foam into the fabric cover through the open end. Ensure it's centered before closing it up. If you prefer to attach the cushion to the chair, use a staple gun to secure it to the seat. Adding a cushion does more than give your desk chair a fresh look; it also provides a host of health benefits. According to Leesa, seat cushions improve posture, reduce back strain, and decrease pressure on your hips. They can even help support digestive health. And because there are a ton of fabric choices and cushions to choose from, you'll be able to find one that matches your personality and style and keeps you comfortable.
Add some wheels
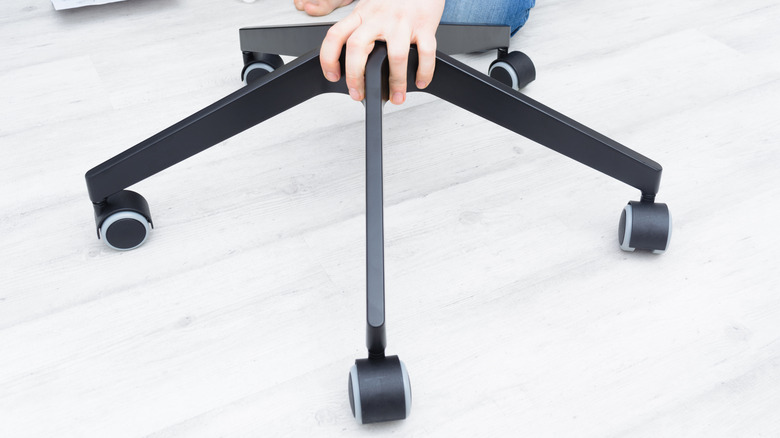
If you want to make your office desk chair more functional, you can upcycle it by adding casters or wheels. This project requires a set of casters, a drill, screws, and a screwdriver. You'll need to first remove the existing legs by unscrewing them from the seat using a screwdriver. Once the legs are removed, place a caster or wheel on the bottom of each leg, drilling screws through the available holes. You'll then want to stand the chair upright and test it out. Roll the chair around to ensure the casters are securely attached and that they glide smoothly.
While adding wheels to your office desk chair can make it more mobile, there are some reasons you might not want to use them. For example, if you have a carpeted floor, the casters may not roll as easily and could get stuck. And if your workspace is small or crowded, you may not have enough room to move your chair around. Casters could also scratch hardwood floors over time. And while wheeled chairs provide better mobility, non-wheeled chairs are more sophisticated in look and feel. So before adding wheels to your office desk chair, consider the potential drawbacks before you make the switch.
Create a hanging planter
There are other things you can transform your office desk chair into, especially if it's beyond saving as an actual chair. One upcycling project is to turn it into a hanging planter. For this, you'll need a drill, jigsaw, potting soil, plants, S-hooks or chains, metal brackets, screws, and rope or twine. First, use the drill to remove the seat and backrest from the frame. Then, cut the chair in half horizontally with the jigsaw. Drill holes in the bottom of each chair half for drainage and, if desired, sand and paint them. Attach metal brackets to the top of each chair half. Make sure the brackets are strong enough to support the weight of the planter when it's hanging.
Next, attach S-hooks or chains to the brackets to hang the planter from a sturdy ceiling or beam. You can also use rope or twine to hang the planter if preferred. Once you know it's sturdy, take it down and fill each chair half with potting soil and add your chosen plants. This unique and eye-catching piece will add a touch of greenery to your workspace and is an environmentally friendly solution to repurposing an old piece of furniture. Additionally, you can remove the seat, set a wide enough planter inside, and place it outside as a statement piece.
Turn it into an indoor swing
For a fun and creative upcycling project, you can turn your office desk chair into an indoor swing. To do this project, you'll need a drill, jigsaw, sandpaper, rope or chain, eye bolts, S-hooks, and paint or stain if you're going to touch it up. Use a drill to remove the seat and backrest from the chair frame. Then use the jigsaw to cut the legs off. Sand the chair to remove any rough edges or splinters. This is the time to paint or stain the piece if you're going to do that step. Next, drill two holes in the top of the chair for eye bolts and insert them securely.
Attach S-hooks to the eye bolts and a length of rope or chain to each S-hook, ensuring they are securely fastened. Finally, hang the chair from a sturdy ceiling or beam using ropes or chains. Ensure the swing is level and that the ropes are the appropriate length for the desired height. This unique and stylish piece will add a touch of whimsy to your home. Whether using it as a decorative accent or a place to relax, your upcycled swing will surely be a conversation starter. Just be sure to check the ropes or chains periodically to ensure they remain secure.
Add a chalkboard or whiteboard
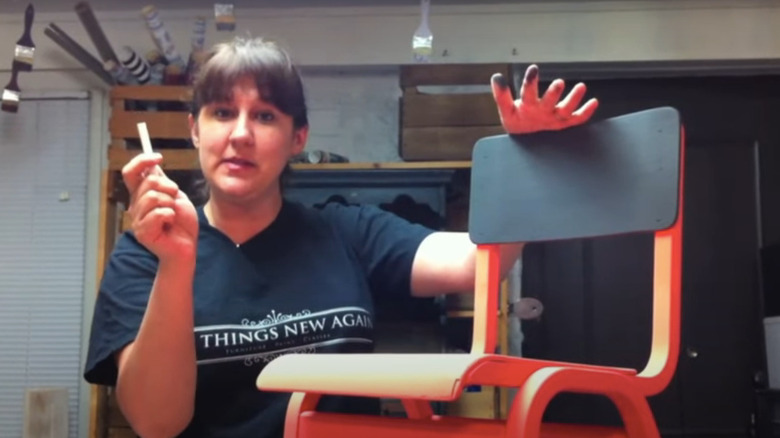
For all you note-takers out there, or for those who like a motivational message around, you can upcycle your office desk chair into a chalkboard or whiteboard. This project is fairly easy and requires sandpaper, primer, chalk or whiteboard paint, paintbrushes, painter's tape, and drop cloths or sheets. Start by laying out your drop cloth or sheet to protect your floor and surrounding areas. Clean the chair with a damp cloth, removing any dust or debris from the surface. Then use sandpaper before applying a coat of primer. Make sure to let it dry completely before moving on to the next step.
When applying the chalkboard or whiteboard paint, you can cover the entire chair or just the backrest and seat. Follow the manufacturer's instructions for the paint you're using, and be sure to apply at least two coats for maximum coverage. Once the paint is dry, add any additional designs or decorations to the chair. Use painter's tape to help you keep clean lines and get creative with your patterns. Finally, use a damp cloth to clean off any excess dust. Your new chalk or whiteboard is ready to be used.
