5 Simple Ways To Store Your Pool Floats And Accessories This Winter
The end of summer signals a number of things. From kids starting back to school to scarves and sweaters coming out of storage and from holiday preparations to picking out pumpkins, fall offers a host of activities and adds plenty to our to-do lists. Putting away any worn and torn summer belongings, such as pool toys, is something else to take into consideration. Indeed, it's important to store these items before winter sets in. This way, you don't have to deal with unnecessary clutter throughout the year and, instead, can manage it when the weather warms up again.
Of course, there will always be some floats and noodles in good condition that you'd like to keep for the following summer season. That's where proper storage comes in handy. Fortunately, this task doesn't take a whole lot of time and is easy to cross off the list.
Ultimately, this is key so you can preserve your family's favorite outdoor toys to be used for summers to come. Ahead, you'll find five simple ways to store your pool accessories this winter. No matter which options you choose, be sure to put away these items properly. According to PoolSupplies.com, they need to be completely dry. Leaving them out for a day in the sun while it's still warm should do the trick. Otherwise, use a clean towel to wipe them down. For inflatables, compress all the air. Then, pick a storage method and knock this project out in no time.
Contain into bins
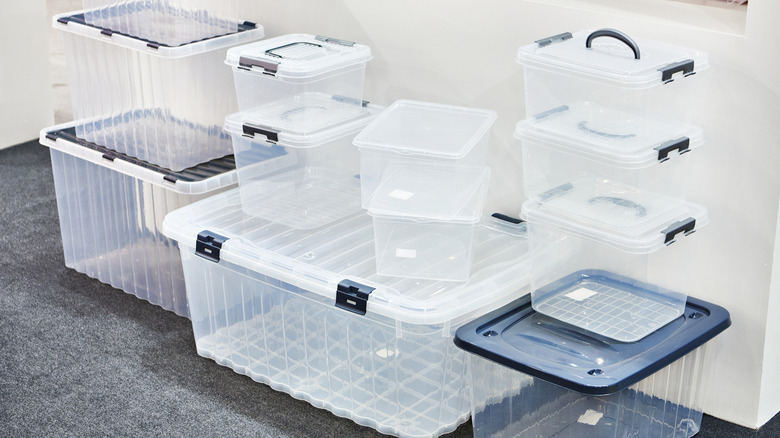
The best and easiest way to store pool accessories for the winter is to place them into containers with latching lids. Clear totes are also worthwhile since you can see what's inside; however, it's also recommended you label them for added convenience. Try sorting by category and storing similar odds and ends together, including beach balls and dive toys, to make labeling a no-brainer.
The Home Edit explains that by using totes like these, you'll be able to effortlessly move them to an out-of-sight space and then grab them comfortably next year. This area can be the garage, shed, or even the basement. A sturdy shelving unit is an ideal spot, as you can slide the bins onto the shelves. However, most lidded totes can stack easily onto one another. Before you go ahead and organize your things, you'll want to clean them well first to avoid any mold and mildew from forming.
As Nejame & Sons illustrates, the best way to ensure overall cleanliness is to place these sundries into a bucket composed of a mixture of vinegar or bleach, water, and baking soda. Then, use gloves to safeguard your hands and scrub these items thoroughly with a brush. Finally, rinse off everything with a hose and then let it all air-dry completely. You can use this same process for your inflatable balls and floats before deflating them.
DIY a deck box
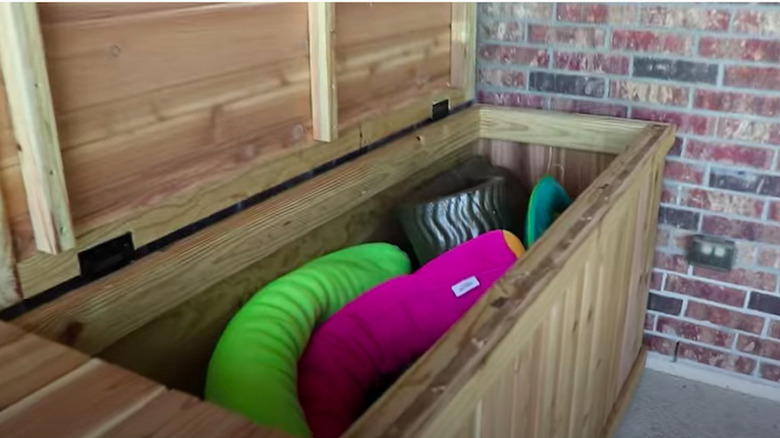
If you don't have the extra space indoors, such as in the garage, shed, or basement, then consider an outdoor weatherproof solution. Often used for items like outdoor couches and chair cushions, deck boxes can also serve as excellent storage containers for pool accessories. Going this route will save precious real estate inside your home while also keeping your belongings safe from the elements. As a bonus, these items will be in closer range of where they need to be accessed next summer.
For those who are handy, Lowe's explains that a deck box can be made from scratch using cedar or pressure-treated wood boards, hinges for the lid, and weather stripping to keep the air and moisture out. If you're not the DIY type, Pool Fun For Everyone recommends searching for such a storage container at your local hardware or home improvement store. In fact, a resin wicker box is not only roomy but is also durable and weather-resistant.
Ultimately, you can make or buy a deck box as big as you need for all your floats and toys. It's still important though to deflate any floats and balls before storing them away because they might be either too large or take up needless space. Of course, you could also store small toys, like rings or gems, into small lidded bins and then stack them inside the box alongside the bigger items.
Put up a pallet
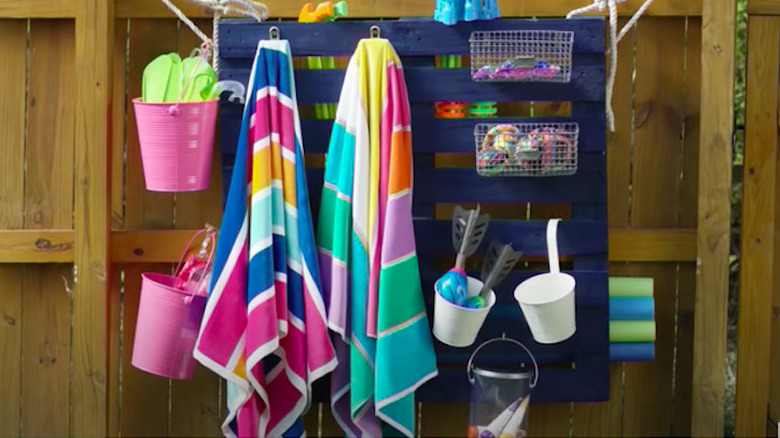
Pool noodles may be the trickiest items to keep organized — and that's often a year-round predicament. A fun and relatively uncomplicated DIY storage solution is to use a wooden pallet for the noodles to slide through. This can seamlessly transition from outside during the summer months to inside the garage or shed in the winter.
Once you get your hands on a pallet, sand it down well and brush on a bright paint color, as DIY Noodles suggests. For use during the warmer months, affix a few hooks on the front for regularly used items, like pool towels and pairs of goggles. You can even hang buckets or baskets to hold smaller toys and games. Then, simply slip any noodles you have lying around into the gap between the top and bottom of the pallet.
If you want to transition this entire system indoors once summer ends, avoid permanently attaching it to any surface, such as a fence or the side of the house. Instead, use a heavy-duty rope to tie it to something, ideally the fence. Then, as the weather starts to cool and it's time to close off the pool, the entire pallet can lean against a wall in the garage or shed. If you prefer, compile all the smaller items, including goggles and toys, into bins and leave the noodles stored horizontally until next year.
Create a caddy
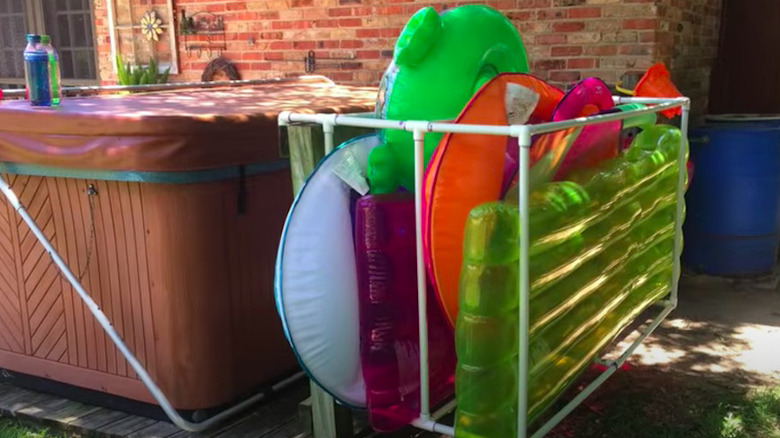
Yet another novice — and versatile — DIY project, a pool caddy will give you storage year-round. Clean & Clear Pools recommends using PVC piping to make this idea come to life. The beauty of this method is that there are countless ways to build your own, and you can choose to do so vertically or horizontally.
If you own a lot of long lounge floats and noodles, a vertical design will work well so that you can glide them in sideways. However, if you'd like to make it transportable for winter, similar to a pallet, consider crafting the caddy into a more compact shape, like a square. This way, you can drop in the noodles and larger toys upright without taking up too much space in the garage or shed during the winter months. Inflatables and most accessories should be placed in bins to avoid exposure to the elements, even when inside.
According to Home Inspection Insiders, PVC is an excellent material to use for a project like this because it's waterproof and generally isn't damaged by sunlight. If left out for a long period of time, you may notice slight discoloration. But remember, it will be placed indoors for most of the year, anyway.
Fortunately, for those looking to avoid making their own PVC puzzle, there are many premade options available from furniture companies. Some even come with wheels, making it easier to tuck it away as cooler weather approaches.
Repurpose a mesh laundry bag
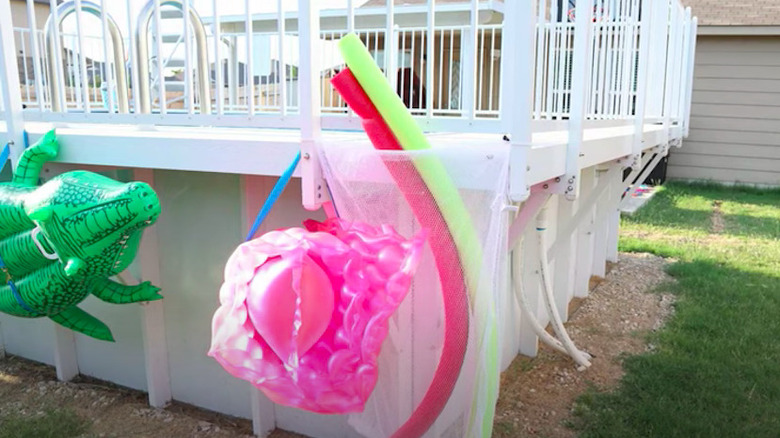
Perhaps the simplest and least expensive method of all? Using a mesh bag to corral floats, floaties, and balls takes minimal effort and is indeed rather effective. During the hot summer months, it can be tied to the side of the pool or a nearby fence, so all the kids (and adults) can grab what they need faster than you can yell "cannonball!" Best of all, the netted material lets items air-dry in between pool days.
Once swimming season is over, all you have to do is bring it indoors. Of course, drying and deflating any inflatable pool items is still highly recommended. After doing so, these items can then live inside the mesh bag beside the noodles and toys. Just make sure you feel comfortable with where the bag is being stored and that it's protected from the elements.
As an alternative, consider labeling a tall, plastic laundry basket and sticking the skinnier pool toys in it upright, according to Leslie's Pools. Plastic hampers, particularly those with drainage holes, are the best material to use, as opposed to fabric, wicker, and metal. That's because plastic allows wet items to dry quickly and helps prevent any mildew buildup.
Whichever storage method you decide on, Romper recommends that the floats and accessories not be stored in direct sunlight. Additionally, freezing temperatures may damage floats. Thus, it's best to keep them compact in a bin during the entire winter season.
