Travel-Themed Decorating Ideas
Traveling has a host of physical, spiritual, and emotional benefits. Learning how to decorate your home with a travel theme means you can display all your souvenirs in a way that keeps those special moments and memories close. However, you don't just have to decorate with mementos from your trips. There are many ways to incorporate a love of travel into your living space. Doing so might give you some travel benefits without ever having to leave your house.
Travelex explains that traveling relieves stress and helps to boost our mental health. However, it's not just the traveling that's good for you. Even planning for a trip and looking at dreamy places on Airbnb has a positive impact on your health. Having something to look forward to can help you through the worst days. Depending on how and where you travel, you can learn more about different cultures and open your mind to new experiences and ways of life.
It may also improve your fitness, depending on your travel style. If you visit Europe or even Disney World, you can expect to log thousands of steps on your fitness tracker. You can reap even more benefits if you're an active traveler who likes hiking, paddleboarding, or swimming. Travel can also improve your sleep because of extra activity and reduced stress. You can reap all these benefits at home if you decorate with a travel theme.
Turn travel photos into coasters
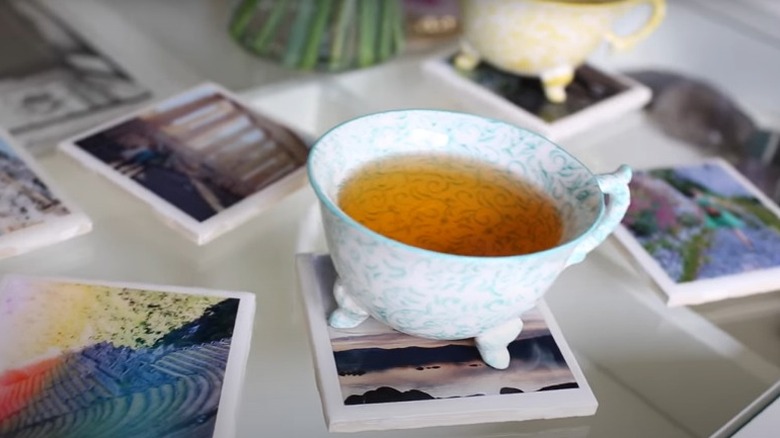
This clever idea allows you to revisit your favorite travel memories whenever you sit down with a drink. They can evoke memories of the people who traveled with you and inspire you to share stories with visitors who notice and appreciate the snapshots. According to Travel Inspired Living, these are easy to create with basic supplies you can get almost anywhere.
You'll need four to six plain colored ceramic coasters, depending on how many photos — and drinkers — you have. These can be any color you desire, but neutral shades like white, black, cream, or beige are the easiest to find. You'll also need Mod Podge, a foam brush, spray adhesive, travel photos, and felt cushions. New-age polaroids work great for this project because they are square.
First, cut your photos to fit the coaster. You can attach them with either spray adhesive or Mod Podge. Choose a matte or glossy finish, whichever best suits your preferences. Position your photo, and coat it with a thin layer of Mod Podge. You can do this with a foam brush or a foam roller. This step will initially obscure the photo, but it will dry clear. Allow the Mod Podge to dry completely before applying two more coats, leaving them for several hours in between. Once your final layer is dry, turn the coasters over and apply felt pads to the corners to prevent them from scratching your tables and other surfaces.
Construct a vacation memory photo map
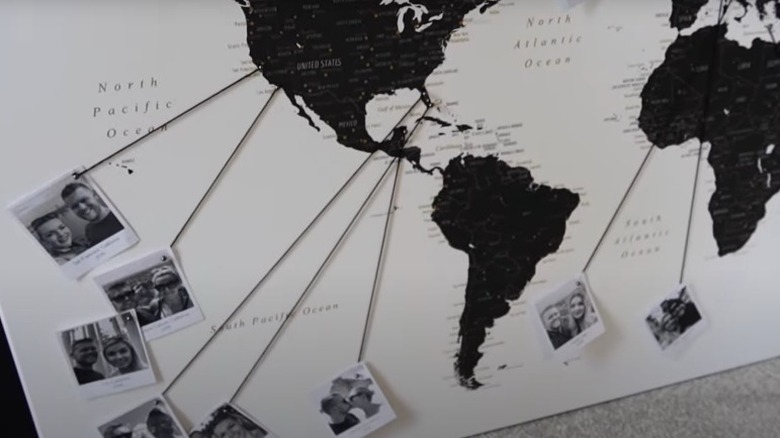
Get travel pictures off your phone and onto your wall with this fun travel-inspired DIY project. Per DIY Fun Ideas, you can link your photographs to the places you took them using a world map decal. Frame your photos any way you choose and use yarn to connect the frame to the correct location on your map.
There are lots of ways you can customize this project to suit your preferences. Instead of yarn, you can use tape or ribbon. Ribbon comes in various colors and styles to go with any decor. Different colors, sizes, and types of frames can also make this travel-themed decor pop. Consider choosing a few larger frames to fit three or four pictures together. Pair these with your smaller and medium frames to offset one another. The wall decal is black and pairs nicely with black frames, but if you're looking for more variety, you can also use gray. For eclectic wall art, select various colors to distribute around your map.
Build a dresser with global appeal
While this DIY project is time-consuming, the results are worth it. One of the best things about this project is that the piece of furniture you are decorating doesn't need to be expensive. You can choose the size, shape, and price you desire by visiting thrift shops, antique stores, or flea markets. Alternatively, you can repurpose a bureau or cabinet you already have.
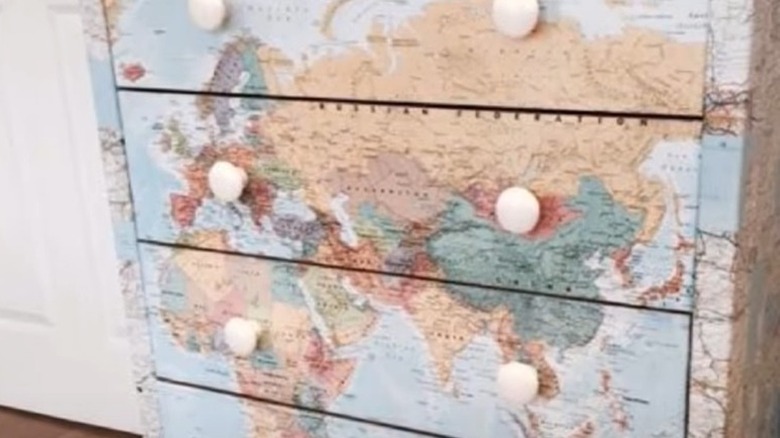
Re-invent your cabinet or dresser and give it a fresh face by attaching maps with Mod Podge or similar decoupage paste. Between the Rafters recommends practicing with a smaller project if you've never worked with Mod Podge before and staying patient. The decoupage process and cutting your maps to fit the size of your drawers will take time and effort. The finished result, however, will be stunning.
Like so many travel-themed decor projects, this one is totally customizable. An old-school map in yellows, creams, and whites will work best if you use a black or dark brown bureau. If you start with a white or cream piece, maps with large amounts of water create a perfect complement. If you don't have a bureau or cabinet in colors that go with your existing maps or vice-versa, you can fix this by starting your project with a can of paint.
Frame your foreign currencies
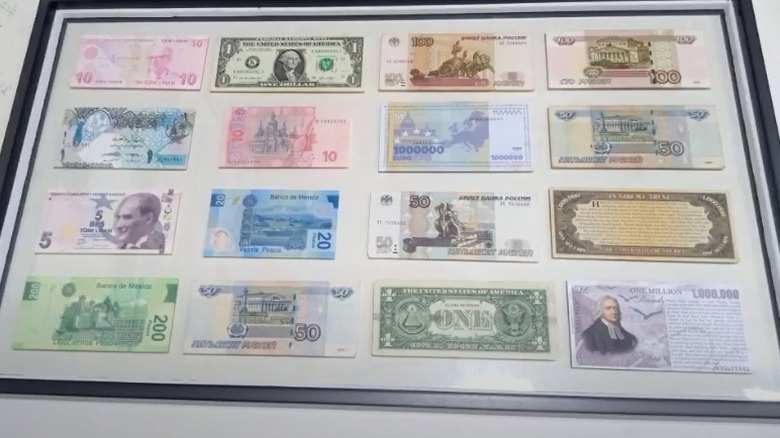
If you're a world traveler, you probably have a collection of coins and foreign currency around the house. While you could save them up for your next trip — maybe you're already planning one — you can also use them as decoration in your home. According to the School of Decorating, floating frames are ideal for displaying your paper currency from international destinations. You can use store-bought frames as-is or adjust them to best complement the currency.
Many countries use coins for smaller denominations of currency, making them more challenging to display. Most travelers store and display their coins in jars or small boxes. However, you can also use frames to display coins from faraway places (via Indigo Amethyst). You can glue the money to the back, or if you want the possibility of using it in the future, use a soft mounting foam instead. It comes in various colors, or you can cover it in fabric to create the look you want. Black or blue velvet will nicely offset your coins, no matter the material.
Build an international gallery wall
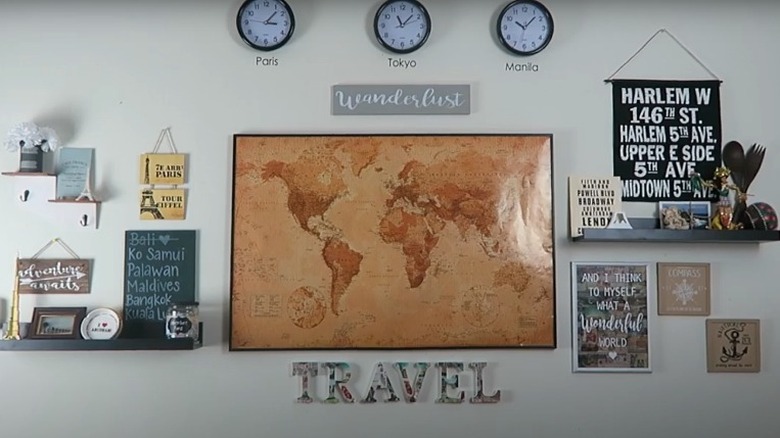
A gallery wall is a beautiful way to display your photos and other collected souvenirs from your travels. You can even create a clipboard with hinge clips to hang your smaller pictures or prints. This idea is a unique way to display odd-sized items from your travels. Hang ticket stubs, painted images, or photos from your Instagram account. According to Live Laugh Rowe, you will need plywood, polyurethane, brushes or rags to apply the polyurethane, metal hinge clips, screws, a screwdriver, 4 x 4 prints, and a sawtooth hanger to create your clipboard. Cut the board to fit the number of pictures — or other items — you will be mounting.
Start by applying polyurethane to the wood, then decide which direction to hang your clipboard and where to mount your clips. Drill holes and mount the clips with flathead screws. Attach the sawtooth hanger to the back, clip your photos or mementos to the clipboard, and hang it on the wall. When deciding on other items for your gallery wall, aim for frames of the same or similar colors, but choose items of different shapes and sizes for eye-catching visual appeal. Consider using mixed mediums as well — watercolor paintings, canvases, and photographs.
Create a travel-themed shadowbox
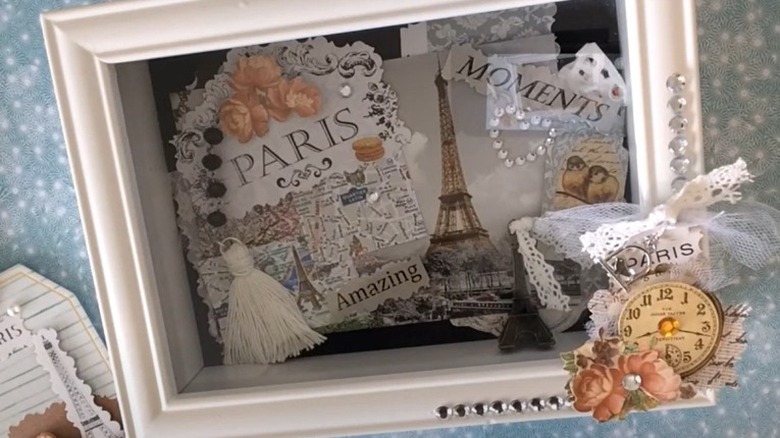
If you've collected a bunch of small tokens from your trips but haven't managed to do much with them, this may be the project for you. It allows you to assemble a small collection of photos and mementos from a trip and put them on display. It's a wonderful option if you're the kind of person who brings more than just photographs home from your travels. Shadow boxes allow you to display multiple items from a location in one place, which means you're not limited to two-dimensional displays.
Per A Sacred Journey, you can use a photo, print, or postcard as your background. Or use more than one, layered on top of each other. Build your shadowbox around the background display, or pick up a pre-made one from stores like IKEA or craft shops like Michael's, Jo-Ann's, or Hobby Lobby. Start by using an adhesive to attach your mementos to your background, including shells, tickets, pins, bills, and other small tokens. Add any accents you choose, like paints, pens, markers, glitter, embroidery floss, or whatever else you can imagine. Layering gives your display depth and lets you show off everything you collected from your favorite destinations in one place.
Turn your suitcases into shelves
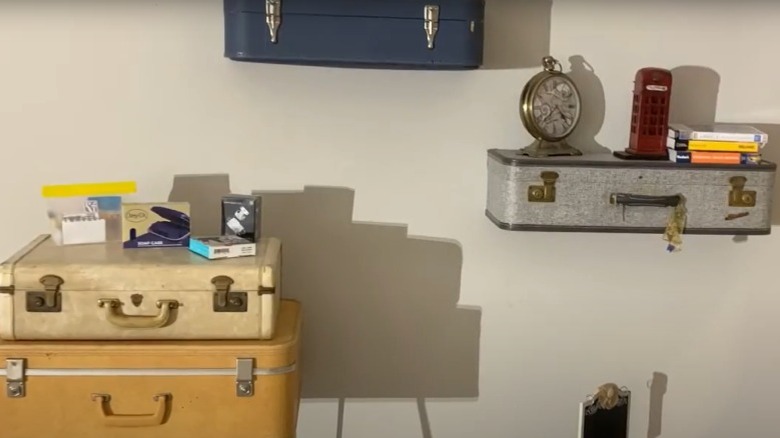
Don't start disassembling the suitcases you use for your travels; this design hack from Ki Nassauer Style works best with vintage luggage and trunks. Search thrift shops or online stores for well-crafted, unique pieces that speak to your personal style. Flea markets and antique shops are also good places to source your suitcases for this DIY project.
Once you've found your luggage, the first thing you'll need to do is remove the lining (via Instructables). Then, trim it to the appropriate size. This job is not for novices, so find someone with experience using a scroll or circular saw and a jigsaw. These are necessary for cutting through the metal band in most vintage suitcases.
Decide what depth you want your shelves to be, then apply a layer of painter's tape to mark where you will cut the suitcases. You will also need to cut pieces of wood to the same size and shape as your suitcase. You use these for mounting. Plan out where you want each shelf to go. Once you've picked your locations, attach the wood pieces to the wall using 2 ½-inch screws. Then fit the luggage over the wood, and decide what to display on your new shelves.
Light up the night with LED map candles
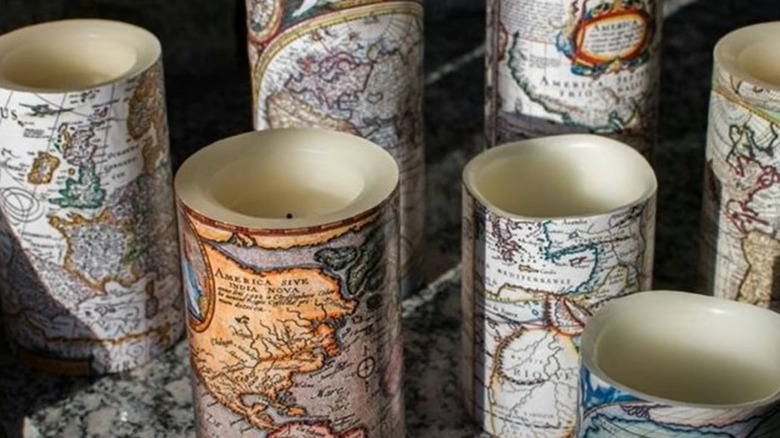
This idea from The Navage Patch is a genius way to give your standard LED candles a fun travel theme. All you need are some maps, Mod Podge, and LED candles. You have two options for applying the decoupage glue. You can attach it directly to the candle or put it on the back side of the map. The map is a slightly easier option in this case because it is a flat surface, and the candle is round.
Try your best to cut the map to the same size as the candle before starting, but it doesn't have to be perfect. It should be slightly larger than the LED candle's surface. A paper cutter will make this task easier, but it's necessary. Glue the map onto your LED candle and smooth the surface, removing air bubbles. Fold the edges over the bottom of the candle, gluing it to the bottom. When using the decoupage paste, keeping your fingers clean is essential. If you get glue on them, wipe it off quickly on a clean cloth. Otherwise, your fingers can stick to the paper, making this project more challenging to complete. Using scissors, trim the map as close to the top of the LED candle as possible. Let the glue dry completely before switching on your candles and lighting up your new display.
Turn a globe into a lamp or shade
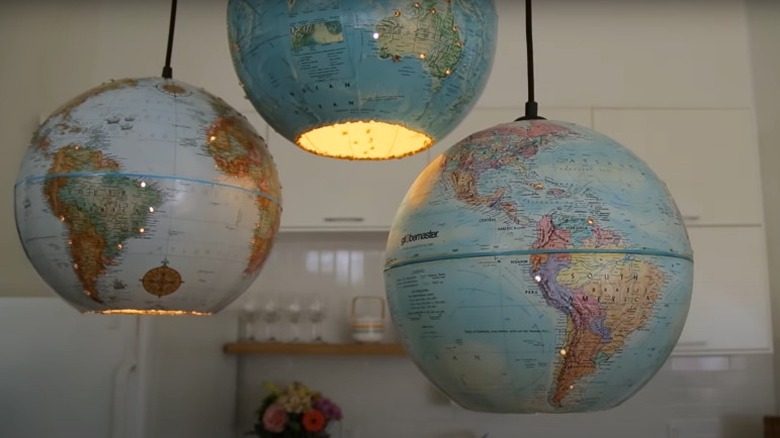
There are several ways to create these lovely travel-themed lamps, depending on what kind of globe you choose to use. Upcycled Wonders recommends cutting a traditional globe in half if you want to decorate a child's room, using the Northern hemisphere for one lampshade and the Southern hemisphere for the other. Since globes come in many colors, you can choose one that complements your existing decor. You can even add decorative accents to the bottom if you prefer.
If you're looking for something more subtle, you can turn a whole globe into a nightlight or chandelier. Drill a hole into the globe's top and place a bulb inside, or cut it in half and reassemble it around the bulb. Either is an excellent option for a child's room, where it can serve as a nightlight and an educational tool all in one. You can also use non-transparent globes as lights, but it will take a bit more work. You will need to drill holes to let the light escape from inside, but this provides tremendous opportunities for your travel-themed decor. You can drill holes along the borders of the countries. If you're a world traveler, you can drill holes in each location you've visited, so your lamp doubles as a reminder of all your favorite trips.
Decoupage garden decorations with maps
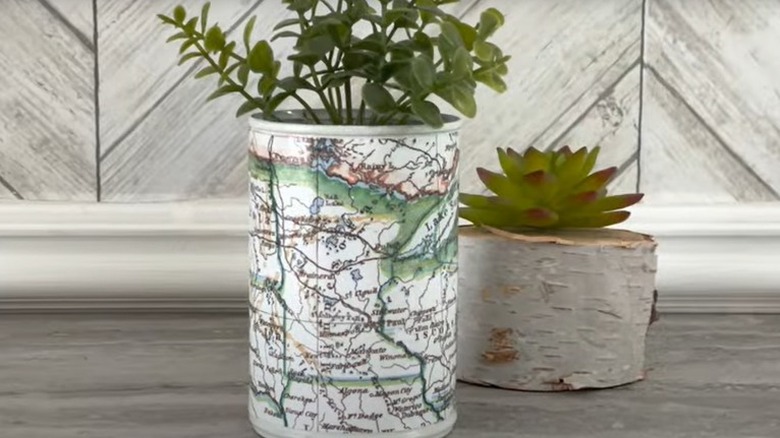
You don't have to limit travel decor to the inside of your house. You can also decorate your garden, porch, or patio with travel-themed objects and designs. One of the best ways to do this is by adding maps to planters or a charming birdhouse. You can use roadmaps or world maps depending on the size and design of the objects.
According to Midwest Living, matching the colors on your maps to your birdhouse is critical for this project. You can buy unfinished birdhouses from craft stores and paint them in the colors that correspond to your maps. If birdhouses aren't your thing, you can decoupage maps on planter cans or even the rims of terracotta planters (via 365 Designs). To plant in them, you must use a water-resistant decoupage medium. However, this isn't necessary if you use them for storage or decoration.
Start by applying a water-based stain to your pots. Measure the rim and cut your maps to a slightly larger size. Look for maps made from decoupage paper, which is thicker and more resistant to bleeding than traditional paper. Put painter's tape under the rim to prevent decoupage paste from getting on the pot's surface. Apply a base layer of decoupage on the rim to help seal the clay. Attach your map to the edge using the same decoupage medium. Smooth out the air bubbles and coat the map with another layer of decoupage. Three coats should be sufficient to seal the decorative rim on your pot.
Make a memory jar
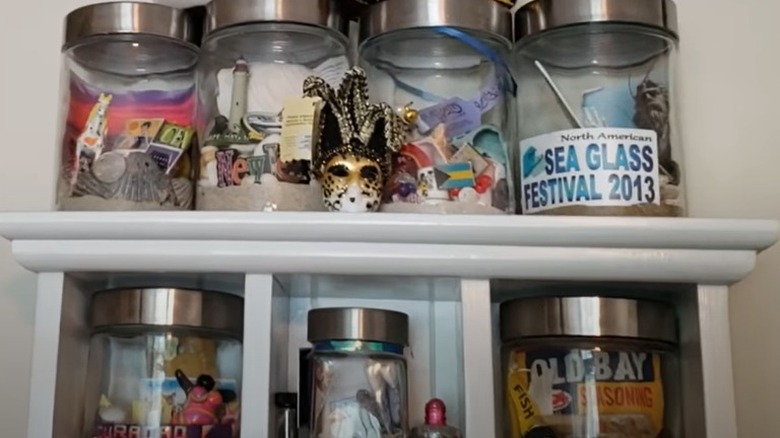
If you collect things like theater ticket stubs and train tickets from your travels, creatively store and display them with mason jars. Mason jars come in various colors, styles, and sizes, with a variety of lids. A rusty-hued jar is an excellent choice for rustic or vintage decor, according to She's Crafty. If you favor modern or minimalist styles, nickel or black are ideal choices.
Memory jars are an excellent way to display your collection of tickets and travel stubs in a visually pleasing manner while also reminding you of the memories associated with those experiences. There are so many things you can include. Consider cards from your hotel room (if they aren't the kind that needs to be turned back in), Disney passes, ticket stubs from a ferry ride, or the funicular you rode in Capri on your last trip to Italy. If you find yourself traveling extensively in Europe and using public transit, you may have a whole collection of ticket stubs for your jar. You can keep all of them in one place alongside your other travel memories or collect location-specific memories in a jar with pictures from the corresponding vacation.
